Shrink Bands for Dropper Bottles: Size, Fit & Tamper-Evident Setup
A practical small-batch guide for serum, tincture, essential-oil, and cosmetic dropper bottles: measure the assembled closure, protect the bulb and pipette, and validate the tamper bridge before production.
 David Okoro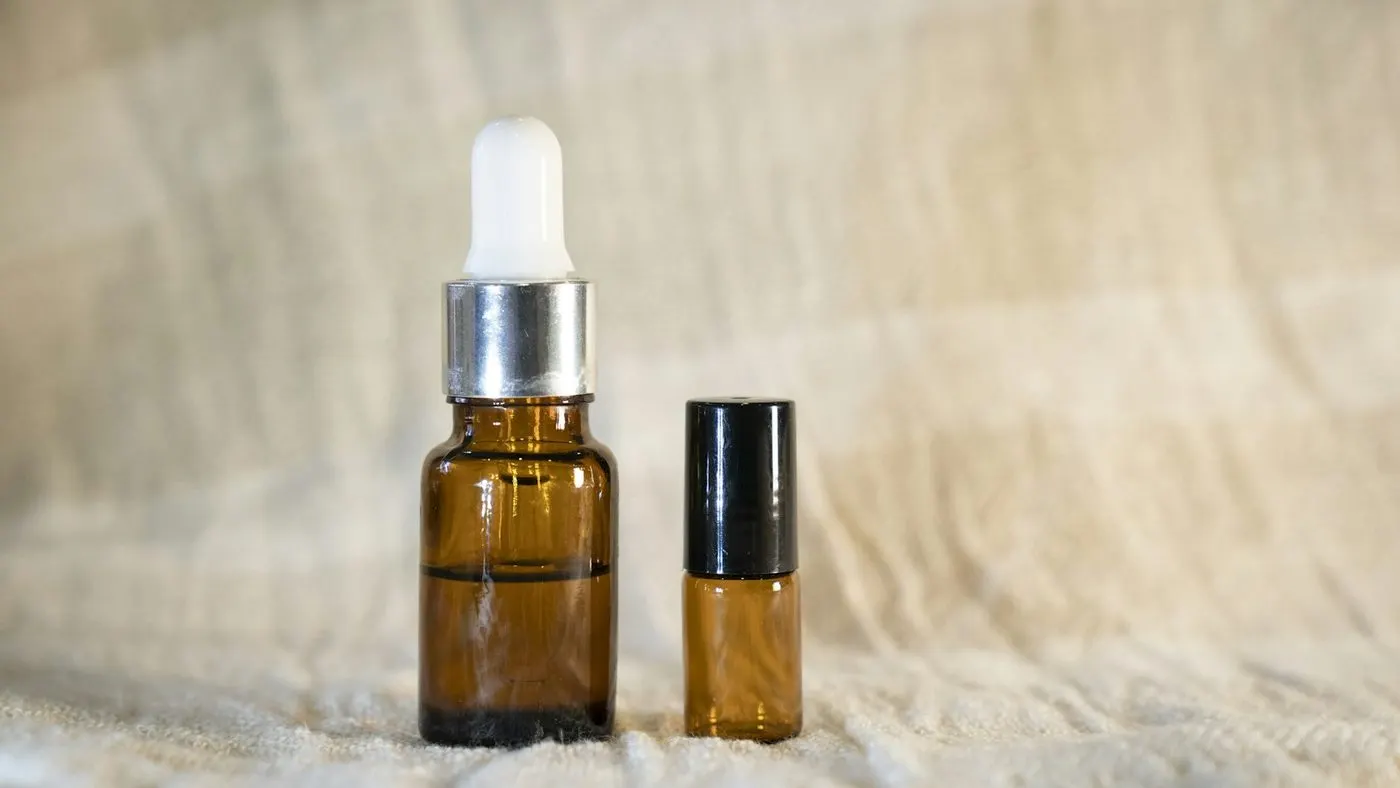
Disclosure: We may earn a commission if you purchase through links on this page, at no additional cost to you.
Quick answer. Do not size a shrink band from “30 mL dropper bottle,” “18-400,” or “DIN18” alone. Those labels describe bottle capacity or neck finish, not the outside geometry of the assembled dropper closure. Measure the maximum outside diameter of the dropper collar, cap skirt, child-resistant overcap, or other feature the unshrunk band must pass over. Then choose a band height that bridges the removable closure and a fixed part of the bottle neck without collapsing over the bulb or shoulder.
For small-batch packaging, a clear perforated band is usually the easiest format to validate because you can see the dropper assembly, spot wrinkles, and give the customer a defined tear path. But the dropper closure must still be checked for heat sensitivity and opening behavior. A shrink band does not replace leak control, child resistance, or the fit between the pipette assembly and bottle. If you are new to neck-band sizing, the shrink band size guide walks through the general measuring workflow first.
Why Dropper Bottles Are Harder to Size Than Simple Screw Caps
A conventional screw cap is usually close to cylindrical. A dropper assembly can combine a threaded collar, cap skirt, rubber or silicone bulb, glass or plastic pipette, child-resistant overcap, tamper ring, and decorative shell. The shrink band sees the outside profile of that complete assembly, not the nominal diameter of the bottle opening.
That difference is easy to miss with 18 mm finishes. Supplier references distinguish 18-400, 18-415, and DIN18 even though all are described around the same nominal neck diameter. The compatible collars are not interchangeable in every configuration, and their outside profiles can differ. Treat “18 mm” as an interface family, not a shrink-band dimension.
A useful supplier example illustrates the gap. SKS pairs an 18/400 glass dropper with a 35 x 25 mm clear PVC shrink band on a 1/2 oz Boston round package. Uline lists an 18/400 dropper cap with an outside cap diameter of about 3/4 inch. Those examples show why the band has to be selected from the assembled closure, not from the 18-400 code itself.
For RFQs, send the shrink-band supplier the actual bottle and dropper drawing—or a physical sample—whenever possible. If you only provide “30 mL amber dropper bottle,” you leave too many geometry variables undefined.
What Should You Measure on the Assembled Dropper?
Install the exact dropper that will be used in production before taking measurements. Pipette length does not normally control the shrink band, but the collar, cap skirt, bulb base, tamper ring, and child-resistant outer shell may all change the outside diameter and the vertical coverage.
Measure the maximum outside diameter across the closure. On a standard bulb-and-collar dropper, that may be the collar skirt. On a child-resistant dropper, the widest point may be the outer shell. If the closure has ribs or a flange, measure over the widest feature rather than between the ribs.
Next measure the height that must be covered. The finished band should grip enough of the closure to show first opening and enough of the fixed bottle neck to create a tamper bridge. Keep the band below the flexible bulb. Shrinking film over the bulb can distort its shape, make dispensing uncomfortable, and create a poor opening experience.
Also note the shoulder transition and label position. A narrow Boston round usually gives a useful straight neck section, but short-neck cosmetic bottles may move quickly into a shoulder. A taller band is not automatically better if the extra film has nowhere clean to recover.
How Do You Estimate the Starting Lay-Flat?
Lay-flat is the flattened width of the shrink tube, not the diameter of the dropper cap. As a geometry check, a circular closure with maximum outside diameter D has a circumference of πD and a theoretical lay-flat of πD/2.
If the maximum outside diameter measures 20 mm, the theoretical lay-flat is about 31.4 mm. That number only tells you roughly where the tube must begin. The unshrunk band still needs installation clearance, and the actual film has a specific shrink range and manufacturing tolerance. Use the supplier’s fit range and a physical sample for the final size.
Supplier examples again show why this matters. Retail shrink-band sellers offer small formats such as 30 x 28 mm for very small droppers, while other 18/400 bottle-and-dropper combinations are paired with 35 x 25 mm or larger bands. The right answer depends on the outside closure geometry, not on the liquid volume inside the bottle.
How High Should the Band Sit on a Dropper Bottle?
Position the band so the tamper function is obvious without interfering with the dispensing components. In most standard dropper designs, that means the band covers the threaded collar or outer cap shell and continues onto the fixed glass or plastic neck.
Do not shrink the band high onto a soft bulb unless the closure supplier has designed the package for that treatment. Bulbs are flexible components; applying concentrated heat or constraining them with recovered film can change their shape or feel. Keep the tamper bridge on rigid package surfaces whenever the design allows it.
At the bottom edge, avoid extending unnecessarily onto a steep shoulder. Film that has to recover across a large diameter change is more likely to wrinkle. If the bottle has only a short cylindrical neck, use the minimum height that still creates a clear bridge between closure and bottle.
If the primary label sits close to the neck, check the finished band position after shrinking. A band that catches the label edge can wrinkle both components or make first opening messy. This is especially relevant on 10 mL and 15 mL cosmetic bottles with limited body height.
Perforated or Non-Perforated for Droppers?
For consumer-facing droppers, perforated bands are usually easier to justify because they provide a deliberate opening path. The user can tear the film rather than cutting around a glass pipette package with scissors or a knife.
Tamper evidence and opening convenience are separate design questions. A non-perforated band may still show irreversible damage when removed, but it can be harder to open. Packaging research on tamper-evident closures shows that opening forces and user capability matter; the strongest-looking package is not automatically the most usable package. The perforated vs non-perforated comparison covers this trade-off in detail.
Test the tear path on the actual dropper. The perforation should survive heat application and shipping but open intentionally without pulling the dropper collar loose or forcing the user to grip the bulb. If the tear line starts opening during shrinking, recheck fit and localized heat before changing materials.
What Changes With Child-Resistant Dropper Closures?
A shrink band is not a child-resistant closure. If the product category or market requires child resistance, the package needs a closure system designed and tested for that function. The shrink band can add visible tamper evidence, but it does not substitute for the mechanical child-resistant mechanism.
Child-resistant droppers are often physically wider and taller than ordinary pipette collars. That can change both lay-flat and cut height. It can also change how the consumer grips the package, so a perforation that lands underneath the outer shell or too close to the bulb may be difficult to start.
Treat the bottle, dropper, child-resistant mechanism, and shrink band as one approved configuration. Do not assume a band that fits a standard 18-400 bulb dropper will fit the child-resistant version on the same nominal bottle finish.
Can the Shrink Band Stop a Dropper Bottle From Leaking?
No. Treat the shrink band as a tamper-evident and presentation component. It is not the primary liquid seal.
Leak performance depends on the bottle finish, dropper collar, liner or gasket where applicable, pipette assembly, closure torque, formulation compatibility, and package orientation during distribution. Specialty Bottle specifically notes that its shrink bands fit droppers but are not intended to prevent leakage.
If product appears under the band, solve the closure problem first. A tight shrink band can hide residue around the neck without fixing the seal. For oil-based serums, tinctures, or essential oils, also validate whether the product attacks labels, liners, bulb materials, or other package components over time.
How Should You Apply Heat Around a Dropper Assembly?
Use the same process principle as other neck bands: keep heat moving and bring the circumference into shrink evenly. The additional concern is the dropper’s mixed materials. Glass, polypropylene collars, elastomer bulbs, decorative shells, and labels do not respond to heat in the same way.
Start conservatively and watch the closure, not only the film. If the bulb softens, the plastic shell deforms, or the label edge lifts, the process window is too aggressive even if the band looks smooth. Do not keep heating a seated band in an attempt to make it “tighter.”
For repeated production, document the heat source, working distance, motion, bottle rotation, and acceptance sample. If a defect repeats in the same position, revisit band size, height, or dropper geometry before increasing heat. The manual application guide covers the detailed application method, and the troubleshooting guide covers defect diagnosis.
Dropper-Bottle Approval Checklist
| Approval field | What to confirm | Why it matters |
|---|---|---|
| Bottle & finish | Exact bottle SKU and neck finish | Prevents mixing 18-400, 18-415, DIN18, or other variants |
| Dropper assembly | Collar, bulb, pipette, child-resistant shell if used | Defines the real outside package geometry |
| Maximum OD | Widest rigid closure feature the tube must pass over | Controls starting lay-flat / fit range |
| Band height | Closure-to-fixed-neck coverage, below flexible bulb | Creates tamper bridge without interfering with dispensing |
| Perforation | Position after shrinking and opening direction | Controls removal and visible damage path |
| Heat process | Tool, motion, working distance, package response | Protects mixed closure materials |
| Leak check | Filled package, closure seating, orientation test | Confirms the actual liquid seal separately from the band |
| Opening test | Tear/removal behavior after cooling | Confirms usability and tamper evidence |
Which Shrink-Band Route Should a Small Dropper Brand Start With?
If the bottle and dropper are already selected, begin with a low-MOQ clear perforated band close to the measured fit range. The first goal is not branding; it is confirming that the tube clears the collar, shrinks onto the fixed neck, leaves the bulb free, and opens cleanly.
Once fit is confirmed, a standard perforated PVC band can be a practical production baseline. Repeat the test whenever the dropper supplier, bulb shape, cap shell, or bottle finish changes. A small geometry change at the closure can be enough to move the package into a different band size.
If you keep reproducing wrinkles, loose fit, or an awkward tear path after the application process is controlled, move to a custom-size/material RFQ. Specify the measured maximum OD, target lay-flat or fit range, band height, material, thickness, perforation location, and the exact dropper assembly. Do not ask the supplier only for a “30 mL dropper shrink band.”
Current Alibaba Sourcing Options
The three options below match the dropper workflow in this guide: confirm clearance and heat behavior on a low-MOQ trial, keep a conventional perforated PVC baseline for production, and move to a custom size/material RFQ when the standard fit is wrong.
Perforated Neck Shrink Bands for Bottles & Jars
A perforated neck-band listing previously screened for small-batch fit trials. Appropriate when you already have the dropper bottle and need to validate clearance, height, and heat behavior before scaling.
- Best for: validating clearance, height, and heat behavior on the assembled dropper
- Format: perforated neck band for bottles and jars
- MOQ / price: check the current listing before ordering
- MOQ
- MOQ ~100 pc — check current listing
PVC Bottle & Jar Shrink Bands with Easy-Tear Perforation
A PVC heat-shrink seal band for bottles and jars with an easy-tear perforation — a conventional production baseline after the dropper geometry is confirmed.
- Best for: conventional production runs after dropper geometry is confirmed
- Format: PVC with easy-tear perforation line
- MOQ / price: check the current listing before ordering
- MOQ
- MOQ ~1,000 pc — check current listing
Custom PVC / PETG Clear Neck Shrink Bands
A custom PVC/PETG clear neck shrink-band listing. Best used when the standard fit is wrong and the RFQ needs a specific lay-flat, height, material, or perforation for the dropper assembly.
- Best for: non-standard lay-flat, height, material, or perforation via RFQ
- Format: custom PVC/PETG clear neck band
- Specify: dimensions, film, and perforation explicitly in the RFQ
- MOQ
- MOQ ~1,000 pc — check current listing
How to use these options: confirm the fit on the low-MOQ trial before scaling, keep the perforated PVC listing as the production baseline, and move to the custom route only when the measured geometry keeps falling outside standard sizes.
Frequently Asked Questions
What size shrink band fits an 18-400 dropper bottle?
There is no universal size. SKS pairs one 18/400 dropper configuration with a 35 x 25 mm band, while other 18-400 droppers use different outside cap dimensions. Measure the actual assembled closure and confirm the supplier’s fit range.
Can I use the same shrink band on 15 mL and 30 mL dropper bottles?
Possibly, if the two bottles use the exact same outside closure geometry and enough fixed neck is available for the same band height. Bottle volume alone does not determine the band.
Should the shrink band cover the rubber bulb?
Usually no. Keep the recovered film on rigid closure and neck surfaces unless the package has been specifically designed otherwise. Covering a flexible bulb can distort it and make opening or dispensing awkward.
Does a shrink band make a dropper bottle child-resistant?
No. Child resistance is a separate closure function. Use a tested child-resistant closure where required and treat the shrink band only as an additional tamper-evident feature.
Can a shrink band prevent tincture or serum leaks?
No. Leakage must be controlled by the bottle/dropper sealing system. The band can show first opening but should not be treated as the primary liquid seal.
References
- Marsh, K., & Bugusu, B. (2007). Food Packaging—Roles, Materials, and Environmental Issues. Journal of Food Science, 72(3), R39-R55. DOI: 10.1111/j.1750-3841.2007.00301.x
- Theobald, N. (2012). Tamper-evident food and beverage packaging. In Emerging Food Packaging Technologies, 220-235. DOI: 10.1533/9780857095664.2.220
- Carus, D. A., Grant, C., Wattie, R., & Pridham, M. S. (2006). Development and validation of a technique to measure and compare the opening characteristics of tamper-evident bottle closures. Packaging Technology and Science, 19(2), 105-118. DOI: 10.1002/pts.721
- Bělík, P., Jennings, B., Shvartsman, M. M., & Thomas, C. U. (2009). Modeling the behavior of heat-shrinkable thin films. Continuum Mechanics and Thermodynamics. DOI: 10.1007/s10659-009-9194-4
Hook this up to your favourite commenting platform — Giscus, Disqus, or your own.
Continue reading

Shrink Bands for Hot Sauce Bottles: Size, Fit & Tamper-Evident Setup
A small-batch buyer guide for woozy bottles and other sauce bottles: measure the closure system, choose the right band height, avoid common sizing traps, and validate the complete package before production.

Shrink Band Size Guide: How to Measure Bottles and Jars
A practical measurement and sizing guide for tamper-evident neck bands, with formulas, worked examples, a lay-flat calculator, and a supplier-check checklist.

Shrink Bands vs Shrink Sleeves: Which Should You Choose?
A practical format-selection guide for small-batch bottle and jar packaging, covering tamper evidence, 360-degree decoration, production complexity, fit, artwork, and recycling considerations.