Custom Printed Shrink Bands: Artwork, Minimums & Proofing for Small Brands
Printing on the band buys a message, not tamper evidence. Decide whether you need it, then walk the approval chain from unprinted fit test to a shrunk sample on your own container.
 Lena Schmidt
Disclosure: We may earn a commission if you purchase through links on this page, at no additional cost to you.
Quick answer. Decide first whether the band needs to carry your brand at all. A clear perforated band shows that the closure was opened; a printed one adds a message or a logo, and that extra brings minimums, lead time and a proofing cycle. The custom-print minimums published by suppliers run from a few thousand pieces to tens of thousands, so most small brands start with a plain band, a stock band printed with a generic seal message, or a clear band plus a label on the jar, and move to custom print once volume justifies it. If you do print, size the band from your physical closure first, keep artwork away from the perforation and the most stretched zones, and approve a sample shrunk on your own container before releasing production.
Does the band need to carry your brand?
Only if it does something your label and your jar can’t. A plain clear band does one job: it shows the closure was disturbed after packing. Printing can add a generic assurance message, your logo and colors, or product information. Before paying for any of them, look at what the package already says. On most jars the front label carries the brand, and the band sits at the top, where the curve of the lid hides part of any logo.
That leaves four configurations, and only the last needs custom tooling:
Plain clear band. Cheapest and fastest. The tamper evidence is the film itself.
Stock band with a generic message. Some suppliers sell bands pre-printed with a “sealed for your protection” style line, in sizes they already hold. You get a printed look without artwork or proofing.
Clear band plus your own label. Branding goes on the jar, where you control print quality and can reprint a few hundred at a time.
Custom printed band. Your artwork on the film, in a size and perforation you specify.
Printed words also do less than sellers imply. A study of five over-the-counter drug packages, described in a National Academies workshop summary, found that more than 80 percent of participants never looked at the tamper-evident warning on the label (Bix et al., 2009, as reported in National Academies, 2024). Separately, a 2022 experiment on food delivery found that tamper-evident seals lowered willingness to pay, apparently by signaling contamination risk (Orlowski et al., 2022). Neither tested a jar on a market shelf. The practical reading is that an intact, neatly shrunk film does the persuading, and printing is a branding decision rather than a safety one.
What each route requires
The same product is quoted at minimums that differ by a factor of ten or more, because film form and print method differ. The table collects what suppliers state, with the caveat that some figures describe full-body sleeves rather than neck bands.
| Route | What suppliers state | Fit for |
|---|---|---|
| Stock printed message band | Pre-printed generic message; sold in packs from supplier stock; limited to listed lay-flat sizes | First sales, testing, small batches |
| Digital custom print | One European converter: 5,000-piece minimum for digitally printed sleeves, no plate or cylinder cost. One US online printer advertises digital shrink sleeves from 50 units. Alibaba showroom listings display minimums of 2,000, 5,000 and 10,000 pieces for custom printed bands and sleeves | Brands with a settled design and a few thousand pieces of annual use |
| Conventional converter | One distributor: custom bands normally 10,000 to 20,000 pieces. Another: clear unprinted custom bands 20,000, colored 100,000, with lead times of 2 and 8 weeks. A bottle supplier: printed sleeves 50,000, 5 to 7 weeks after artwork approval | Established lines with steady volume |
Supplier figures are a snapshot and change often. Sleeve figures are shown because few suppliers publish neck-band minimums; confirm that a quote covers bands. Marketplace data changes.
Two things follow. First, ask which print method a quote assumes. Gravure and flexographic printing need plates or cylinders, which is why minimums climb; digital printing avoids them. One converter lists rotogravure, flexographic and digital as its options. Second, divide the minimum by your monthly use before you accept it. A 10,000-piece order for a brand that fills 300 jars a month is about 33 months of bands, and film that sits that long in a warm stockroom is a different risk from film used within a season. Ask the supplier for storage and shelf-life guidance in writing.
Why the printed art isn’t the art you will see
The band is printed flat as a tube, then shrinks onto a three-dimensional closure, so any graphic that sits where the film shrinks most gets stretched or compressed. Lay-flat width is half the tube’s circumference, which is why a design that looks right on screen can look wrong on the jar. Packaging trade writers describe the same problem for sleeves: converters pre-distort artwork to account for container shape, the film’s shrink potential and the heat tunnel, and a sample run on the real container is still advised.
How much the film shrinks is itself product-specific. One distributor lists PVC shrinkage as moderate (10 to 45 percent) or high (up to 63 percent) and PETG up to 74 percent; another supplier says custom printed bands reduce by up to 40 percent. These are different products described differently, so ask for the figure on the exact film in your quote. The geometry is simple: if a 40 mm cap sits over a 30 mm neck, the film must shrink about 25 percent in diameter across that step. Where closure and neck are nearly the same width, as on many straight-sided jars, there is little circumferential shrink and little distortion. Where the cap is wider than the neck, expect stretching at the step. That is arithmetic, not a supplier claim.
Color moves too. Shrinking thickens the ink layer, and a peer-reviewed study of printed shrink sleeves found a measurable drop in lightness, from an average L* of about 58 to about 53 at a 66 percent shrinking factor, with color shifts growing as the film shrank further (Babaei et al., 2016). The test used full-color halftones on sleeves, so it is not a band specification, but the direction is useful: dark tones get darker, and a brand color matched on paper will not match on film. Solid spot colors, bold shapes and large type are more forgiving than photographs and small text.
Do not rely on viewers failing to notice. A master’s thesis testing consumer reaction to distorted graphics on full-body sleeves found no threshold at which distortion is guaranteed to go unnoticed (Bailey, 2015). Place critical elements where the surface is flat or cylindrical, and let the proof on your own container settle the rest.
Layout rules around the perforation and seam
Keep type, logos and thin lines off the places where the film will be cut or joined. A band carries a perforation, and distributors list vertical, horizontal, T-perf, single and double options, so ask the printer for its dieline and see where the tear line falls. If the perforation runs through your logo, the first opening splits it. If the band is seamed, the seam is another joint to plan for: sleeve printers advise keeping small text and continuous graphics away from it.
Fewer elements survive better. One label converter suggests abstract shapes in high-distortion areas because they tolerate small distortion. A single color band with a short line of text and a simple mark is a reasonable first custom order; a full-color repeat pattern needs more proofing and more risk tolerance.
Print is the last decision, not the first. Confirm fit on an unprinted sample first, using the closure measurements from our Mason jar guide or the general method in our size guide. A printed band with the wrong lay-flat width is a more expensive way to discover the same mistake.
What to send, and in what order
Treat the order as a sequence of approvals, each cheaper to correct than the next:
- Freeze the closure. Same lid, same liner, same jar as production. Measure the widest outside diameter and the height you want covered.
- Pass an unprinted fit test. Order a small pack of plain bands in the film and lay-flat you intend to print on, and check seating, wrinkles and the tear.
- Request the dieline. Printers supply a template to size artwork to, and some give lay-flat, cut length, seam and perforation positions on it. Do not design from a guess.
- Supply artwork in the printer’s format. Name each brand color as a spot color or Pantone reference so the printer does not approximate it from a screen file.
- Read the proof for the flat problems. Spelling, perforation position, seam position, color references. A flat proof cannot show shrink distortion.
- Ask for a printed sample shrunk on your container. This is the only step that shows what the customer will see. If the supplier won’t provide one, treat the first run as the sample and order the smallest quantity quoted.
- Write down the approved specification. Film, lay-flat, height, perforation, colors, shrink figure, minimum and lead time after approval, so reorders match.
How to compare two quotes properly
Two quotes for “10,000 custom bands” are rarely the same offer. Put the same questions to every supplier and write the answers in one place before comparing a single price.
- Unit basis. Is the minimum counted in finished bands, meters of tube, or cartons? A figure that looks low can be a different unit.
- What the minimum covers. One design or the whole order? If you want two flavors with two prints, you may be buying the minimum twice.
- One-time charges. Plates, cylinders, setup, proofs and dieline work. Digital routes tend to remove some of these, which is the point of choosing them, but ask for the line items.
- Film and shrink figure. Material, thickness, and the stated shrink percentage in each direction.
- Lead time clock. Counted from artwork approval, from deposit, or from shipping? The figures above are not comparable until you know.
- Delivered quantity. Ask whether the shipped count can differ from the ordered count, and by how much.
- Freight and duties. For overseas orders, who pays, and what shipping terms the price assumes.
Then compute one number for each: total landed cost divided by the bands you will realistically apply before the film is a year old in your stockroom. That figure, not the headline price per thousand, is what a small brand actually pays for each sealed jar. A cheaper quote with a bigger minimum can easily lose that comparison.
Mistakes that waste a print run
These come up repeatedly in supplier guidance and in the logic of the process, and each is avoidable before money is spent.
Printing before the fit test. The wrong lay-flat width is a sizing error, but on a printed band it also becomes a printing error, because the artwork was built on the wrong geometry.
Designing from a screen mockup. A mockup of a flat rectangle tells you nothing about how the band sits across the cap edge. Work from the printer’s dieline.
Putting the logo across the tear line. The first person to open the jar splits your mark, and the torn halves are what stays in the bin and in their photos.
Choosing brand colors on a screen. Screens emit light and film absorbs it, and the film will also darken a little when it shrinks. Give the printer named color references and ask for a physical proof.
Printing text that will change. A health claim, a promotion, a price or a recipe name that changes next quarter turns thousands of printed bands into scrap. Bulk-printed bands carry identical text on every piece, so anything that varies by batch is safer on the jar label, unless your printer offers variable coding. Ask before assuming.
Changing the closure afterward. A new lid supplier, a different liner or a slightly different jar mold alters the geometry the band was approved on. Re-run the fit test whenever any of them changes.
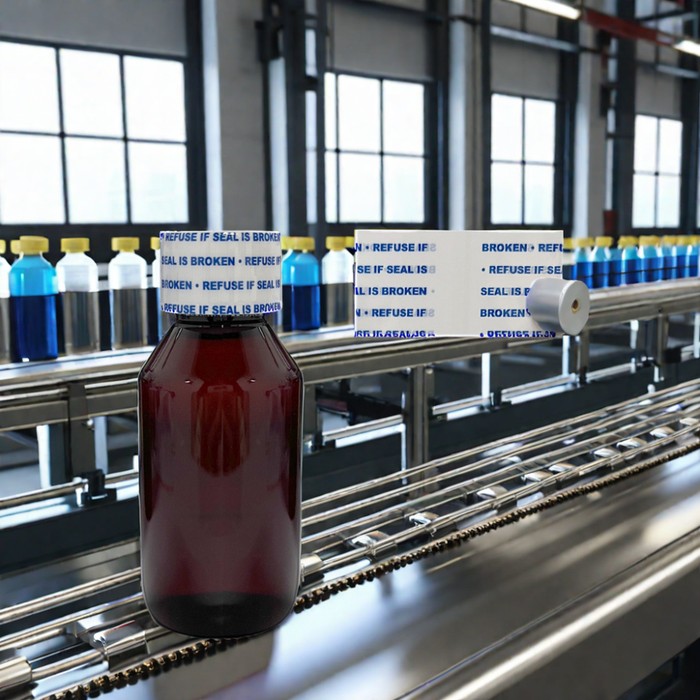
Perforated shrink band with your own printed artwork
A perforated band printed with your artwork, quoted from 5,000 pieces with per-unit pricing that drops as the run grows. Printing is the point of this route, so budget the plate or cylinder setup and one or two shrink proofs on your own container before the full run is released.
- Role: Print route candidate
- Custom logo printing
- Perforated peel strip
- From 5,000 pcs
- MOQ: 5,000 pcs
Which sourcing route fits your stage
Move one route at a time, and only when the previous one has stopped serving you. Three roles cover most small brands.
Trial. A plain or stock-printed band in a small pack, enough to test fit and workflow. Price per band matters less than sample access and a clear lay-flat and height.
First custom run. The lowest custom quantity a supplier will quote for a design you have already tested on plain film. Treat it as a paid sample for the next run.
Scale run. Converter-level minimums, once monthly use makes the order a year’s supply or less.
A practical rule of thumb: if you cannot name the design you will still be selling in twelve months, you are not ready for the third role. Staying on the first two costs a little more per band and leaves you free to change the label, the claim or the jar without writing anything off.
FAQ
Can I get custom printed bands in quantities of a few hundred? The custom minimums I found for bands and sleeves start in the thousands, with one online printer advertising 50-unit digital sleeves. Below the thousands, use a stock-printed band or put your branding on a label.
Does a printed message make the seal legally tamper-evident? No. Requirements come from local rules and sales channels, and a printed line is not a substitute for checking them.
Does printing change how a band shrinks? Ask your printer. Film, ink coverage and heat source interact, so test the printed sample the way you will apply it. Our heat equipment guide covers the tools.
Should the lot number or best-before date go on the band? On a bulk-printed band every piece carries the same text, so batch-specific data is usually safer on the label. If you want it on the band, ask whether the printer can add variable coding and at what minimum.
Is it worth printing if I only sell online? Unboxing is where the band is seen once, then discarded. A plain band plus a good label gives most of the effect for far less commitment, and printing is easier to justify once the product and its copy have stopped changing.
References
-
Babaei, V., Pelvet, C., & Hersch, R. D. (2016). Color reproduction on shrink sleeves. Color Research & Application, 41(1), 56–63.
-
Bailey, N. (2015). Preference of consumers toward non-distorted graphics on full-body shrink sleeve labels [Master’s thesis, Clemson University]. Source
-
National Academies of Sciences, Engineering, and Medicine. (2024). Defining and evaluating in-home drug disposal systems for opioid analgesics: Proceedings of a workshop. National Academies Press. (discusses Bix et al., 2009) Source
-
Orlowski, M., Lefebvre, S., & Boman, L. (2022). The unintended effects of tamper-evident food closures. International Journal of Hospitality Management, 107, 103315. Source
Hook this up to your favourite commenting platform — Giscus, Disqus, or your own.
Continue reading
Shrink Bands for Mason Jars: Size, Fit & Tamper-Evident Setup
How to size a band for regular-mouth and wide-mouth Mason jars, decide whether it goes over the screw band, and test the setup before you buy in volume.

How to Choose a Handheld Induction Sealer for Small Batch Bottles
Match the cap, liner, output and process before you buy
Do You Need a Cap Liner Insertion Machine?
A small-batch guide to manual, pre-cut and automatic cap lining