Shrink Bands for Supplement Bottles: Size by Cap, Neck Bead & Seal Setup
A child-resistant cap is wider than its thread size suggests, so the band has to be sized to the closure. Measure the cap, confirm the neck bead, and test on filled bottles.
 Lena Schmidt
Disclosure: We may earn a commission if you purchase through links on this page, at no additional cost to you.
Quick answer. Size a supplement-bottle band from the closure, not from the thread size printed on the bottle spec. A child-resistant cap has an outer shell, so it is wider than its thread diameter suggests: one distributor’s sizing chart pairs a 38-400 continuous-thread cap with a 66 mm lay-flat band but a 38-400 child-resistant cap with 77 mm. Measure the widest point of your actual cap, work out the minimum lay-flat as roughly half the circumference, choose a height that reaches the bottle’s neck bead, and confirm the bottle has a bead, because without one the band has nothing to grip. The tamper-evidence rules I checked cover over-the-counter drugs, not supplements as such, so confirm what your product category and sales channel require before relying on a plain band.
Why supplement bottles trip up the usual sizing rules
Most shrink-band advice assumes a bare cap on a bottle neck. Supplement bottles break that assumption in two ways. Many carry child-resistant closures, which add a second layer around the cap and change its outside diameter. And they come in a few very common finishes (28, 33 and 38 mm), so sellers tend to order by the number on the bottle listing, then discover the band is too narrow to pass over the cap.
The fix is to treat the cap as the thing you are fitting. If you want the general measuring method, our size guide covers it. This page assumes you already know how to read a lay-flat width and focuses on what is specific to HDPE and PET supplement bottles with screw closures.
What size band fits which cap?
Start with a published chart, then verify with a measurement. US Plastic Corp’s sizing chart, which TricorBraun reproduces in its own guide, lists a recommended lay-flat for each neck finish. The rows most supplement brands will care about are below.
| Neck finish | Closure style | Recommended lay-flat |
|---|---|---|
| 28 mm (410/415) | Continuous thread | 50 mm |
| 33 mm (400/405) | Continuous thread | 66 mm |
| 33 mm (400) | Child resistant | 77 mm |
| 38 mm (400/405/2000) | Continuous thread or lug | 66 mm |
| 38 mm (400) | Child resistant | 77 mm |
| 38 mm (430) | Continuous thread | 90 mm |
Source: US Plastic Corp shrink band sizing chart (also reproduced by TricorBraun). A starting point, not a guarantee: closure shapes vary by manufacturer.
The second and fourth rows show the pattern that matters. Same thread diameter, but the child-resistant version is paired with a lay-flat 11 mm wider. Other sellers show the same logic from the cap side: one marketplace seller lists a 75 x 56 mm band for lids between 1.5 and 1.75 inches across, aimed at tall supplement and pharmacy bottles.
If your closure isn’t on the chart, TricorBraun’s rule is to measure the neck circumference, divide by two and add 2 mm. For a closure-based check, use the geometry directly. A band lies flat as a tube whose width is half its circumference, so the minimum lay-flat for a cap of diameter D is about πD ÷ 2. A 42 mm cap needs at least 66 mm, and a 49 mm cap at least 77 mm. By that arithmetic, the chart’s 66 mm and 77 mm pairings imply caps up to roughly 42 mm and 49 mm across. That is a deduction from the numbers, not a supplier statement, and the only way to confirm it is to put a caliper on your actual cap.
Why child-resistant caps need the wider band
A child-resistant closure typically has an outer shell over an inner cap, so the widest point of the assembly is the shell, not the thread. The band has to slide over that widest point before shrinking down to the neck, and the neck is much narrower. The distance between those two diameters is how far the film has to travel when it shrinks.
Take the wide pairing above. A 77 mm lay-flat is about 49 mm across when opened out. Shrinking onto a neck near 33 or 38 mm means a drop of roughly a quarter to a third of the diameter, which is within the range some suppliers quote for PVC. That is why undersizing is expensive here: the band either stops at the cap’s shoulder and never reaches the neck, or it forces on with wrinkles and a split at the first heating.
Oversizing is the quieter failure. If the band is much wider than the cap needs, it lands loose, the film bunches at the bead and never tightens evenly. Stay close to the arithmetic, and treat any chart value as the middle of your test range rather than the answer.
Neck bead and height: what the band holds onto
A band stays on by gripping a ridge. TricorBraun states that the bottle must have a neck bead to hold a seal band in place, and Container and Packaging notes that a container or lid without a lip risks the band slipping off. Check this first, because it is the one problem no band size can fix. Run a fingernail around the neck just below the cap: you should feel a raised ring. Many stock HDPE supplement bottles have one, but some stylized or tall-neck bottles don’t.
Height is the other half of the spec. Stock supplement-sized bands in the listings I checked come in heights from about 25 mm to 56 mm. Measure from the top of the closure to the lower edge of the bead, then buy two neighboring heights in a sample pack and see which one laps over the lid edge slightly and finishes just below the bead. Too short and the band hovers above the bead without locking; too tall and the film pools on the shoulder. Pick the height where the lower edge sits cleanly on the bead, not the one that looks neatest before shrinking.
Do supplements need a tamper-evident band at all?
This is a regulatory question, and the honest answer depends on what you sell and where. In the US, FDA’s tamper-evident packaging rule, 21 CFR 211.132, applies to over-the-counter human drug products, and it exempts certain categories such as dermatologicals and lozenges. It defines a tamper-evident package as one with indicators or barriers to entry that provide visible evidence of tampering if breached or missing. FDA’s compliance policy guide lists heat shrink bands among technologies capable of meeting that standard, and describes the band as one that must be cut or torn to open the container and cannot be worked off and reapplied without visible damage.
In the sources I checked, those texts describe OTC drugs. I did not find a sentence in them that extends 211.132 to dietary supplements, and I am not a regulatory advisor. Marketplaces, retailers and contract packers set their own requirements, and a band is also a trust signal for buyers of capsules and powders. The practical step is to ask your sales channel and a qualified regulatory consultant what applies to your exact product, before you decide whether a band is optional.
If you are covered by the OTC rule, two details matter for a band. The FDA guide says it should carry an identifying characteristic that cannot be readily duplicated, and the rule requires a label statement describing the tamper-evident feature. The rule’s own example for a banded bottle is a sentence referring to the imprinted seal around the neck. So a plain clear band may not be enough on its own, which is where printed or stock-printed options come in. Our custom printed bands guide covers that path.
Setup before you apply a band
Apply to a filled, capped bottle, and tighten the closure the way a consumer would receive it. A band shrunk onto a loosely seated cap will sit crooked and may hide an unsealed bottle. If your bottle has an induction liner, do the induction step first; the band is a separate layer, and our comparison with induction seals explains how the two relate.
Heat is where supplement bottles differ from jars. HDPE bottles soften, and some contents (gummies, softgels, probiotics) don’t like warm conditions. A general trade source notes that heat-sensitive closures or labels need lower-temperature films, so check what your closure and label are made of and test on a filled sample. Use a heat gun with the bottle turning in your hand, keep the nozzle moving, and stop as soon as the film is smooth. Our heat tools guide compares the equipment.
Then run a quick consumer test on a few bottles: open each one, and confirm the band tears on the perforation without binding the cap’s shell, and that the cap still turns and presses as designed afterward. If the band interferes with the child-resistant action, you have a sizing problem, not a heating one.
Four mismatches that cause most bad orders
Ordering by bottle volume. A 150 cc and a 300 cc bottle can share the same neck finish and the same closure, or they can ship with different ones. Volume tells you nothing about the cap, and the cap is what the band has to clear.
Switching closures without re-testing. Moving from a standard cap to a child-resistant one, or changing the closure supplier, changes the widest diameter. A band that fit last quarter can now stall at the cap’s shoulder.
Ignoring the cap’s shape. A flat-topped cap, a domed cap and a tall ribbed cap sit differently under the film. A taller closure may need the taller band even when the lay-flat is unchanged, so measure height on the real cap each time.
Assuming every film behaves alike. PVC and PETG shrink differently and respond differently to heat, so a width that works in one film may need adjusting in the other. Our PVC versus PETG guide covers the choice; for this page, just keep the film constant between your test and your order.
Keeping reorders consistent
The second order is where small brands usually get caught. The first batch was tested carefully; the reorder arrives from a different supplier, or from the same one with a slightly different film, and nobody remembers the settings. Keep a few unused bands from the tested lot in a labeled bag next to a spare cap, and compare every new delivery against them by width, height and film feel before it reaches the packing table.
Store cartons away from heaters, radiators and sun-warmed rooms, because the film is made to react to heat. And when you reorder, use the same listing or part number, and ask the supplier whether shrink behavior is consistent between production lots. If the answer is vague, treat the first bands from the new lot as a test rather than as proven stock.
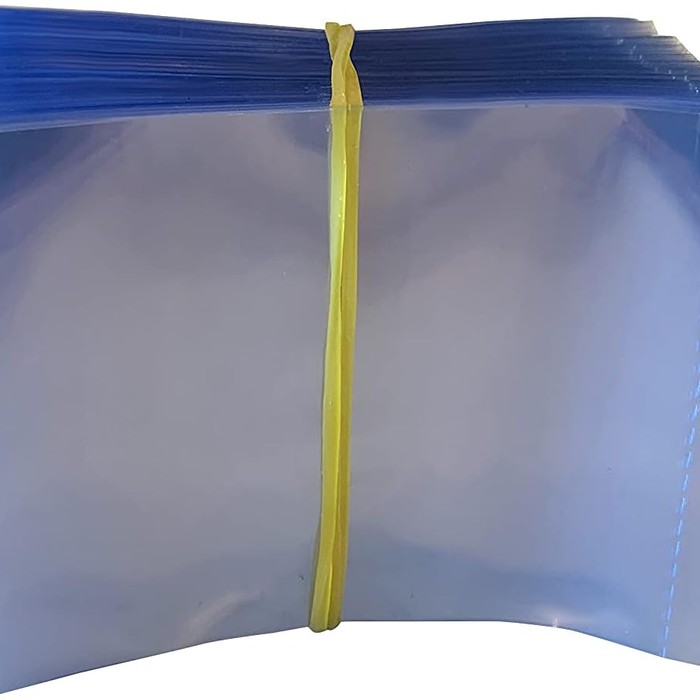
75 x 56 mm clear perforated shrink band, 1¾ in cap
A clear perforated band sized 75 x 56 mm for tall supplement and pharma bottles with a 1¾-inch cap. That is the seller's stated sizing, so check your measured cap diameter against it before ordering.
- Role: Amazon consumer option
- 75 x 56 mm
- Perforated
- For 1¾ in caps
- MOQ: Check current listing
A short checklist before a full carton
- Measure the real closure. Widest diameter of the cap as shipped, in millimeters, with a caliper.
- Compare to the chart and the arithmetic. The chart value should be at least πD ÷ 2 for your measured cap.
- Confirm the bead. Feel for a raised ring below the cap on a filled production bottle, not a sample.
- Order a sample pack in two neighboring heights. Buy one lay-flat width and test both heights, or two widths at one height if the cap is borderline.
- Shrink three bottles on the real line and inspect. Smooth film, no splits, bead gripped, closure still opens as designed.
- Run a drop and transit test. A few shaken or dropped bottles show whether the band holds when handled.
- Write down the specification. Cap model, measured diameter, lay-flat, height, perforation, film, supplier and heat settings.
Document the specification even if you buy a standard stock band. When a supplier changes the closure or you switch bottle suppliers, that note tells you what to re-test.
FAQ
Can I size by the bottle’s neck finish alone? As a starting point, yes, but the closure decides. The chart above gives two different widths for the same 38 mm thread depending on whether the cap is child resistant.
Will a band work on a bottle with no neck bead? Not reliably. A bead gives the film something to grip, and without one the band can slip. Change the bottle, or ask the supplier about a different closure or a sleeve.
Does a band replace an induction seal? They do different jobs. The band shows the cap wasn’t removed; the induction liner seals the mouth. Many brands use both. See our comparison page.
Is a plain band enough for labeling and regulatory purposes? It depends on your category and channel. For OTC drugs the FDA guide expects an identifying characteristic and a label statement. For supplements, confirm with your channel and an advisor.
Perforated or not? For consumer packs, perforated is easier to open without damaging the label. Our perforation guide covers the trade-off.
References
-
U.S. Food and Drug Administration. (n.d.). Compliance Policy Guide Sec. 450.500: Tamper-resistant packaging requirements for certain over-the-counter human drug products (May 1992). Source
-
Tamper-evident packaging requirements for over-the-counter (OTC) human drug products, 21 C.F.R. § 211.132. Source
Hook this up to your favourite commenting platform — Giscus, Disqus, or your own.
Continue reading

Custom Printed Shrink Bands: Artwork, Minimums & Proofing for Small Brands
Printing on the band buys a message, not tamper evidence. Decide whether you need it, then walk the approval chain from unprinted fit test to a shrunk sample on your own container.

Shrink Bands for Mason Jars: Size, Fit & Tamper-Evident Setup
How to size a band for regular-mouth and wide-mouth Mason jars, decide whether it goes over the screw band, and test the setup before you buy in volume.

How to Choose a Handheld Induction Sealer for Small Batch Bottles
Match the cap, liner, output and process before you buy