How to Choose a Reusable K-Cup That Fits Your Keurig
A reusable K-Cup can fit a Keurig and still be the wrong version for that brewer. Check the model number, the filter generation, and the pod holder before you buy.
 Lena Schmidt
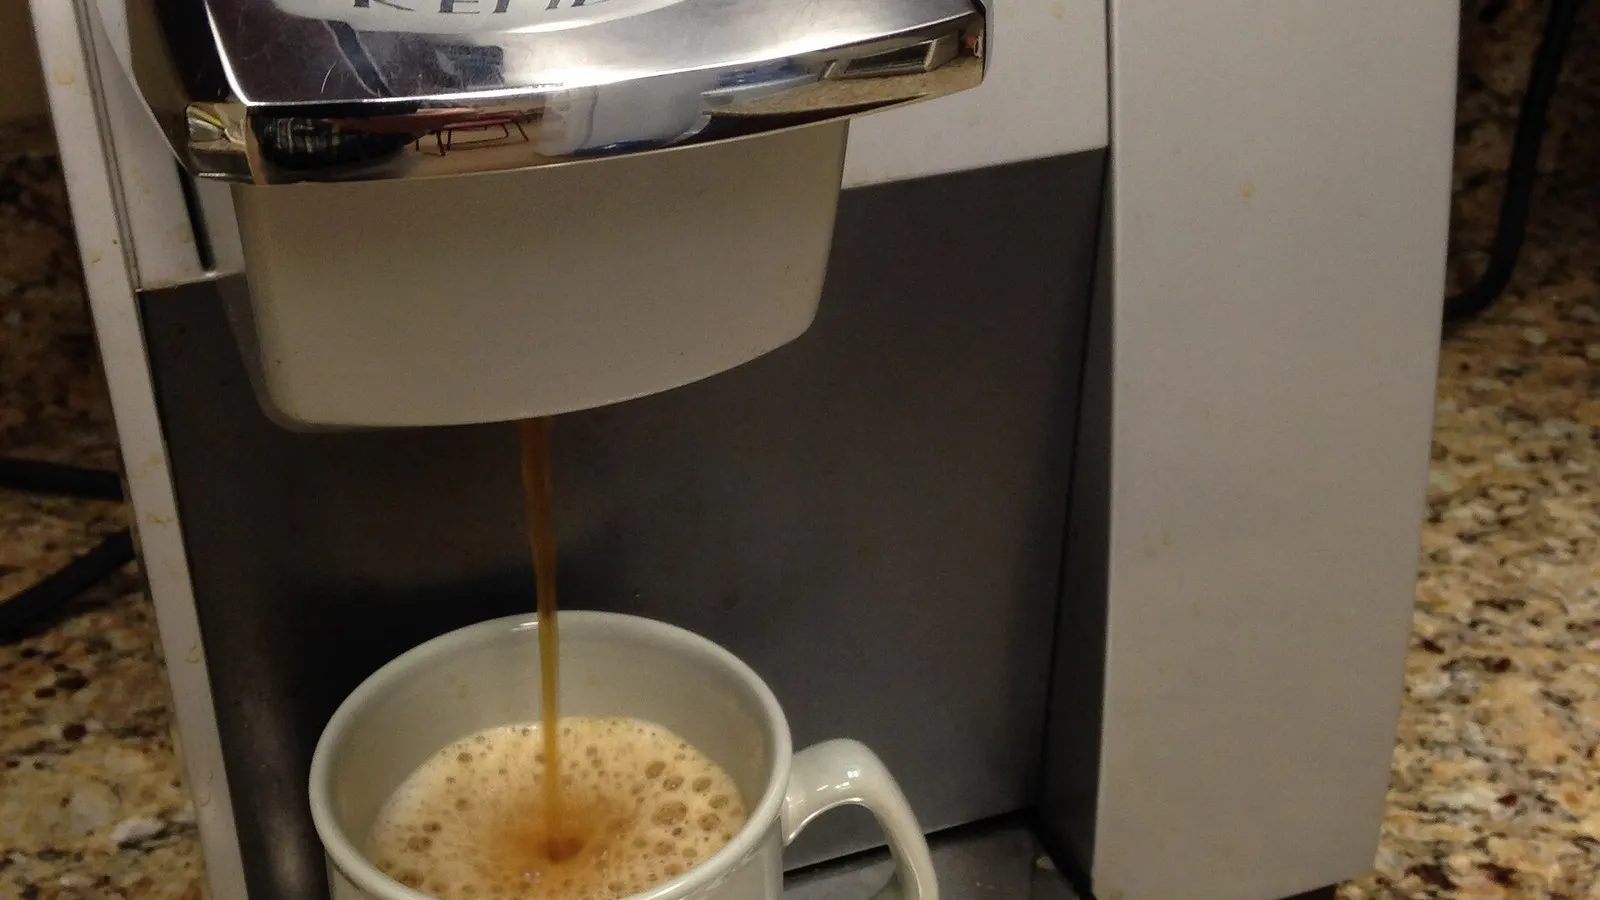
Disclosure: We may earn a commission if you purchase through links on this page, at no additional cost to you.
A reusable K-Cup can fit a Keurig and still be the wrong version for that brewer. Before buying, check the exact model number under the machine, identify whether the listing is for the current My K-Cup 3.0 or an older filter, and confirm that the product page names your brewer family. The word “universal” is not enough: Keurig’s current compatibility chart excludes its 2.0 and commercial machines, and older filters have their own model limits. [1]
If you want the lowest-risk option, use the brewer’s model number with Keurig’s current compatibility page, then match the filter version and installation instructions to that exact machine. If you are considering a third-party stainless-steel pod, treat the manufacturer’s fit list as a compatibility claim to verify, not as proof that every K-Cup-shaped basket will work.
Why “Universal” Can Still Mean Not for Your Keurig
Reusable filters look simple: a small basket holds ground coffee while water passes through it. But the brewer has to close around the filter, puncture or route water through its lid, and drain through the outlet in the right position. A few millimeters of height, an off-center opening, or an incompatible holder can turn a plausible-looking purchase into a lid that will not latch, a brew that stops, or grounds that spill into the cup.
There is also more than one product generation. Keurig’s April 2025 support instructions identify a newer My K-Cup version and give a compatibility chart for it. The chart lists most at-home K-Series families, including K-Mini, K-Slim, K-Supreme and K-Duo, but excludes K-200, K-300, K-400 and K-500 Series 2.0 brewers, as well as commercial machines. The company separately points owners of earlier filters to instructions for pre-2025 versions. [1]
That distinction matters because a model name can survive several product revisions. A buyer who remembers that an old filter worked in a K-Classic, for example, may assume that any filter labeled “My K-Cup” installs the same way. It may not. A Reddit owner of a K-Classic described trouble with the 2025 design until they reinstalled the brewer’s standard pod holder; that is an individual report, not a replacement for the manual, but it shows why installation details belong in the compatibility check.
Step 1: Find the Brewer’s Model Number
Do not shop from “Keurig Mini,” “K-Supreme,” or a memory of the machine’s color. Turn the brewer off and look for its identification label, usually on the underside or back. Record the model name and any suffix, such as Plus, Smart, Essentials, or a generation label. If the label is difficult to reach, check the original box, purchase receipt, or the brewer’s settings or support page. The exact model is more useful than a photo of the machine because similar-looking brewers can use different brew-head designs.
Next, search the model name on Keurig’s support site and open the use-and-care guide for that exact unit. Search within it for “reusable,” “My K-Cup,” or “filter.” The manual’s compatibility statement takes priority over a generic marketplace title. For example, the K-Supreme guide warns that the brewer is compatible only with the newly designed My K-Cup filter and says not to use other reusable filters or previous versions because they may damage the brewer. [2]
If you cannot identify the machine confidently, pause before ordering. Ask Keurig support with the model number or send a clear photo of the label to the seller. A listing that replies “fits most Keurigs” without confirming your specific model is not resolving the important question.
Step 2: Match the Model and Filter Generation
For the current My K-Cup 3.0, Keurig’s 2025 chart says yes for K-Brew + Chill and for the listed at-home single-stream and MultiStream families. It says no for Keurig 2.0 K-200, K-300, K-400 and K-500 Series brewers, and for commercial brewers. Keurig also says a compatible filter that does not sit correctly should be aligned with the exit needle and seated flush in the pod holder. [1]
That is the most useful dividing line for many shoppers: current home models versus the older 2.0 platform and commercial units. But it does not make older accessories interchangeable with the current one. Some older My K-Cup filters were sold for narrower ranges, while model-specific brewer guides may require a particular design. Check the date or version in the listing photographs and the included instructions, not just the product name.
Third-party makers often split products into single-stream and MultiStream ranges. Their compatibility lists can help narrow the choices, but confirm that your model appears by name and that the exact pack or variant shown on the page is the one you are buying. A store may group several options under one listing; choosing the wrong dropdown variant can change the cup design even when the main title remains broad.
Step 3: Check the Holder and the Way the Filter Seats
Read the installation steps before you order, especially if the product says to remove, replace, or retain the brewer’s pod holder. Current My K-Cup instructions say to put ground coffee in the filter, close its lid, place it in the pod holder, lower the handle, and select a brew size. They also tell users with fit problems to check alignment with the exit needle and make sure the accessory sits flush. [1]
Do not force a filter into the chamber or press down on a brewer lid that resists closing. A stiff close can mean the cup is too tall, the holder is still installed when it should be removed, a removable basket is not seated, or the accessory is simply incompatible. Stop and compare the parts against the manual. Forcing the handle can damage plastic parts or change how the needles meet the filter.
Check for small parts before your first brew. Some reusable filters include a removable plug or adapter; some require the original holder to be removed, while the current My K-Cup 3.0 instructions describe a different installation path. A YouTube demonstration can make the sequence easier to see, but use a video for the same brewer family and filter version. Older K-Supreme demonstrations may show a red plug or earlier accessory. They are useful visual context, not universal instructions. [5][6]
Troubleshoot Grounds in the Cup
A little sediment does not always mean the filter is defective. Start by checking that the lid is closed fully and the basket is not filled above its marked line. Then confirm that the filter sits flat, is the right version, and has no visible split, loose seam, or damaged mesh. If the brewer handle did not close normally, do not keep brewing until fit is resolved.
Next, look at the coffee. Keurig’s instructions say the reusable filter is for ground coffee and do not recommend tea leaves, hot cocoa, or other powders. The older 2.0 filter instructions advise against very fine espresso grind because it can clog the screen or brew poorly. Those statements apply to the product instructions cited; they are not a universal grind recipe for every aftermarket filter. Use the grind guidance printed for your basket, and begin with ordinary ground coffee rather than espresso-fine powder. [1][3]
If the problem began after switching from pods, clean the filter and the brewer’s accessible needle area only as the machine manual directs. Keurig’s troubleshooting materials advise cleaning the entrance and exit needles when grounds appear during brewing and, for certain situations, running cleansing brews. Do not poke a needle with an improvised metal object or disassemble a brewer unless its instructions permit it. [4]
Community reports help explain why these checks matter. Keurig owners on Reddit describe filters that will not let the lid latch, weak coffee, and grounds around the cup or brew chamber. Those posts show experiences rather than controlled tests; they cannot prove that a brand or model fails generally. Their practical lesson is narrower: a filter can appear to fit while its position, fill level, grind, or version still needs attention.
Fill Level, Cup Size and Cleaning
Follow the fill marks printed on the filter. For the current My K-Cup, Keurig recommends the lower “cup” line for brews below 10 ounces and the upper “mug” line above 10 ounces. It presents those as starting fill references; the amount you prefer depends on the coffee and your taste. Do not pack grounds down unless the filter’s instructions specifically call for it, because compressing the basket can impede water flow. [1]
After brewing, let the hot accessory cool enough to handle safely, empty the grounds, and rinse the basket so oils do not dry onto the mesh. Keurig says the current My K-Cup parts can be washed by hand with warm, soapy water or placed securely on the dishwasher’s top rack; its support instructions recommend regular cleaning and checking the mesh for buildup. Confirm care instructions for a third-party stainless filter separately, since dishwasher suitability varies by product. [1]
If water begins draining slowly, inspect the filter for fine grounds and coffee-oil buildup before concluding that the brewer is broken. A soft brush may help only if that accessory’s instructions allow it; avoid sharp tools that could enlarge mesh openings. Replace a basket if its lid, seal, mesh, or body is cracked or distorted. A reusable filter is a repeated-use item, but it is not maintenance-free.
Plastic Mesh or Stainless Steel: Decide After Fit
A plastic-bodied filter with a mesh basket can be convenient if you want a product designed around the brewer maker’s instructions and clear fill lines. Stainless-steel refillable cups can appeal to buyers who prefer a metal basket, several cups in a pack, or a simpler rinse routine. Neither material makes an incompatible shape fit. Match the brewer first; compare materials, pack size, lid style, and cleaning instructions second.
Be cautious with claims such as “zero grounds,” “fits every Keurig,” or a guaranteed taste improvement. Mesh openings, grind, fill level, coffee, and the brewer all affect the result. Seller claims and customer ratings can suggest what to investigate, but they cannot replace the official fit chart or an independent test on your exact machine. If the listing does not give a named compatibility range, clear product photos, and a workable return policy, keep looking.
A Practical Buying Check Before Checkout
Before paying, confirm these four items: (1) the exact brewer model and suffix; (2) the filter’s version and named compatibility range; (3) whether the installation keeps or removes the original pod holder; and (4) the fill, cleaning, and return instructions. Save a screenshot of the compatibility statement if the listing has several variants. On arrival, compare the filter with the instructions before brewing, then test that the handle closes naturally and the filter is seated as described.
One current Amazon example is the Keurig My K-Cup reusable coffee filter. Use the listing as a starting point rather than a promise of universal fit: open it, confirm it is the current version, and compare its stated compatibility with your brewer’s manual. If the page is showing an older variant or your model is not listed, do not buy that option. Keurig’s official compatibility page is the final check.
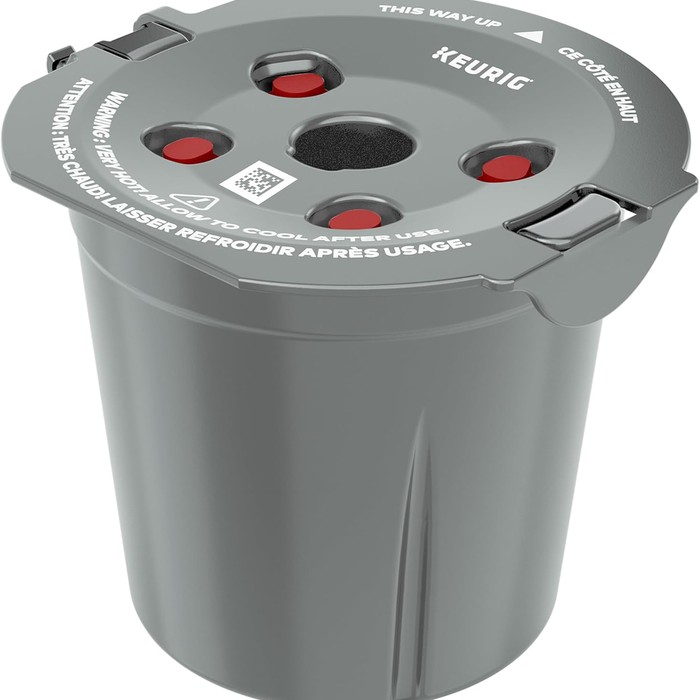
Keurig My K-Cup reusable coffee filter
The brewer maker's own refillable filter, sold with its version and compatibility information printed on the pack. Fit still depends on your exact model, so check the chart before the first brew.
- Role: Amazon consumer option
- Keurig My K-Cup
- Ground coffee only
- Dishwasher-safe parts
- MOQ: Check current listing
Questions Buyers Ask
Do I Need a MultiStream Reusable Cup for a K-Supreme
Do not decide from “MultiStream” alone. The K-Supreme guide says to use the newly designed My K-Cup, and the current Keurig chart identifies compatible models for the 2025 filter. For other brands, buy only when the exact brewer is named in the instructions or compatibility list. [1][2]
Can I Use the New Filter in a Keurig 1.0 Brewer
Keurig’s 2025 chart includes 1.0 home brewers, while a user report describes reinstalling the regular pod holder on a K-Classic before the newer accessory worked. Check your brewer and filter instructions for the holder setup rather than assuming the older installation steps still apply. [1]
How Much Coffee Should I Put in It
Use the basket’s fill marks and manual. For the current My K-Cup, Keurig recommends its lower line below a 10-ounce brew and upper line above 10 ounces. Keep grounds below the maximum and adjust one variable at a time if flavor is too weak or strong. [1]
Why Does My Reusable Cup Leave Grounds in the Mug
Check the lid, fill level, mesh condition, grind guidance, and fit. If the filter sits crooked or the handle does not close normally, stop and verify compatibility. Clean the brewer’s needles only according to its manual. If a correctly installed, undamaged filter still releases grounds, contact the maker or return the product.
The safest purchase is the filter whose version, holder setup, and model list agree with your brewer’s own documentation. Take the minute to read the label and the chart before checkout; it is often the difference between a useful reusable accessory and another small part in the kitchen drawer.
References
-
Keurig, “How to Use the Keurig My K-Cup Reusable Coffee Filter,” April 1, 2025. Compatibility chart, fit alignment, fill lines, and cleaning instructions. Source
-
Keurig, K-Supreme Use & Care Guide. Reusable-filter compatibility warning. Source
-
Keurig, My K-Cup 2.0 Instruction Sheet. Fill limit, grind, insertion, and cleaning directions for that older filter. Source
-
Keurig, K-Supreme Plus Smart Use & Care Guide. Cleaning and troubleshooting guidance. Source
-
YouTube, “Use A Reusable K-Cup With The K-Supreme (Plus): Here’s How,” visual demonstration of an earlier filter setup. Source
-
YouTube, “Using Reusable K-Cups with Keurig K-Supreme: What You Need To Know,” visual demonstration and discussion. Source
Hook this up to your favourite commenting platform — Giscus, Disqus, or your own.
Continue reading
Garbage Disposal Splash Guard Replacement: Check Fit First
Two guards can look identical in a photo and fit different disposers. Confirm the model, check whether the old guard lifts out at all, and treat universal as a seller's scope claim.
Dog Poop Bag Refills: Check Roll Fit Before You Buy
Bag width and length do not tell you whether a refill fits the dispenser. Compare roll diameter, usable width and the core before you buy a multipack.

Toilet Brush Refills: Check the Connection Before You Buy
A refill that will not fit is usually the wrong coupling, not a badly made brush. Identify the handle, compare the connector, and dry-fit before you trust the word universal.