How to Choose the Right Toilet Flapper Size: 2 Inch vs 3 Inch
Flappers are matched to the flush-valve opening, not the width of the rubber. Confirm the leak, measure the right feature, and match the hinge before ordering.
 Lena Schmidt
Disclosure: We may earn a commission if you purchase through links on this page, at no additional cost to you.
The short answer
Most replacement flappers are chosen by the flush-valve opening they cover, not by the outside diameter of the rubber flap. The two common labels are 2-inch and 3-inch. If you can see the opening clearly, measure across the valve seat; if not, compare the old part with a manufacturer sizing guide. A flap that measures about 3 inches across can belong to a 2-inch valve, while a part around 4 inches across can indicate a 3-inch valve. That apparent mismatch is why measuring the rubber alone causes wrong orders. These dimensions are useful clues, not a substitute for a model-specific parts diagram. [1][2]
Before buying anything, check that the leak is actually at the flapper. A toilet that runs can also have a fill valve that will not shut off, a water level set above the overflow tube, a chain caught under the flap, or a canister seal that does not use a conventional hinged flapper. If your toilet uses a tower or canister, an unusual hinge, a flush ball, or a named proprietary valve, identify the toilet model first. A “universal” label is not proof that a part fits every tank.
First check whether the flapper is the problem
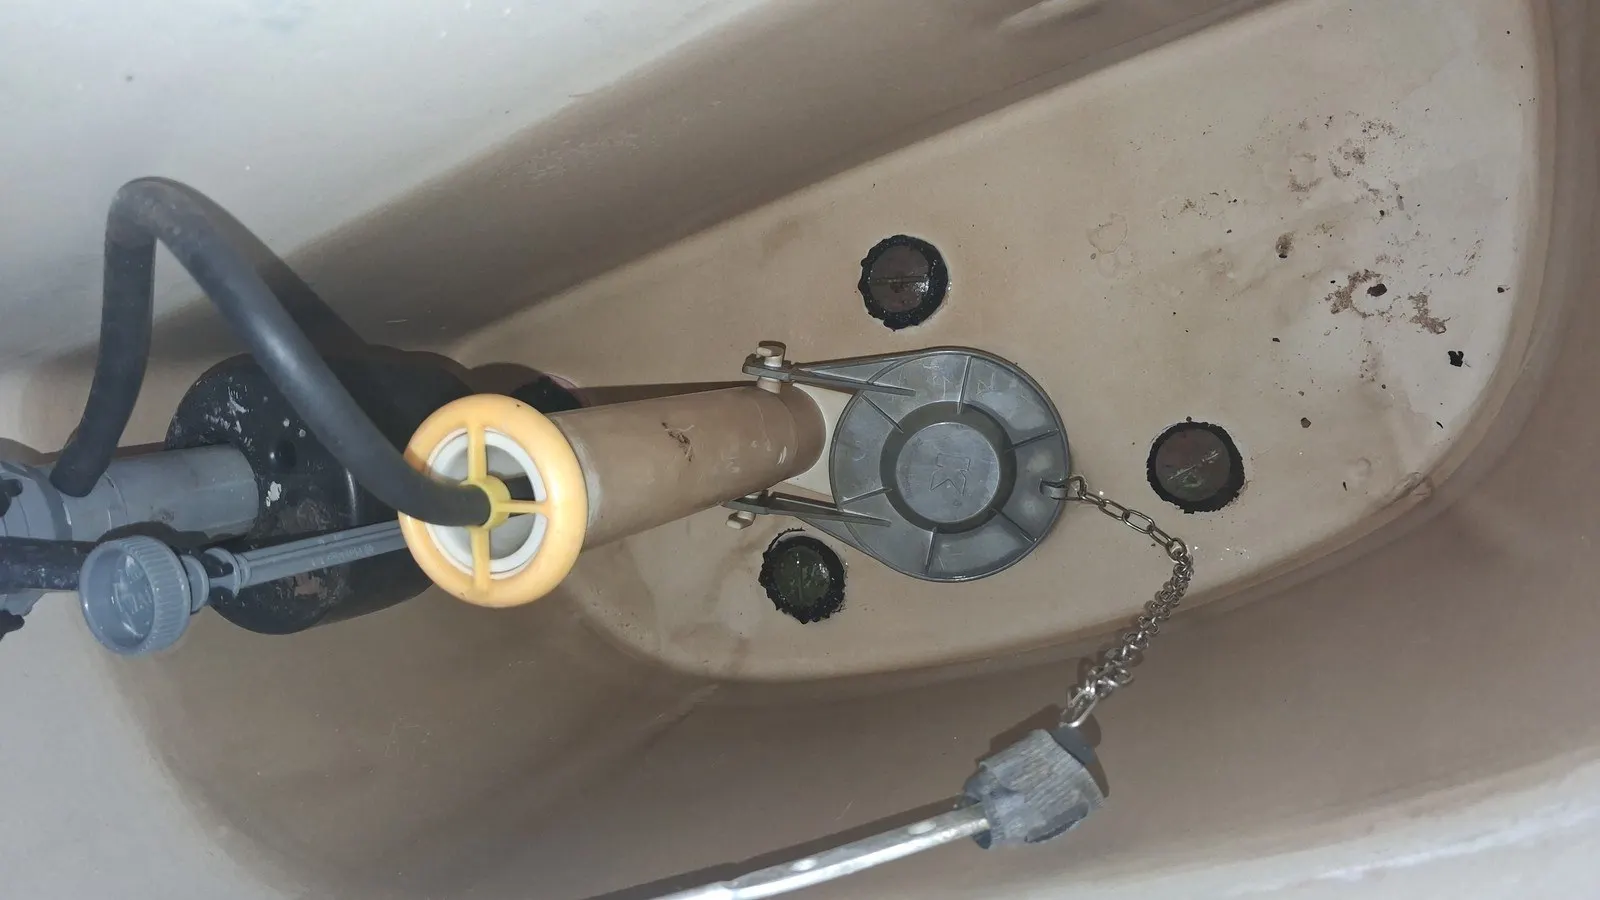
Take the tank lid off and set it somewhere stable. Watch the tank after it refills. If water is flowing over the top of the overflow tube, the tank water level or fill valve may be the issue; replacing the flapper will not correct that cause. If the tank is quiet but the bowl has a persistent ripple, or the fill valve briefly starts without anyone flushing, water may be escaping through the flush valve seal. Kohler’s troubleshooting guidance lists several possible causes of a running toilet and distinguishes flapper-style valves from canister-style valves. [3]
A simple dye check can help confirm a slow tank-to-bowl leak: put a few drops of food coloring in the tank water, do not flush, and look in the bowl after about 15 minutes. Color in the bowl means tank water has crossed the seal. The test identifies a leak path, not the exact failed part. A worn flapper is one possibility; debris, a damaged flush-valve seat, a canister gasket, or a misaligned part can produce a similar result. If there is no color transfer, inspect the fill valve and overflow before ordering a seal.
Also look at the chain. It should have enough slack for the flap to rest fully on its seat, but not so much that it slips beneath the flap or tangles around the lever. Kohler’s guidance suggests roughly one to two links of slack for its described setup; follow your toilet or replacement-part instructions if they specify another adjustment. [3] A chain problem is free to fix and can imitate a failed flapper, so check it before buying a replacement.
How to tell whether you need a 2-inch or 3-inch part
The name refers to the flush-valve size category. It is not necessarily the finished width of the rubber disk. Korky’s sizing guide recommends measuring the flush-valve opening and describes standard 2-inch and large 3-inch categories. [1] Fluidmaster’s selection materials use a different practical clue: measure an intact old flapper across its widest point; a flap near 3 inches corresponds to its 2-inch models, while a flap near 4 inches corresponds to its 3-inch model. [2] Those guides are compatible once you notice they are measuring different objects: one measures the opening, the other the replacement flap.
For the clearest measurement, shut off the toilet’s supply valve, flush once, and let most of the tank water drain. Remove the old flap only if it comes off easily and you can restore the chain and hinge. Use a ruler to measure the open circular passage at the top of the flush valve, from inner edge to inner edge. Do not measure the broad plastic base at the bottom of the tank, the overflow tube, or the old rubber from tab to tab and call that the valve opening. If the opening is hidden by a tower, cover, or unusual rim, stop and use the tank or toilet model number instead.
If the old flap is intact, photograph it beside a ruler and note how it attaches: two side ears on pegs, a center ring, a hinged arm, or a special shape. The mounting geometry matters as much as the diameter. A nominally correct 2-inch flap can still fail if its ears do not fit the pegs, its body is too wide for the tank, or the hinge position prevents it from landing flat. An undersized flap may leave part of the opening exposed; an oversized one may sit off-center, rub the tank, or fail to seal. Match both the sealing surface and the attachment points.
Use three checks before ordering
A reliable match comes from agreeing evidence rather than one guess. First, read the make and model from the tank, the inside of the lid, or the toilet’s original paperwork. Manufacturers often place the tank model number on the inside rear wall or underside of the lid, but locations differ. Search the manufacturer’s parts diagram for that exact number. Kohler explicitly warns that parts can vary by model and advises identifying the product before selecting service parts. [4]
Second, compare the old component with a current manufacturer compatibility list. Record its part number, color, shape, and attachment style. Color alone is weak evidence: manufacturers use colors for product lines, and colors can fade or vary. Third, confirm the valve opening or flap dimensions using the manufacturer’s own guide. If the model diagram names a proprietary seal, trust that over a generic size chart. When the three checks disagree, do not buy the closest-looking universal part; contact the maker with a photo and model number.
What to record before you close the tank
A few minutes of documentation can prevent a second trip to the store. Photograph the inside of the tank from above, with enough light to show the valve, overflow tube, and handle arm. Take a close photo of the part where it attaches to the overflow tube or flush valve, then photograph the old flap next to a ruler if it is still intact. Keep the photos together with the toilet’s make and model number. A single close-up of a red or black rubber part is rarely enough to identify it; the hinge and surrounding valve shape often narrow the match more reliably.
Write down whether the tank has a conventional lift chain and hinged flap, a tower that rises vertically, or a round flush ball. Note any molded letters or part numbers on the rubber and plastic. If the toilet is a two-piece model, the tank model can differ from the bowl model, so record the number from the tank itself when possible. If the model stamp is missing, manufacturer support may ask for photos of the whole toilet, tank interior, and dimensions. This is where “universal” listings tend to disappoint: they may cover common sizes but omit the exact orientation or clearance that your tank needs.
For an online order, compare the image in the listing with your photo rather than relying on the product title alone. Make sure the listing describes the same valve size and the same mounting style; then check the package contents for the clips, adapters, or chain you actually need. Save the original part until the new one has been installed and the tank passes a leak check.
When “universal” is the wrong shortcut
Universal flappers are useful when the toilet really has a common hinged arrangement and you have confirmed the size range. Some products include separate 2-inch and 3-inch assemblies or an adapter, while others are designed only for one valve size. For example, Korky describes its Fit-All model 3020 as converting between standard 2-inch and large 3-inch assemblies and includes a model-specific leg adapter. That is a claim about that product’s design, not a guarantee for every toilet with either opening. [5]
Be cautious with one-piece toilets, compact or low-profile tanks, canister flush valves, flush balls, and toilets with distinctive hinge or arm designs. In a canister system, the part that seals the outlet may be a flat gasket beneath a lift tower rather than a hinged flapper. Kohler’s support pages show both styles and advise using the toilet’s model number to find the correct part. [3][4] Some branded toilets also use a standard-size valve with a proprietary shape around the hinge; diameter alone cannot resolve that fit.
The recurring confusion in homeowner and plumbing discussions reflects this practical gap: people can measure a 2-inch center opening or a roughly 3-inch old flap and reasonably conclude they have different sizes. The labels use nominal categories, while shoppers see the whole component. Community posts are helpful for understanding the wording people search, but they are anecdotes, not compatibility specifications. Use them to discover the question; use the parts maker’s chart to answer it.
Buying a replacement that solves the leak
For a confirmed standard 2-inch valve with an ordinary two-ear hinge, a 2-inch replacement is the straightforward starting point. One example is the Korky 2017 adjustable 2-inch flapper; the manufacturer describes it as a 2-inch model, and the Amazon listing identifies the same model number. It is not the right purchase for a 3-inch opening or a canister seal. If the opening is 3 inches, select a 3-inch product whose hinge layout matches the old part, or use the toilet model’s specified replacement.
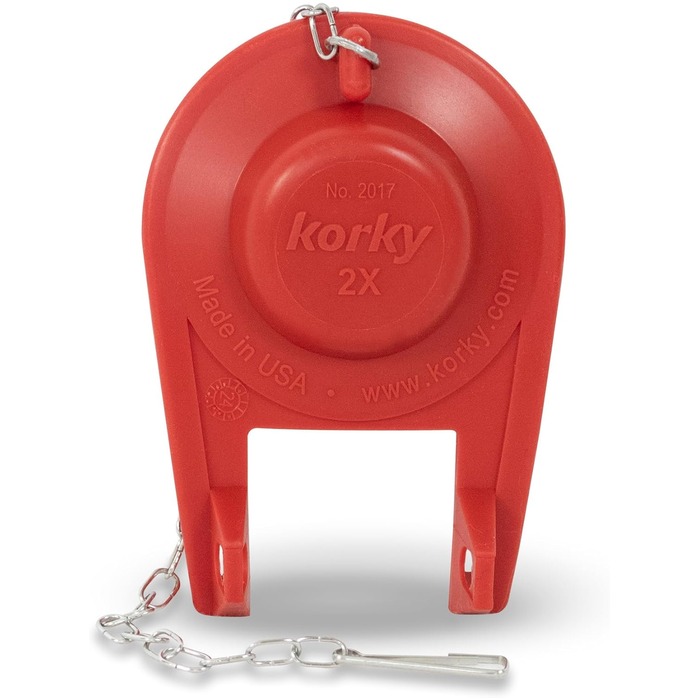
Korky 2017 2-inch toilet flapper
A 2-inch replacement flapper for a confirmed standard flush valve with an ordinary two-ear hinge. It is not the right part for a 3-inch opening, a canister seal, or a proprietary hinge.
- Role: Amazon consumer option
- 2-inch size
- Adjustable
- Verify valve size and hinge first
- MOQ: Check current listing
Avoid choosing by star rating or a “fits most” phrase alone. Check that the listing states the valve size, names the attachment style, and includes any adapter your toilet needs. Look for clear return terms if the model cannot be confirmed. Buying a two-size kit may be convenient when the opening is common but uncertain; it is not a solution for a proprietary mechanism. A repair kit that replaces the entire flush valve may be appropriate when the valve seat itself is damaged, but replacing the complete valve involves removing the tank and should be treated as a larger repair.
Install and test the new flapper
Turn off the supply and flush to lower the tank water. Remove the old flapper, keeping its chain arrangement in view. Clean the valve seat with a soft cloth; grit or scale can prevent a new seal from lying flat. Do not scrape a plastic seat with a metal tool. Attach the replacement using the manufacturer’s steps, position the chain so it has slight slack at rest, and make sure the flap can lift without catching on the fill valve, overflow tube, or tank wall. Reopen the supply and allow the tank to fill.
Flush several times while watching the flap rise and return. It should settle squarely on the seat and stay there without twisting. If the toilet double-flushes or the flush feels weak, an adjustable flapper may be opening too long or too briefly; follow its instructions to change the setting in small increments. Do not assume a generic “higher number” setting always means more water on every design. Product adjustment scales vary.
Repeat the dye test after the repair. If color still enters the bowl, remove the part and inspect its seating, hinge alignment, and chain slack. Check the rim for mineral deposits or damage. If a correct new flapper still cannot seal against a nicked, warped, or heavily scaled valve seat, the flush valve may need repair or replacement. Persistent running can also point back to the fill valve or overflow. At that point, use the toilet model’s service guide or call a plumber rather than stacking more universal parts.
A quick decision path
Choose a standard 2-inch flapper when the valve opening measures in that category, the old component and mounting points match, and the toilet does not call for a brand-specific part. Choose a 3-inch flapper when the opening is the larger category and the replacement’s shape and hinge match. Choose a model-specific seal or assembly when you see a canister, tower, flush ball, unusual hinge, or a manufacturer parts diagram naming a dedicated component. If you cannot see the valve opening or identify the mechanism, get the tank model number before ordering.
That sequence avoids the common trap of treating “2-inch versus 3-inch” as a choice based on the outer edge of a rubber disk. Confirm the leak, measure the correct feature, match the mounting style, and verify the exact toilet when the design is unusual. A small rubber part is inexpensive; a return trip, a continuing leak, and repeated guesswork cost more than taking a photo and checking the model first.
Sources
-
Korky, “What Size Flapper Do I Need?”. Source
-
Fluidmaster, 502 flapper installation instructions and retail catalog. Source
-
Kohler Assist, “Toilet Constantly Leaking or Running”. Source
-
Kohler, “Service Parts” — identify model and select parts from the product diagram. Source
-
Korky, Fit-All Universal 2-Inch and 3-Inch Premium Toilet Flapper, model 3020. Source
-
Korky, “How to Install the Fit-All Universal 2-Inch & 3-Inch Toilet Flapper”. Source
Hook this up to your favourite commenting platform — Giscus, Disqus, or your own.
Continue reading
Garbage Disposal Splash Guard Replacement: Check Fit First
Two guards can look identical in a photo and fit different disposers. Confirm the model, check whether the old guard lifts out at all, and treat universal as a seller's scope claim.
Dog Poop Bag Refills: Check Roll Fit Before You Buy
Bag width and length do not tell you whether a refill fits the dispenser. Compare roll diameter, usable width and the core before you buy a multipack.
Toilet Brush Refills: Check the Connection Before You Buy
A refill that will not fit is usually the wrong coupling, not a badly made brush. Identify the handle, compare the connector, and dry-fit before you trust the word universal.