Bathroom Sink Stopper Won’t Stay Down? How to Fix It Before Replacing the Drain
A stopper that pops back up is usually an adjustment, debris, or a worn seal. Identify the mechanism first, then decide whether to fix or replace.
 Lena Schmidt
Disclosure: We may earn a commission if you purchase through links on this page, at no additional cost to you.
Start by identifying what “won’t stay down” means
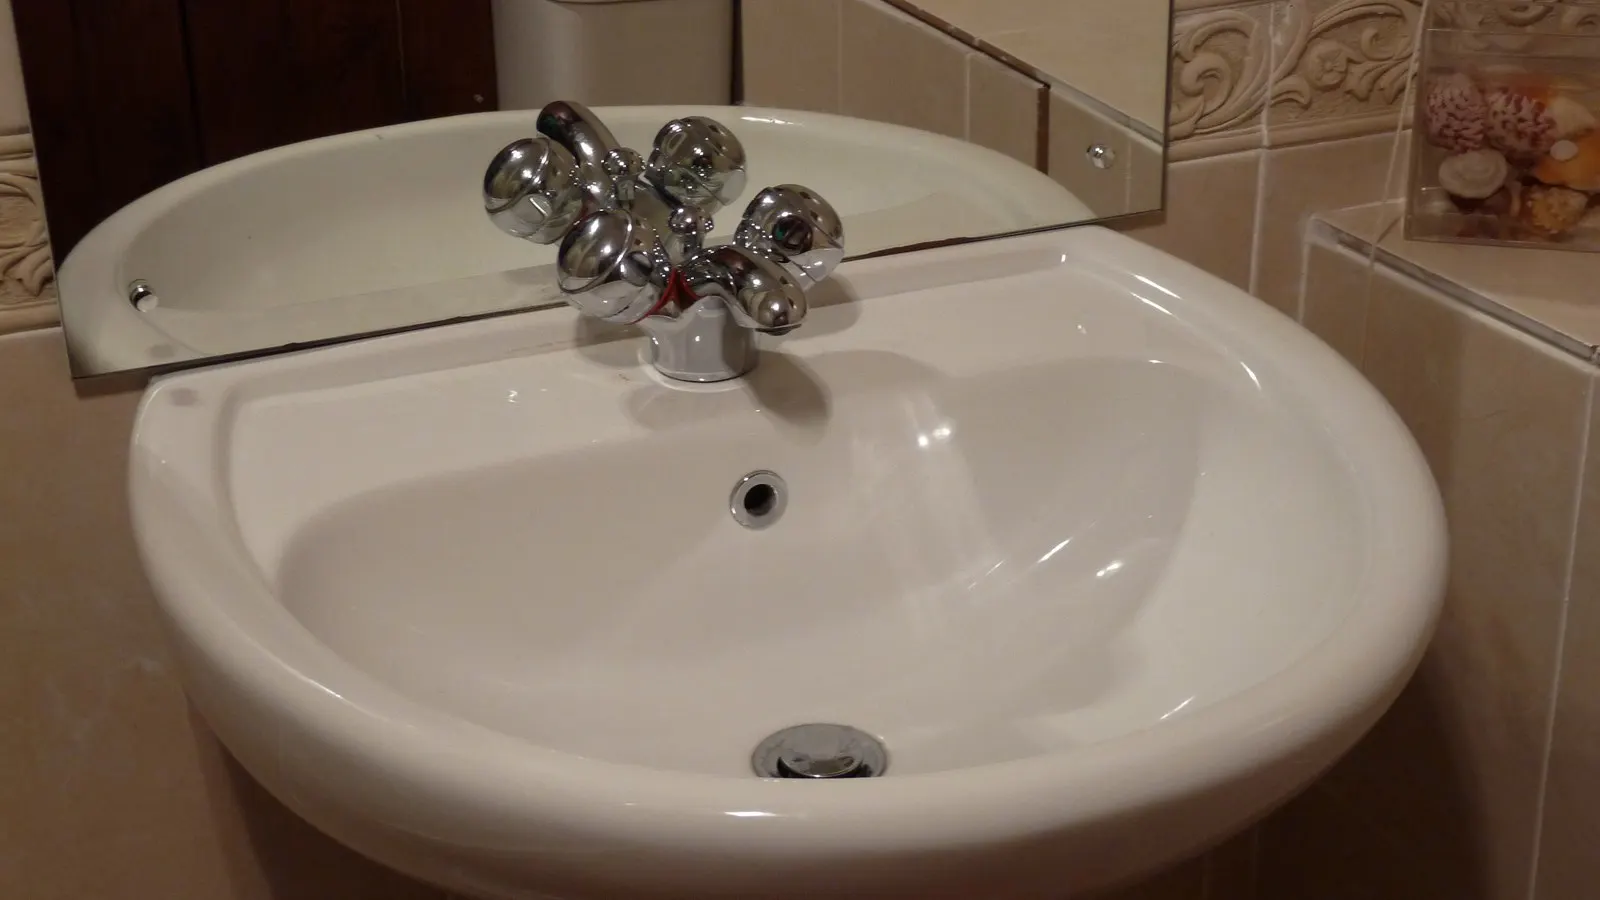
A bathroom sink stopper that will not stay closed is usually a small adjustment, debris, or worn-seal problem—not proof that the drain assembly needs replacing. First identify the mechanism. A lift-rod stopper is controlled by a small knob behind the faucet and metal linkage under the basin. A push-click stopper is opened and closed by pressing the cap itself; it has a spring mechanism in the stopper, not the same lift-rod linkage.
The phrase “won’t stay down” can describe two different failures. If the stopper pops back up as soon as you press it, focus on a push-click mechanism or a stopper that is being held up by its linkage. If it stays down but water keeps draining, it is failing to seal. If the basin drains slowly with the stopper supposedly open, the stopper may not be lifting high enough or hair may be restricting the opening. Those symptoms look similar from above, but the repair is different.
This guide covers bathroom basin drains. It does not apply to a bathtub overflow lever, a kitchen sink basket strainer, or a sink where water is leaking onto the cabinet floor. For a cabinet leak, stop using the sink until you find whether water is escaping at the pivot-rod nut, drain flange, or supply plumbing. A stopper adjustment will not repair a plumbing leak.
A 30-second check tells you which mechanism you have
Look at the faucet and the back of the drain. A lift-rod setup has a narrow rod behind the faucet; beneath the sink, that connects to a perforated strap, spring clip, and horizontal pivot rod entering the drain body. Moving the faucet rod tips the pivot rod, which raises or lowers the stopper. Moen describes a broken pivot rod or incorrect pivot-rod/lift-rod adjustment as common reasons its pop-up assembly will not open or close properly.
A push-click, also called push-button or clicker, has a cap you press to alternate between open and closed. There may be no rod or strap beneath the sink. Its spring cartridge and seal sit in or under the stopper cap. A clicker that immediately rebounds, will not latch, or feels gritty should be treated as a stopper mechanism issue; moving a lift-rod strap that is not there cannot fix it.
Before taking anything apart, operate the stopper once while watching under the sink. If the faucet rod moves but the stopper does not, the linkage may have disconnected. If the stopper moves but does not seat, cleaning or adjustment is more likely. If the stopper is push-click, test it with the basin empty and note whether each press changes its position. That simple observation keeps you from buying a replacement for the wrong mechanism.
Clean the stopper and seal before adjusting anything
Hair, soap film, and mineral residue can keep the stopper from seating flat. Open the drain, then remove the stopper only in the way its design allows. Many lift-rod stoppers can be lifted out after the pivot rod is disconnected below; some are designed to unscrew or release from above. A clicker may unscrew at the cap or lift out as a cartridge. Do not force it or assume every model uses the same removal method. Check the faucet or drain instructions if the cap does not release with gentle hand pressure.
For a lift-rod drain, put a small container and towel under the pivot-rod connection before loosening it. The rod passes through a nut and seal at the drain body. Loosen only enough to withdraw the rod, keep track of the spring clip and washer, and avoid pulling on plastic parts. With the stopper out, remove visible hair and residue from the stopper, its rubber seal, and the drain opening. Wipe the contact surfaces clean and inspect the seal for splits, flattened spots, or missing pieces.
Reinstall the stopper and test it before changing the linkage. A clean seal that now holds water was the whole problem. If the stopper still will not close fully, look for a bent stopper, damaged seal, or rod that is pressing against the underside of the basin or vanity. Delta notes that an obstruction under the sink can prevent some non-removable pop-up stoppers from dropping far enough to seal; rotating the drain body slightly may clear that interference, but only when the model permits it.
Adjust a lift-rod stopper in small steps
If the rod and strap are connected, check that the spring clip is still holding the pivot rod in one of the strap holes and that the strap screw is snug. A loose clip can let the linkage slip; a strap hole that is too high or too low changes how far the stopper travels. Kohler’s adjustment guidance is to move the linkage to a different hole, then check the stopper’s movement. Make one change at a time so you can tell which direction helped.
Put the faucet lift rod in the position that should close the drain. If the stopper remains visibly raised, loosen the strap screw, move the strap connection one hole to increase downward travel, tighten the screw, and test. If the stopper closes but will not lift enough to drain freely, adjust in the opposite direction. The correct hole depends on the parts and geometry of your faucet; there is no universal hole number or fixed adjustment distance.
After each adjustment, cycle the lever several times. The stopper should seat without being forced and should rise enough that water can pass around it. Fill the basin partway, watch the water level for a few minutes, then open the drain and confirm it empties without an unusually restricted flow. If the stopper seals only when the linkage is set so high that it cannot open, the stopper height, pivot rod, or drain parts may be mismatched or worn. Do not keep tightening the strap until the mechanism binds.
If you have a push-click stopper, check the cap and cartridge
A push-click stopper does not use the lift-rod adjustment above. Remove the cap or cartridge according to the manufacturer’s instructions, then rinse away residue and inspect the spring assembly and rubber seal. A cap that has unscrewed slightly may not engage the latch correctly; if the design uses a threaded cap, hand-tighten it only as directed. If pressing the cap no longer toggles between positions after cleaning and correct reassembly, the spring mechanism may be worn or broken.
Check that the stopper is centered and that its seal sits evenly on the drain rim. An incompatible replacement cap can appear to fit while sitting too high, rubbing the sides, or leaving the drain partly blocked. If the clicker is a removable insert, measure the drain opening at the rim and compare it with the product’s stated fit range. Confirm whether the sink has an overflow opening and whether the replacement is made for an overflow or non-overflow drain assembly; a stopper insert and a complete drain body are different purchases.
Do not try to repair a sealed spring cartridge by prying it open unless the manufacturer provides a service procedure. If the spring has corroded, the latch will not hold, or the rubber seal is permanently deformed, replacing the stopper or cartridge is usually more predictable than forcing a temporary catch.
Replace the stopper, cartridge, or full drain assembly?
Replace only the stopper when the drain body and linkage are sound and the manufacturer sells a compatible stopper or cartridge. This is often the simplest route for a model-specific lift-rod assembly or a push-click cartridge. Match the faucet or drain model number when possible. Decorative finish matters, but the mechanical connection and seal shape matter more.
A removable press-in stopper can be a practical workaround when you want a push-to-close top and the existing drain opening is compatible. It is not a repair for a broken pivot rod or a guarantee that every sink will seal. It may also change how the sink drains: a basket or stopper insert can occupy space in the opening and collect hair or debris, so remove it periodically and verify that water can flow freely.
Replace the full drain assembly when the body is corroded, the pivot-rod opening or threads are damaged, the linkage parts cannot be sourced, the flange leaks into the cabinet, or the old design cannot accept a suitable replacement stopper. Before ordering, record whether the sink has an overflow, the drain opening size, the tailpiece connection, and the finish you need. Product listings often use “universal” broadly; treat a stated range as the seller’s claim and compare the actual drain geometry rather than assuming the label guarantees fit.
A replacement option, with its fit limits made clear
One current example is the Hibbent 3-in-1 bathroom sink drain strainer and pop-up stopper. Amazon’s listing identifies it as a press-operated replacement with a removable stainless-steel filter basket and a brass bullet core. The listing says the included O-rings cover drain holes from 1.1 to 2.36 inches; that is the seller’s stated range, not an independent fit test. Measure your drain and confirm overflow compatibility and installation style before ordering.
the Amazon page showed 4.3 out of 5 stars from 9,195 ratings. That is a substantial review history, but ratings do not confirm fit for your sink, prove the life of the spring, or replace the manufacturer’s instructions. The product is a different operating style from a lift-rod stopper, so choose it only if you are comfortable pressing the drain cap and the listing’s dimensions match your sink.
View the Hibbent 3-in-1 sink stopper on Amazon . Check current fit details and availability on the listing.
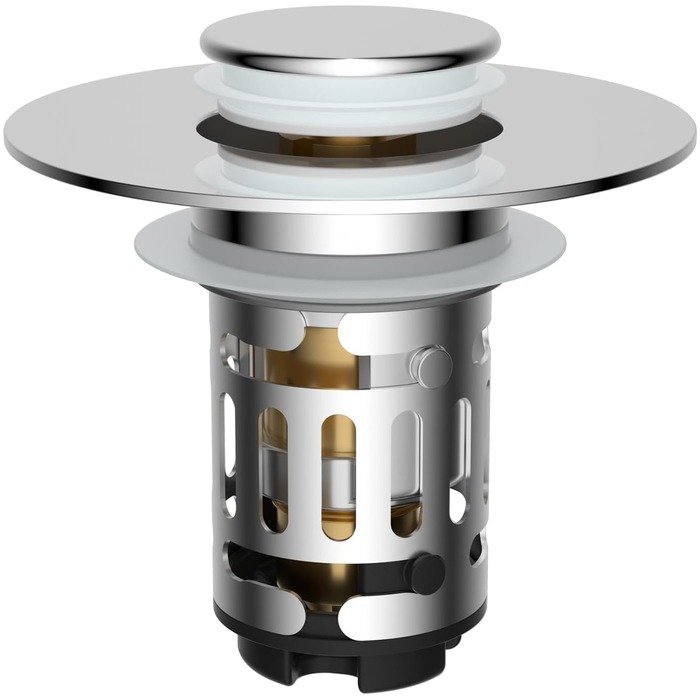
Hibbent 3-in-1 bathroom sink stopper
A press-operated replacement that combines strainer, stopper and overflow cover in one part. It is a fit-dependent workaround, not a repair for a damaged lift-rod linkage or a cracked drain body.
- Role: Amazon consumer option
- Press-to-close stopper
- Built-in strainer
- Check drain opening size first
- MOQ: Check current listing
Measure the drain opening itself, not the decorative stopper cap. If the old stopper comes out, compare the portion that sits inside the drain with the listing’s sizing diagram and check whether the drain has an overflow slot. A press-in insert cannot repair a broken external linkage, and a clicker assembly designed around one drain body may not fit another even if the top looks similar. Keep the original stopper until the replacement has been test-fitted and seals correctly.
If the existing stopper just needs a linkage adjustment or cleaning, keep the original assembly. If a part is broken, use the faucet or drain model number to look for its matching replacement first. As an Amazon Associate, ObjectBrief earns from qualifying purchases.
Test the repair before calling it fixed
A stopper can move up and down and still fail its job. With the drain closed, add enough water to cover the stopper, wait several minutes, and look for a falling water level. Then open it fully and make sure the basin drains at a normal rate. On a lift-rod system, repeat the open-close test several times while checking underneath for a drip at the pivot-rod nut. On a push-click system, confirm that pressing the cap reliably alternates positions.
If it still leaks slowly, press gently on the stopper to see whether the seal changes. A seal that works only under hand pressure may be dirty, damaged, or misaligned. Delta also notes that water can pass around the drain flange and enter through the overflow path, so a basin that empties is not always evidence that the stopper itself is the only leak point. If you see water on the cabinet floor, investigate the drain connections rather than continuing to adjust the cap.
Keep the test modest: a partial basin is enough to reveal a slow drop, and it avoids leaving a full sink unattended while you look underneath. If the water level falls but the cabinet stays dry, inspect the stopper seal and drain flange. If you see droplets under the sink, dry the area, run water briefly, and identify the first wet connection. A drip at the pivot nut calls for a different repair from water escaping at the faucet supply line.
The useful order is simple: identify the mechanism, clean the contact surfaces, adjust the linkage only on a lift-rod model, and replace only the failed part when the fit is confirmed. That sequence fixes the common small faults first and prevents a “universal” stopper purchase from becoming a second problem.
Sources
Hook this up to your favourite commenting platform — Giscus, Disqus, or your own.
Continue reading
Do Washing Machine Anti-Vibration Pads Stop Walking?
A pad that has shifted out from under the washer is a symptom, not the diagnosis. Check the machine is stable and the foot fits the cup before buying a grippier set.
When a Silicone Faucet Mat Pools Water, Check the Fit and Drain Path
A mat that holds a puddle is failing at one of three points: the counter does not drain toward the bowl, the mat is set the wrong way, or its outlet is blocked.
How to Keep a Cutting Board From Sliding on a Countertop
Most boards move because of a film of water or oil, a warped corner, or an overhang, not because the board is light. Find the cause, then pick a damp cloth or a grip pad.