How to Clean a Reusable Water Bottle Straw and Bite Valve Without Damaging Them
A model-first routine for the straw bore, bite valve, lid channels and gaskets of a reusable bottle.
 Lena Schmidt
Disclosure: We may earn a commission if you purchase through links on this page, at no additional cost to you.
A reusable bottle can look clean while its straw or mouthpiece still smells stale. The fix is usually not a stronger chemical or a bigger brush. It is separating only the parts your bottle maker says are removable, washing the inside of the straw with a brush that fits freely, and treating a slit-style silicone bite valve as a different component from a straight tube.
That distinction matters. CamelBak says its Big Bite valve can be removed and washed with warm, soapy water, but warns that forcing a bottle brush through the slit can tear the silicone [1]. A regular straw, by contrast, is designed to accept a correctly sized straw brush. Because bottle lids vary, use your exact model’s manual for disassembly, dishwasher, and soak instructions.
Why the straw and mouthpiece need their own cleaning step
Rinsing the bottle body does not necessarily rinse the straw’s inner wall, the underside of a mouthpiece, or the narrow channel where a valve seats. Those areas can retain water and drink residue. In online discussions, owners repeatedly describe black specks, an off taste, or a bite valve that remains hard to clean after the bottle itself has been washed. Those posts are useful for understanding the problem, but a photo or comment cannot identify a spot as mold or establish that a particular chemical is safe for a specific part.
The practical answer is to think in parts, not in “the bottle” as one object:
- The straw tube is a hollow passage. A slim brush can scrub its inner surface if the brush diameter and length fit the tube.
- The bite valve or mouthpiece controls how liquid exits. Some have a slit or one-way opening; others are rigid spouts or removable silicone covers.
- The lid channel and gasket seat are contact surfaces around the valve and straw connection. They need to be washed, rinsed, and dried too. A dark mark is not enough to diagnose its cause. It could be residue, staining, material wear, or microbial growth. If it wipes away, clean the component and inspect it. If it stays embedded, returns quickly, or is on a cracked, torn, sticky, or misshapen part, stop trying to scour it and check the maker’s replacement guidance.
Start with your bottle’s exact model
Before pulling on a valve or putting parts in a dishwasher, identify the lid or bottle model. Brand families often use more than one valve design. A method recommended for a removable silicone valve may be wrong for a fixed spout, a push-button lid, or a filtered bottle.
Look for the model name on the bottle base, packaging, receipt, or manufacturer’s care page. Confirm four things in the manual:
-
Which pieces are meant to come off, and how they detach.
-
Whether the straw, valve, gasket, and lid are dishwasher-safe, and which rack or cycle is allowed.
-
Whether the maker allows a cleaning solution or soak, and what concentration or contact time it specifies.
-
How each piece should be reinstalled, including the orientation of tabs, notches, and seals.
Do not pry out a gasket just because a cleaning video shows another lid being dismantled. If the manual does not describe removal, clean the accessible surfaces and ask the manufacturer whether the part is serviceable. That protects both the seal and any locking mechanism.
A reliable routine for a removable straight straw
For a normal day’s use, wash the straw with dish soap and warm water. If the bottle held juice, a sports drink, a smoothie, or anything other than plain water, wash it promptly rather than leaving residue to dry inside. A quick rinse can clear loose liquid, but it does not replace scrubbing the tube.
-
Remove the straw as directed. Hold the lid steady and pull or twist only in the way the model’s instructions show. Check both ends for a removable connector or valve.
-
Rinse from both ends. Run warm water through the passage to move out loose residue. If the tube bends, flex it gently; do not kink or stretch it.
-
Add a little dish soap. Wet a straw brush and apply a small amount of soap to the bristles. The brush should enter without force. If it catches, stop and use a thinner brush rather than pushing harder.
-
Scrub through the whole tube. Move the brush from end to end, withdrawing it fully. On a long tube, make sure the brush reaches the full length; clean from both directions if needed. A brush that only reaches halfway leaves part of the passage untouched.
-
Rinse until clear. Flush water through from both ends until you no longer see suds or loose debris. Soap left in the tube can affect the next drink’s taste.
-
Air-dry completely. Shake off drops, then leave the tube open and separated from the lid in a clean, ventilated place. Do not reassemble a damp straw into a closed bottle.
A flexible straw brush is useful for curved tubes, but the handle should not be so thick that it distorts the tube. For rigid, straight straws, a simple narrow brush is often easier to guide. The useful specifications are the bristle diameter, usable length, flexibility, and a smooth tip that does not snag. “Fits most straws” is not a measurement; compare the tool to the passage you actually own.
Clean a bite valve without stretching its slit
A bite valve is not just a short straw. On many sports bottles, drinking opens a slit in soft silicone. That slit can be damaged if a wire brush or a stiff oversized cleaner is pushed through it. CamelBak’s care instructions specifically advise against forcing a brush through the Big Bite valve slit because it can tear the silicone.
For a CamelBak Big Bite valve, the maker’s published routine is to pull the valve and straw off the cap, wash them by hand with warm, soapy water or use the dishwasher where permitted, and avoid pushing a brush through the slit. It also describes a deeper-cleaning soak for the specific removable parts [1]. Follow the latest CamelBak instructions for your model and region; do not copy that soak recipe onto another brand’s valve.
For other brands, use this conservative sequence unless the manual says otherwise:
- Remove only the valve pieces the manual identifies as removable.
- Wash the outside and accessible surfaces with warm, soapy water and a soft cloth or small, soft brush.
- If the valve is designed to open when squeezed, gently flex it under running water to flush the channel; do not stretch the slit or insert a tool into it.
- Rinse thoroughly and let the part dry fully before fitting it back. If the manufacturer specifically provides a valve brush or shows a disassembly method, follow those directions. A small detailing brush may be suitable for exterior grooves, but that does not make it safe to probe the valve’s drinking slit. Never use a knife, pin, toothpick, or metal pick to scrape inside an opening that can be torn or punctured.
Wash the lid channel and gasket seat
A washed straw can still smell if liquid has collected where it joins the lid. Use soapy water on the underside of the cap, the straw socket, hinge, threads, and the exposed surface around the mouthpiece. A soft toothbrush or a small nylon detailing brush can reach ridges without acting like a lever.
Remove a silicone gasket only when the manufacturer says it is removable and explains how to replace it. Wash both the gasket and the groove it sits in. Look for a twist, cut, stretch, or debris underneath. Before reassembly, check that the gasket is fully dry and seated flat; a pinched or displaced seal can cause leaks.
Small parts can disappear in a sink or fall through a dishwasher rack. Put only dishwasher-approved parts in a closed utensil basket or small dishwasher cage if the maker allows that method. Keep the bottle body and lid out of the dishwasher when the instructions say to hand-wash them. “The bottle is dishwasher-safe” does not automatically mean every cap component is.
When smell or visible residue remains
First repeat the basic process more carefully: disassemble approved parts, wash with soap, brush the full straw bore, rinse the lid channels, and dry everything separately. Check whether the odor is coming from the straw, bite valve, gasket, or bottle itself by smelling the clean, dry components one at a time. That helps avoid replacing a whole bottle when one inexpensive seal or straw is the source.
Do not jump straight to bleach, vinegar, baking soda, boiling water, or cleaning tablets. These methods are not interchangeable, and compatibility depends on the material and model. One manufacturer may specify a diluted solution for a removable valve; another may warn against that chemical or heat. Never mix cleaning chemicals. If you use a product approved by the bottle maker, follow its label for dilution, contact time, and rinsing.
If an inaccessible part still has a visible deposit or persistent odor after the maker-approved cleaning routine, replacement is often the more sensible choice. Replace a torn bite valve, cracked straw, damaged gasket, or component that no longer seals. If the manufacturer sells replacement parts, match the exact bottle generation and cap style; similar-looking valves are not necessarily interchangeable. When no replacement is available and the part cannot be cleaned as directed, retire that lid rather than scraping into hidden cavities.
Choosing a straw brush that fits
The brush is a sizing tool, not a force tool. Measure or compare the straw opening and choose bristles narrower than the inside diameter. The wire core should not scrape a thin plastic or silicone tube, and the bristle head should not mushroom so widely that it jams. For long straws, measure the usable tube length and select a brush that reaches it in one pass or can clean from both ends.
Two brush formats cover different needs, and neither replaces the directions for your exact lid. The Owala 2-in-1 Water Bottle Brush pairs a larger bottle brush with a smaller straw brush that stores inside its handle; at the time checked, its Amazon listing showed 4.8 stars from 3,860 ratings and 2,000+ purchases in the past week. Those figures are a marketplace snapshot and can change; they do not establish how well the small brush fits your specific straw.
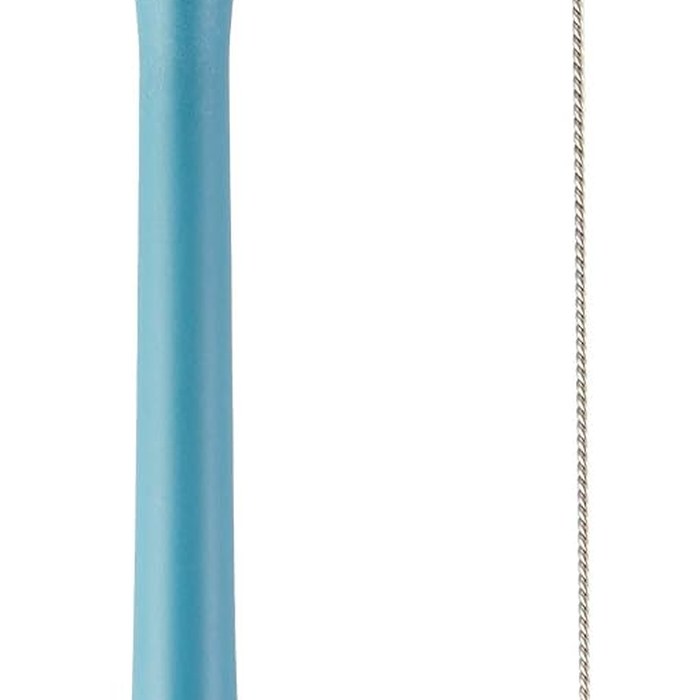
Owala 2-in-1 Water Bottle and Straw Brush
A two-in-one brush with a removable straw brush for tube cleaning. The small brush is for a straw whose bore it enters freely; it is not a way to scrub a slit-style silicone valve, and forcing any brush through a slit can tear the material.
- Role: Amazon consumer option
- Main brush plus tube brush
- Stores in the handle
- Size the brush to the bore first
- MOQ: Retail single unit
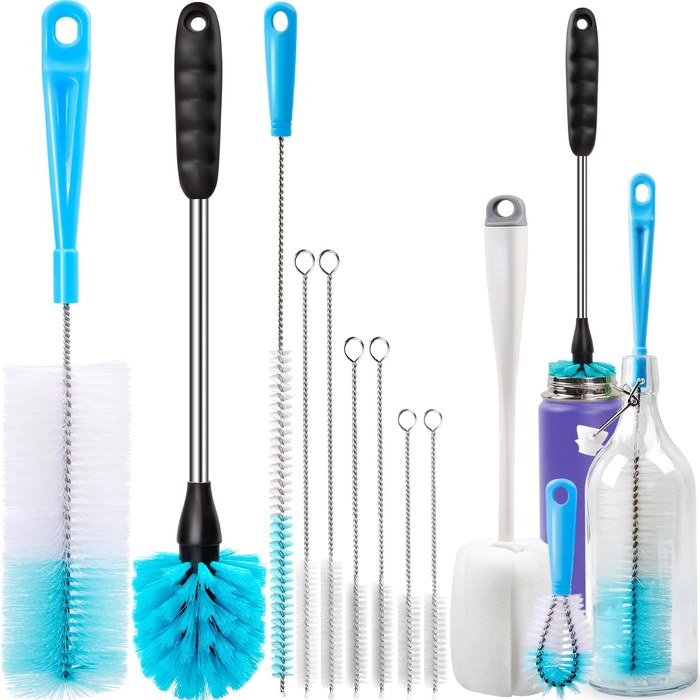
Holikme Bottle and Tube Brush Set
A multi-piece bottle and tube brush set. When checked, Amazon listed it as a bestseller in tube cleaning brushes with a 4.6-star rating. Check the included brush lengths and diameters before buying, since kit contents and listing variants change, and use the narrowest size that still passes through the tube without scraping.
- Role: Amazon consumer option
- Multiple diameters
- Long handles
- Kit contents can vary
- MOQ: Retail single unit
Ratings, badges and kit contents change over time. They describe listing activity, not whether the brush fits your bottle; measure your straw opening and compare it with the current product page before ordering.
A single slim brush may be the better choice if your only problem is one narrow straw. A multi-piece kit is more useful if you clean bottles with different tube diameters, lid channels, and bottle bodies. In either case, rinse the brush after use, remove trapped debris from the bristles, and hang it so it dries. A brush stored wet in a closed handle or pouch can develop the same stale smell you are trying to remove from the bottle.
How often should you clean it?
For a bottle used every day, make washing the straw and drinking surfaces part of the regular wash-up rather than waiting until a smell appears. Public-health and university medical guidance commonly recommends washing reusable bottles regularly with soap and water, while exact intervals differ by use and contents [3][4]. The practical threshold is simple: clean promptly after drinks other than water, and do not keep refilling a bottle indefinitely without washing it.
If you use only water, your bottle still contacts your mouth and hands. Rinse after use when you cannot wash immediately, then wash the bottle, lid, straw, and mouthpiece at the next practical opportunity. After illness, visible residue, or a bottle left closed and wet for an extended period, take the lid apart as allowed and clean all accessible pieces before reuse.
A quick check before you refill
Before putting the bottle back together, confirm that the straw is open end to end, the valve has no visible tear, the gasket is seated correctly, and all parts are dry. Reassemble in the manual’s order and test the cap over a sink with water. Check for drips, a loose straw, or a valve that no longer closes. If the seal leaks or the bite valve looks stretched after cleaning, replace the damaged component before carrying the bottle in a bag.
The repeatable method is deliberately plain: identify the model, remove approved parts, use a brush sized to the tube, leave the valve slit alone unless its maker instructs otherwise, rinse thoroughly, and dry every piece apart. That routine resolves the common straw problem without turning routine maintenance into trial-and-error chemistry.
References
-
CamelBak Care & Cleaning — brand-specific instructions for Big Bite valves, straw removal, dishwashing, and the warning against forcing a brush through the slit Source
-
Owala How to Clean a Stainless Steel FreeSip Bottle — model-specific part separation, washing, and drying directions Source
-
UPMC How to Correctly Clean Your Reusable Water Bottle — general soap, brush, rinse, air-dry guidance and reminder to check manufacturer care instructions Source
-
NBC Select How to Clean a Reusable Water Bottle — accessible guide to bottle, straw, and lid cleaning Source
-
YouTube: How to Pull Apart and Fix/Clean CamelBak Eddy+ Bite Valve Lid — a model-focused demonstration; use the manufacturer’s current manual if its directions differ Source
Hook this up to your favourite commenting platform — Giscus, Disqus, or your own.
Continue reading
Do Washing Machine Anti-Vibration Pads Stop Walking?
A pad that has shifted out from under the washer is a symptom, not the diagnosis. Check the machine is stable and the foot fits the cup before buying a grippier set.

When a Silicone Faucet Mat Pools Water, Check the Fit and Drain Path
A mat that holds a puddle is failing at one of three points: the counter does not drain toward the bowl, the mat is set the wrong way, or its outlet is blocked.
How to Keep a Cutting Board From Sliding on a Countertop
Most boards move because of a film of water or oil, a warped corner, or an overhang, not because the board is light. Find the cause, then pick a damp cloth or a grip pad.