How to Remove Dog Hair from Cloth Car Seats Without Damaging the Fabric
A dry, surface-first method for woven upholstery, seams and seat bolsters.
 Lena Schmidt
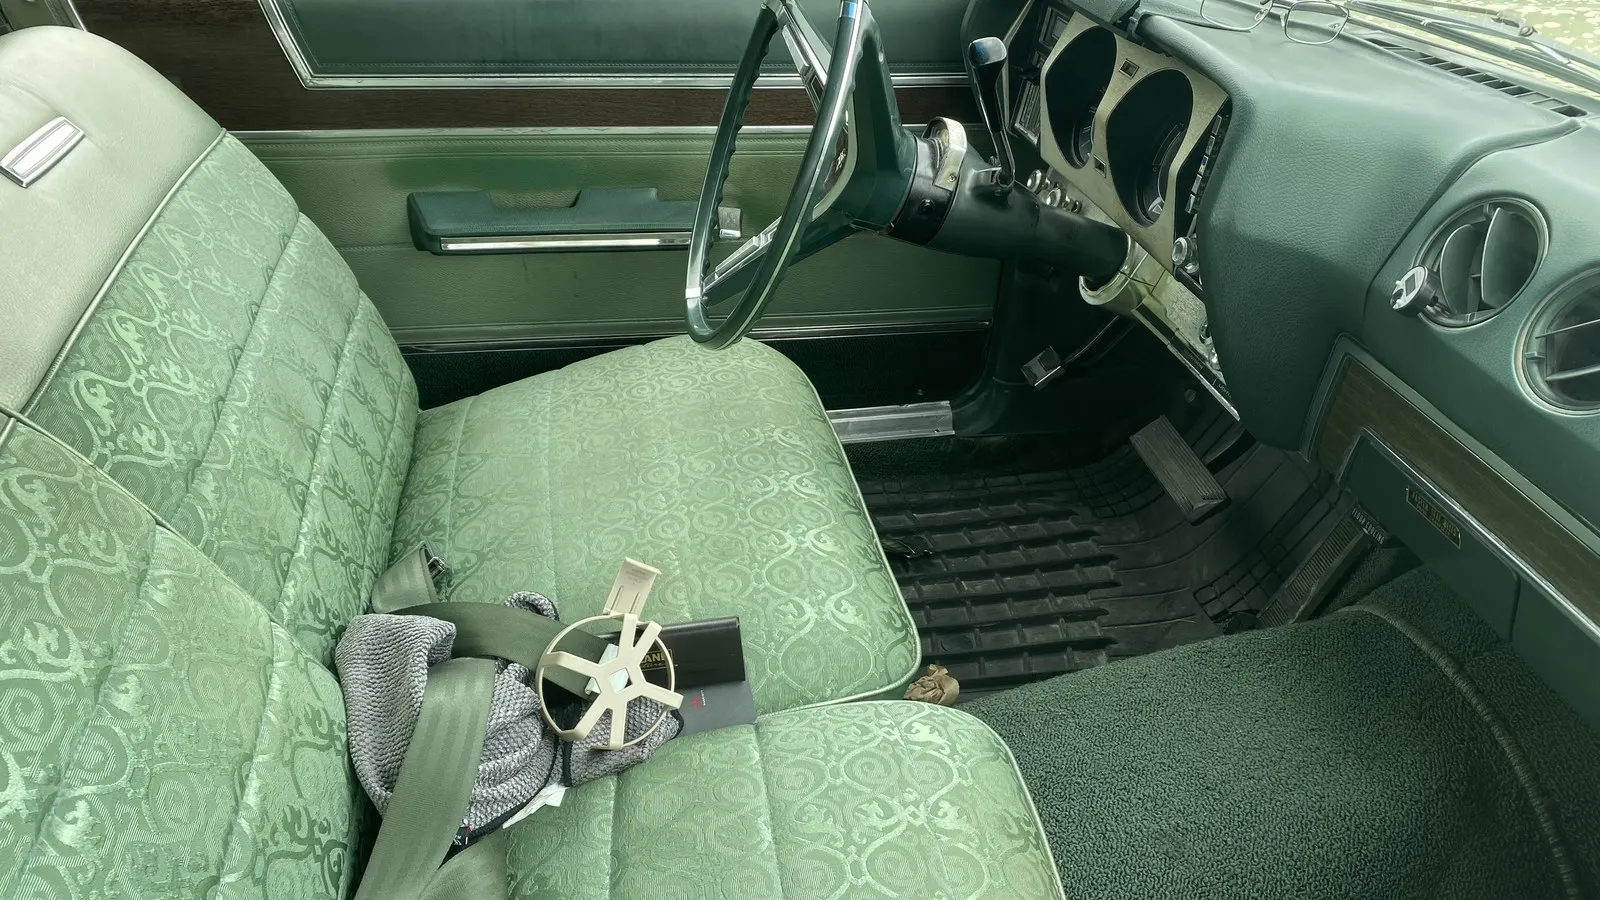
Disclosure: We may earn a commission if you purchase through links on this page, at no additional cost to you.
Dog hair that stays in a cloth car seat after vacuuming usually needs to be lifted before it can be collected. Start with a clean vacuum and an upholstery attachment to remove loose hair, then work a small section at a time with a compatible rubber-edged pet-hair tool. Use short, light strokes in one direction, gather the loosened fur, and vacuum again. Test any tool on a hidden area first. Do not wet the seat, use a pumice stone, or scrape across stitching until you have checked the vehicle manual and seat material.
This guide is specifically for removable-looking hair on woven cloth car-seat upholstery. It is not a seat-stain treatment, a carpet-cleaning guide, or advice for leather, suede, Alcantara, perforated trim, or a seat with exposed damage. The distinction matters: the seat is a finished surface with seams, controls, and potentially safety equipment inside it. A method that works on a removable floor mat may be too rough or too wet for a seat cushion.
Why the vacuum leaves hair behind
Short, fine, or stiff hairs can lodge between the threads of a woven seat cover. The vacuum may remove dust and hair lying on top while leaving strands caught at an angle in the weave. A smooth upholstery nozzle can pass over them without creating enough contact to pull them loose. In owner discussions, this is the recurring complaint: the vacuum works on loose fur, but hair remains in the rear seat fabric or appears again after the first pass.
More suction or force is not automatically the answer. A nozzle pressed into the cushion can drag across seams; a stiff tool used rapidly can roughen fabric. Separate the jobs: vacuum loose hair, lift embedded strands with a compatible tool, then vacuum the clumps. Stop if the fabric pills, snags, or changes texture.
Check the seat before choosing a tool
Look at the seat in good light and identify the surface you are touching. Many cloth seats are woven fabric, but vehicles can combine cloth panels with synthetic leather bolsters, suede-like inserts, perforated sections, or different trim on the rear bench. Do not assume that a single seat is made from one material. Check the owner’s manual for cleaning instructions and warnings for the exact model year.
This check is more than a cosmetic precaution. Ford’s owner guidance, for example, advises vacuuming loose dirt from fabric and cloth seats and gives specific care instructions for seats equipped with side airbags; other vehicle makers may give different approved products or cautions. Ford also warns in some manuals against household cleaners that could affect seat materials, and against applying strong detergents or solvents around seat-mounted airbags. These are manufacturer-specific directions, so use your own manual as the authority rather than transferring Ford’s product recommendation to another vehicle. [1][2]
Remove loose items and removable covers first. If a child restraint is installed, follow its instructions before moving it. Keep fur away from buckles, seat tracks, adjustment switches, and powered mechanisms; do not pull a seat apart to retrieve it.
A safe sequence for cloth seats
1. Start with a dry seat and a clear workspace
Work when the seat is dry. Open the doors for visibility and move seats only through their normal controls. If a seat is damp from rain, a spill, or earlier cleaning, let it dry before using a rubber tool; wet hair can mat into the weave. Use a flashlight to find concentrated fur, then work one zone at a time: cushion, bolster, backrest, seam.
2. Vacuum loose hair before agitating the weave
Use a vacuum with a clean filter and an upholstery nozzle. Work down the backrest and from the cushion’s center outward. Keep the nozzle moving; do not press it into or wedge it under seams. A crevice tool can collect hair already beside a seam.
Check both manuals before using a powered brush head on seats; its roller can catch a loose thread. When uncertain, begin with a non-powered nozzle. Empty a full dust cup or bag if suction has dropped.
3. Test the pet-hair tool out of sight
Choose a hidden area on the same cloth panel, such as a lower section concealed by the normal seat position. Read the tool instructions, then make a few light passes. The point of a test is to check the fabric’s response, not to see how much hair you can pull up. Look for fuzz, a change in nap, color transfer, a snag, or a thread beginning to lift. If you see any of those, stop and use vacuuming or professional detailing instead.
Avoid the edge where cloth meets a different material. Rubber tools can cross the boundary and rub a plastic trim piece, leather-look bolster, or decorative piping. Keep the working edge inside the cloth panel and use a softer brush or vacuum attachment near mixed materials.
4. Lift embedded hair in short, controlled strokes
Work on a hand-sized patch. Hold the tool at a shallow angle and draw it across the fabric in one direction with light-to-medium pressure, following the visible weave. Gather hair into a line or clump; do not scrape for a one-pass result.
Pause after several strokes and collect the fur by hand or with the vacuum. Repeat in a second direction only if hair remains and the test patch showed no change in the fabric. Do not rub rapidly back and forth. Repeated friction can heat, roughen, or pill the surface, and it can push some hair toward seams instead of lifting it.
If the tool catches, stop rather than pulling harder. A hair may be looped around a thread or trapped at a stitch. Ease the tool away in the direction it came from, remove loose fur by hand, and inspect the cloth. A small visible strand is preferable to a pulled seam.
5. Finish with a second vacuum pass
Vacuum the clumps with the upholstery nozzle; use a crevice tool only where it does not press into stitching. Check under angled light and repeat one gentle pass only where needed. Leave a strand trapped in a seam rather than attacking it with a blade or pick.
What to do at seams and tight gaps
Seams are where a broad rubber tool is least useful. First vacuum along the seam with a narrow attachment held just above the fabric. If the vacuum does not pick up the hair, use a clean, soft detailing brush to move it toward the open seat surface while the vacuum catches it. Brush away from the seam rather than into it. Avoid scraping across the stitching, pulling thread ends, or pushing debris under a seat cover.
For the gap between the seat cushion and backrest, use the seat’s ordinary adjustment controls to create access if the manual permits. Keep fingers and tools clear of powered rails and moving hinges. If hair has fallen deep into the mechanism or is wrapped around a seat track, leave it to a detailer or service professional. Removing trim or reaching under a seat can disturb wiring and safety components.
Methods that are tempting but risky
Spraying water, fabric softener, or cleaner to make hair release. Online discussions recommend light misting or diluted fabric softener, but those are anecdotes, not universal vehicle-care instructions. [3] Liquids can leave rings, soak foam, or conflict with a manufacturer’s directions. This article’s method is dry. If you also need stain treatment, consult the exact vehicle manual and use a product approved for that seat material.
Using a pumice stone or sweater stone. Some detailing videos demonstrate abrasive stones on heavily contaminated interiors. A stone can pull embedded fibers, but it can also roughen cloth or scratch nearby plastic, leather, or trim. It is not a good first tool for an owner who has not tested the seat. Use only if the stone maker and vehicle guidance support the surface, and stop immediately if the fabric changes.
Using duct tape or packing tape. Tape can lift surface lint from a small, durable patch, but adhesive may leave residue or pull at delicate fibers. Never wrap sticky tape around a hand and press it into the seat as a default method. A reusable tool or vacuum is easier to control.
Using a drill brush or compressed air. A powered brush may be too aggressive; compressed air can send fur into vents, buckle openings, or beneath the seat. Neither is necessary for routine care.
Cleaning the seat belt with the same method. Do not scrape, coat, or soak seat-belt webbing. Follow the vehicle manual for belt cleaning. A seat belt is a restraint component, not another upholstery panel.
Which tool fits the job?
Two Amazon listings illustrate different tool roles rather than a ranked “best” choice. The Lilly Brush Mini Pet Hair Detailer is a compact rubber-edged tool marketed for car fabrics and embedded pet hair; its listing showed 4.6 stars from 54,339 ratings when checked on 20 October 2026. Use light strokes and test the exact seat first.
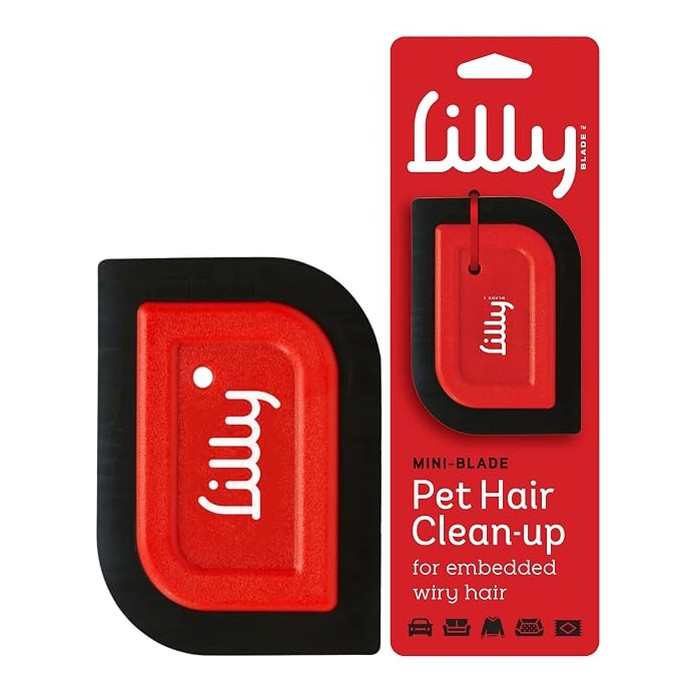
Lilly Brush Mini Pet Hair Detailer
A reusable rubber-edged detailer listed for car interiors and upholstery. Treat the rating as a marketplace signal, not a test on your seat: work on a hand-sized patch, keep the strokes short and light, and stop if the weave pills or snags.
- Role: Amazon consumer option
- Reusable detail tool
- Short controlled strokes
- Test on a hidden panel first
- MOQ: Retail single unit
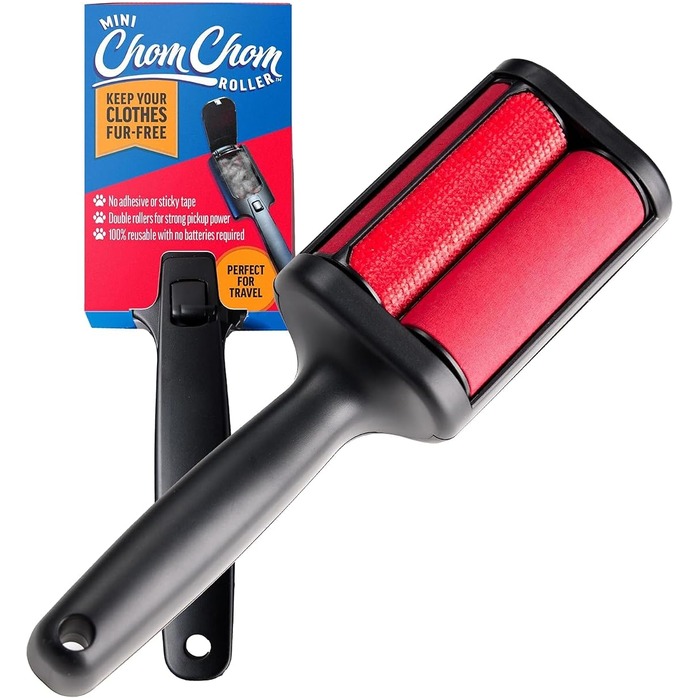
ChomChom Roller Pet Hair Remover
A reusable roller with an internal collection chamber. Its listing showed 4.5 stars from 206,021 ratings and 10,000+ bought in the past month on the same check date. The roller body is awkward at stitched seams, so it should not replace a vacuum or a tested detailer for hair lodged in the weave.
- Role: Amazon consumer option
- Reusable roller
- Internal collection chamber
- Best on taut flat panels
- MOQ: Retail single unit
Ratings and purchase badges change over time and vary by marketplace. They describe listing activity, not independent testing on your seat fabric. Check the current product page, seller, variant and instructions before ordering.
Keep the next cleanup smaller
If your dog rides regularly, use a vehicle-compatible cover that does not block belts, buckles, child-restraint anchors, side-airbag areas, or seat controls. Check the vehicle and cover instructions. Shake out removable covers after trips and vacuum before fur gets pressed into the weave. Keep battery-powered vacuums out of hot or freezing vehicles.
Quick answers
Why does dog hair stick to cloth car seats? Short or fine hairs can catch between woven threads, while static and the seat’s texture make loose hairs cling. A vacuum removes loose material first; a compatible tool then lifts the embedded strands so they can be collected.
Can I use a damp rubber glove? Some people report success, but check the manual and test a hidden patch. Dry removal avoids adding moisture when seat-care limits are model-specific.
Can I use a lint roller? It can pick up surface hair from a firm, smooth panel. It is less effective in seams and on hair lodged in a coarse weave. Avoid pressing adhesive into a delicate or damaged surface.
What if hair is stuck in the stitching? Vacuum along the seam and use a soft brush to guide it outward. Do not dig with a pick, blade, or tweezers. If the hair is trapped under the seam or near a mechanism, ask a detailer.
Should I shampoo the seat after removing fur? Not for hair alone. For a stain or odor, follow the vehicle’s procedure for that material and let it dry fully.
The practical goal is not to use the strongest tool; it is to remove the hair that will release without changing the seat. Vacuum first, test, lift gently, collect, and stop when the fabric or seam signals that more force would create a different problem.
References
-
Ford Owner Manual, “Vehicle Care – Cleaning the Interior.” Instructions for fabric and cloth seats; use only as a model-specific example Source
-
Ford Owner Manual, “Cleaning the Interior – Cleaning Fabric Seats and Headliners.” Source
-
Hagerty, “Sweating the Details: How to remove pet hair from your car.” A comparison of removal tools; methods remain surface- and vehicle-dependent Source
-
Chemical Guys, “How to Remove Pet Hair From Your Car.” Source
-
Lilly Brush, “How to Get Pet Hair out of Your Car with Lilly Brush.” Manufacturer guidance; product-related claims are attributed to the maker Source
Hook this up to your favourite commenting platform — Giscus, Disqus, or your own.
Continue reading
Do Washing Machine Anti-Vibration Pads Stop Walking?
A pad that has shifted out from under the washer is a symptom, not the diagnosis. Check the machine is stable and the foot fits the cup before buying a grippier set.
When a Silicone Faucet Mat Pools Water, Check the Fit and Drain Path
A mat that holds a puddle is failing at one of three points: the counter does not drain toward the bowl, the mat is set the wrong way, or its outlet is blocked.
How to Keep a Cutting Board From Sliding on a Countertop
Most boards move because of a film of water or oil, a warped corner, or an overhang, not because the board is light. Find the cause, then pick a damp cloth or a grip pad.