How to Clean Mold from a Front-Load Washer Gasket Without Damaging the Seal
A model-first cleaning guide for trapped residue, musty odor, and stubborn dark marks
 Lena Schmidt
Disclosure: We may earn a commission if you purchase through links on this page, at no additional cost to you.
The short answer
Start with the washer manual, not a homemade cleaning recipe. Front-load washer makers do not give one universal chemical method: Whirlpool’s guidance includes a diluted chlorine-bleach procedure, while LG specifies an oxygen-bleach solution on one support page and warns against straight bleach on the gasket. Follow the instructions for your exact model and region. Then clean the folds gently, rinse as directed, dry the seal, and leave the door ajar if the manual and household setup allow it. Never combine cleaning products. [1][2][3][4]
That sequence matters because the door gasket is both a cleaning surface and a water-sealing part. The folds can hold water, lint, detergent residue, and small objects. A black mark may be removable soil or mold, but a mark that remains after the approved method does not prove that live mold is still present; nor does color alone show that the rubber is damaged. The practical goal is to remove residue without stretching, cutting, or chemically attacking the seal, then decide whether the remaining problem is a stain, persistent odor, or a service issue. [1][5]
Why the gasket gets dirty
A front-loader’s flexible door boot has a lip and folds that contact the tub and door. Water and laundry residue can remain in the lower folds after a cycle. If the door closes while the interior is damp, the seal may take longer to dry. Users describe the same pattern in cleaning forums: a musty smell, black material inside the lower fold, or marks that return after a cleaning attempt. Those discussions confirm that this is a recurring household question; they do not establish how common the problem is or identify the material in every photograph.
A smell can also come from detergent buildup, the dispenser drawer, the drain area, or the drum rather than the gasket alone. Whirlpool’s odor guidance treats the gasket and washer interior as related but separate cleaning areas. If clothes continue to smell after the seal is clean, do not keep escalating the gasket treatment. Follow the machine’s Clean Washer or Tub Clean instructions and inspect the drawer and other user-serviceable areas described in the manual. [6]
Before cleaning, identify what you are seeing
Remove loose lint, hair, coins, and other debris first. With the washer empty and the door open, gently fold back the accessible edge of the gasket. Do not pull hard or try to detach the boot. Look at the full inner channel, especially the lower area where water can sit, and note whether the material is loose residue, a surface film, a dark stain, or a visible split. Avoid diagnosing mold from color alone. Household photos and casual inspection cannot reliably distinguish every kind of stain from growth or rubber discoloration.
If the gasket is torn, punctured, loose from its seating, or visibly deformed, stop scrubbing and contact the manufacturer or a qualified appliance technician. The seal helps contain wash water; damage can cause leakage. If you see only a stubborn dark mark on intact rubber, try the manufacturer-approved process once and assess the surface afterward. Repeating stronger treatments or scraping the mark can damage the part without answering whether it is a stain or embedded discoloration. [5][7]
Read your model instructions first
Search the support site using the complete model number, not just the brand. Some makers publish instructions that vary by model family, country, or washer-dryer combination. Whirlpool’s front-load guide describes using a diluted bleach solution on the gasket, followed by wiping with clean water and drying. LG support pages give a specific oxygen-bleach dilution for one gasket-cleaning procedure and separately say not to use undiluted bleach because it can deteriorate the gasket. Do not blend those instructions into a new recipe. Use only the solution and steps listed for your washer. [1][2][3]
Pay attention to the exact product name. A washer-cleaning tablet intended for the empty drum is not automatically a gasket treatment. A mold-stain gel marketed for bathroom grout is not automatically approved for a washer seal simply because an online listing mentions washing machines. Check both the washer manual and the cleaner’s label for the surface and use method. If either source is unclear, use the manufacturer’s support channel before applying the product. [6][8]
Frequency advice also varies. Whirlpool mentions a deeper gasket clean roughly every 30 cycles or about monthly in one guide; other manufacturers phrase maintenance differently. Treat those intervals as the manufacturer’s guidance for its own washer, not a universal schedule. A quick wipe after a wash and a periodic deeper clean are different jobs. Adjust the routine to the manual and to what you actually find on the seal. [1][9]
A careful cleaning sequence
-
Empty the washer and prepare the area. Remove laundry and any objects caught in the gasket. Open a window or otherwise ventilate the room if the approved product label calls for it. Put on the protective equipment specified by the manual and cleaner label. Keep children and pets away while you work and store the product safely afterward. Never mix bleach with vinegar, ammonia, or another cleaner; CDC and EPA warn that combinations can release dangerous gases. If you used a different product earlier, do not layer a second one over it. [10][11]
-
Start with loose residue. Use a soft, damp cloth to wipe the accessible surface and lift lint or detergent film. Pull the rubber lip back only enough to see and reach the fold. Do not stretch it sharply, use a knife, or push a hard tool behind the seal. If you find a coin or other object, remove it without forcing it toward the drum. Look for small drain holes or channels, but clear them only as the owner’s manual describes.
-
Apply only the approved cleaner. Follow the manual’s concentration, contact time, and method exactly. Do not make the solution stronger because the mark looks dark. Apply it to the cloth or sponge if the instructions call for wiping rather than spraying. Keep the cleaner on the gasket area specified by the manufacturer and prevent it from running into places the instructions do not mention. A gel product’s thick texture may help it stay in place, but that does not establish compatibility with every washer seal.
-
Wipe gently through each fold. Work around the full circumference, including the lower lip. Use light pressure. If a soft detail brush is permitted by the manual, use short, controlled strokes and stop if the rubber catches, roughens, or changes shape. Avoid stiff grout brushes, abrasive pads, metal picks, and repeated hard scrubbing. The aim is to lift surface residue, not abrade the rubber until the black color changes.
-
Rinse and dry as directed. Some manuals specify wiping the gasket with clean water after treatment; others require a particular follow-up cycle. Follow the washer instructions and the cleaner label rather than improvising a rinse. Wipe the accessible folds dry with a clean cloth. Leave the door open or ajar when the washer is not in use if that is allowed and safe in your home. Do not leave a door wide open where it creates a trip hazard or can be pulled by a child or pet. [1][2][3]
-
Run a washer-cleaning cycle only when the instructions call for it. A drum-cleaning cycle addresses the washer interior; it does not substitute for wiping the gasket. Likewise, manually cleaning the seal does not replace the scheduled tub-clean cycle. Do not add a second chemical to the drum simply to flush out the first unless the manual directs you to do so.
Brush, cloth, or stain-removal gel?
For ordinary moisture and loose residue, start with a soft cloth. A narrow detail brush can reach a crease that a cloth misses, but the brush should be compatible with the seal and used lightly. A two-piece nylon detail-brush set is one option for controlled crevice work; a washer-gasket stain-removal gel is a different option for visible marks when both the washer manual and gel label permit that use. These tools do different jobs, and neither is a substitute for model-specific chemical instructions.
For comparison, the two products below are a gel stain remover for seal and grout lines and a two-piece detail brush set. The brush reaches into the folds without much pressure; the gel is for a stain that survives ordinary wiping. Use either only where the washer manual allows it.
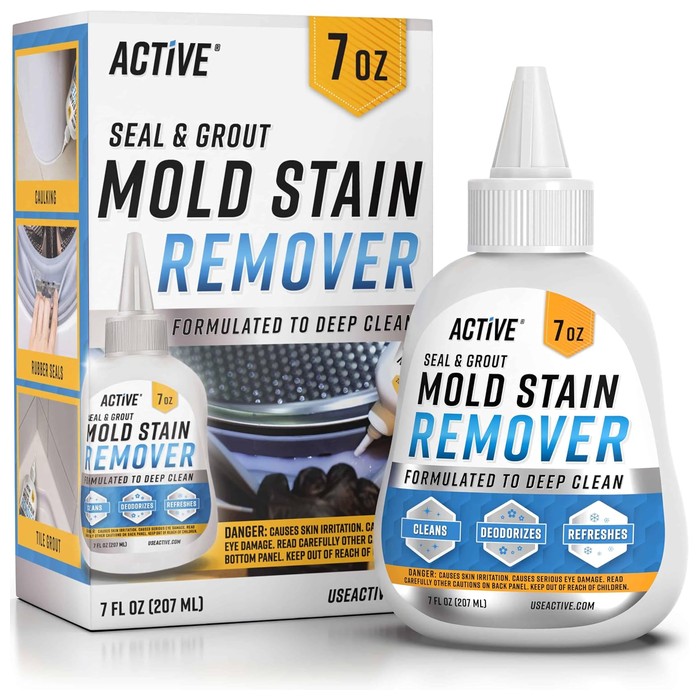
ACTIVE mold stain remover gel, 7 oz
A gel stain remover for seal and grout lines. Use it only where the washer manual allows a stain remover, follow the stated contact time, and rinse and dry the gasket afterwards. Do not combine it with bleach or vinegar in the same session.
- Role: Amazon consumer option
- Gel for seal and grout stains
- Follow the manual and contact time
- Do not combine with bleach
- MOQ: Check current listing
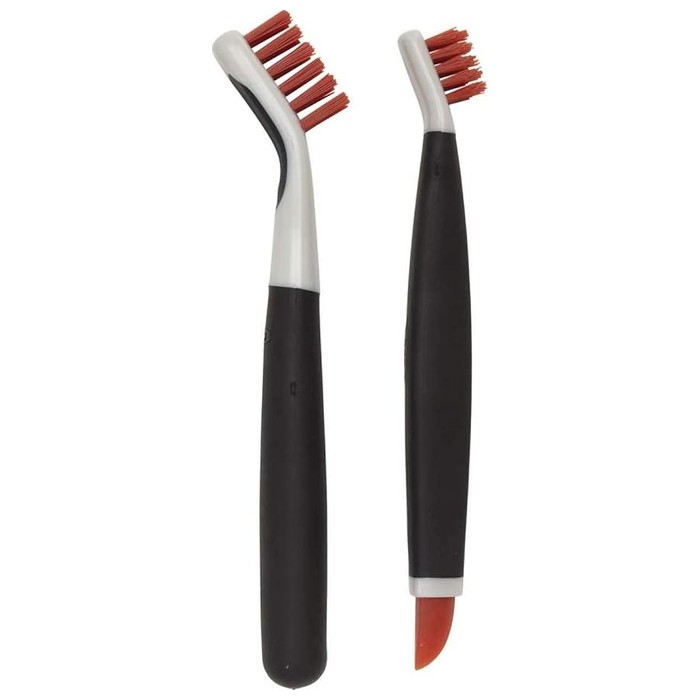
OXO Good Grips deep clean brush set
A small and a large nylon brush for reaching into the gasket folds and around the door lip. Use light pressure: the gasket is a sealing part, so scrubbing hard can abrade the rubber rather than clean it.
- Role: Amazon consumer option
- Small and large detail brushes
- For gasket folds and the door lip
- Light pressure only
- MOQ: Check current listing
When a dark mark does not come off
Stop before changing to a stronger chemical. A mark that remains after the washer maker’s method may be embedded discoloration, a change in the rubber, or residue the chosen process did not remove. Visual appearance alone cannot confirm which explanation is correct. Check whether the surface still feels intact and flexible, whether the gasket sits evenly, and whether the door closes and seals normally. Do not treat a cosmetic stain as a repair diagnosis.
If the washer continues to smell, inspect the dispenser drawer and other maintenance areas named in the manual, then run the recommended washer-clean cycle. If the seal is cracked or water leaks from the door, stop using the washer and request service. If the gasket looks intact but the stain persists, send the model number and clear photos to the manufacturer for advice. Replacing a gasket can involve model-specific disassembly and reinstallation; it is not a routine cleaning step. [5][6][7]
Keep moisture and residue from building up again
After laundry is removed, wipe visible water and debris from the gasket, especially the lower fold. Leave the door open slightly to let the interior dry if the machine’s instructions recommend it and the opening is safe in your household. If the washer has a detergent drawer that can be left open, follow the maker’s instructions for drying it too. These habits reduce trapped moisture; they do not guarantee that mold will never return. [1][6]
Use the detergent type and dose specified for the washer and the load. More detergent is not a more effective gasket cleaner; excess product can contribute to residue. Remove wet laundry promptly and use the scheduled tub-clean cycle or cleaner recommended in the manual. If moisture repeatedly pools in the same spot, check the model-specific support page for drainage and gasket advice rather than poking the drain channels with a sharp object. [6][9]
Common mistakes that make gasket cleaning harder
Do not assume a cleaning tablet will remove a mark on the gasket. Tablets are usually placed in the drum or dispenser for a specific empty-machine cycle; they may not touch the folded seal in the way a manual wipe does. Do not assume a stain-removal gel is safe because it is sold for grout or silicone caulk. Washer seals differ by model and product labels vary. Read the use surface, application time, and rinse instructions, and stop if the washer maker’s manual rules out that cleaner.
Avoid combining methods in one session. Applying a gel after bleach, or wiping vinegar over a bleach-treated seal, can create an unsafe chemical combination if residue remains. EPA and CDC guidance is clear: do not mix bleach with other cleaners or disinfectants. If you have already used one product, complete the rinsing and follow-up directions on its label before deciding whether the task is finished. Do not add another chemical simply because the first left a stain. [10][11]
Finally, do not pull the rubber boot away from the drum to reach behind it unless a service procedure for your model explicitly instructs you to do so. The gasket is installed to hold water; removing a clamp or stretching the seal can turn a cleaning task into a leak. A damaged seal, persistent water escaping at the door, or a recurring odor from inaccessible areas calls for manufacturer support or appliance service, not a longer brush handle.
A practical decision rule
If you find loose lint or a surface film, wipe the gasket and dry it. If you find dark marks on intact rubber, use only the washer maker’s approved treatment and do not judge the result by color alone. If you find a crack, loose seal, or leak, stop cleaning and seek service. If the odor remains after the gasket and drum are maintained according to the manual, look beyond the gasket. This keeps the job focused: remove what can be safely removed, preserve the seal, and get help when the washer shows a mechanical problem.
References
-
Whirlpool, How to Clean the Gasket on a Front Load Washer Source
-
LG USA Support, Front Load Washer Gasket Stains and Mold Source
-
LG USA Support, Front Load Washer Maintenance Source
-
Maytag Product Help, Cleaning a Front Load Washer Door Seal Source
-
GE Appliances, Front Load Washer Leaking Water Source
-
Whirlpool Product Help, Removing Odors or Smells from a Front Load Washer Source
-
LG USA Support, Front Load Washer Odor and Gasket Source
-
The Spruce, The Washing Machine Seal That Traps Grime Source
-
Martha Stewart, How to Clean the Rubber Seal on a Washing Machine Source
-
US EPA, Should I Use Bleach to Clean Up Mold? Source
-
CDC, Cleaning and Disinfecting with Bleach Source
-
Video references: GE Appliances, Front Load Washer Cleaning Door Gasket, LG front-load washer maintenance videos and tutorials, https://www.lg.com/us/support/video-tutorials/ Source
Hook this up to your favourite commenting platform — Giscus, Disqus, or your own.
Continue reading
Do Washing Machine Anti-Vibration Pads Stop Walking?
A pad that has shifted out from under the washer is a symptom, not the diagnosis. Check the machine is stable and the foot fits the cup before buying a grippier set.
When a Silicone Faucet Mat Pools Water, Check the Fit and Drain Path
A mat that holds a puddle is failing at one of three points: the counter does not drain toward the bowl, the mat is set the wrong way, or its outlet is blocked.
How to Keep a Cutting Board From Sliding on a Countertop
Most boards move because of a film of water or oil, a warped corner, or an overhang, not because the board is light. Find the cause, then pick a damp cloth or a grip pad.