How to Keep Felt Pads on Dining Chair Legs
Diagnose slipping felt, prepare the foot properly, and choose between adhesive pads, fitted caps and mechanical glides.
 Lena Schmidt
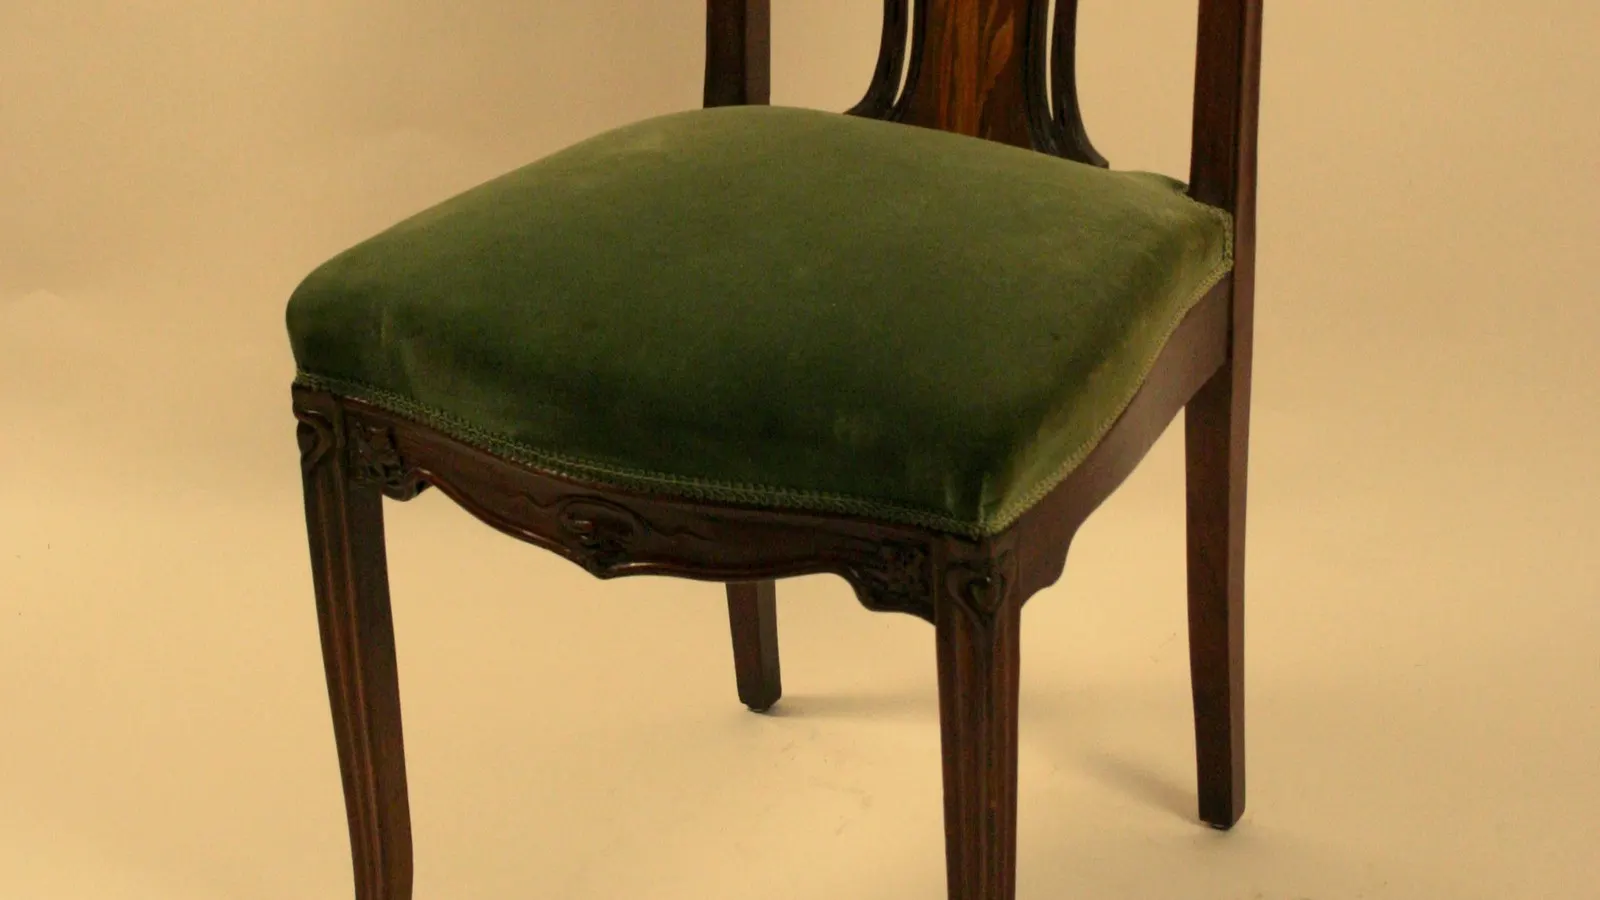
Disclosure: We may earn a commission if you purchase through links on this page, at no additional cost to you.
A felt pad lying under the dining table is worth inspecting before you throw it away. If its adhesive face is covered in dust, the next step differs from a pad that has split apart while its backing remains firmly attached. Buying another pack without checking the failed pad can leave you repeating the same repair.
For a flat, sound chair foot, remove the failed pad and residue, prepare a clean, dry surface, and fit fresh felt that covers the contact area without a loose overhang. If properly fitted adhesive pads repeatedly move sideways, consider a suitable cap or mechanically attached felt glide. First check the leg material, dimensions, and how its bottom meets the floor.
This guide concerns dining chairs on indoor hard floors, especially finished wood. It does not cover wheeled office chairs or moving heavy cabinets. The National Wood Flooring Association recommends floor protectors beneath furniture legs; choosing a secure attachment is only part of making that protection work. [1]
Find the part that is actually failing
Turn the chair over onto a padded, stable surface and compare all four feet. Photograph the failed foot before cleaning it. That gives you something to compare with the replacement later and helps reveal whether the same leg repeatedly causes trouble.
The entire pad has detached. Look at the adhesive face and the chair foot. Dust, old glue, loose finish, or an uneven contact surface are reasons to reconsider preparation. A pad with only a small central contact mark may have been stuck onto a domed furniture glide rather than a flat foot.
The pad has crept sideways. A crescent of exposed adhesive or a pad hanging beyond one edge suggests movement at the attachment. Check which direction it moved and whether that matches the chair’s usual travel. Treat this as evidence to investigate, not proof that every adhesive pad will fail.
The backing remains but the felt has separated. Cleaning the chair more thoroughly will not repair a failed connection within the protector. Replace the damaged assembly or its intended replacement tip. Adding glue between unidentified layers makes it harder to know what is carrying the load.
The pad is still attached but the chair scratches. Stop using that chair until you inspect the contact surface. Look for trapped particles, exposed backing, a damaged housing, or a foot whose edge reaches past the felt. An attached pad is not automatically a functioning pad.
Check the foot before choosing the fixing
Identify what is beneath the chair: bare wood, painted wood, a plastic insert, a metal tube, or an existing swivel glide. Do not assume that a dark disc is leftover packaging. It may be the original foot, an insert covering a tube, or part of an adjustable assembly.
For an adhesive pad, measure the flat surface that will receive it. For a sleeve, measure the outside of the leg or existing glide where the sleeve will grip. These are different measurements. A one-inch round pad and a cap sold for a one-inch leg are not interchangeable specifications.
Measure front and rear legs separately. For square feet, record width and depth; for round feet, record diameter. Note any taper and the available straight section above the foot. Photograph the shape beside a ruler so you can check a seller’s sizing diagram without relying on memory.
Then return the chair upright and examine the bottom at floor level. A leg can lean outward while its end is cut parallel to the floor. Conversely, an apparently ordinary leg may rest on only one edge. The useful question is whether the protector will have broad contact during normal use.
If the chair rocks, check its joints, existing feet, and the floor before installing thicker pads. Move it to another nearby position to see whether the rocking changes. Do not use a stack of soft pads to conceal a loose joint or an unidentified height difference.
Give adhesive felt one properly prepared attempt
Adhesive felt remains a reasonable choice for a compatible flat foot. Scotch describes its self-stick pads as furniture protectors intended to let furniture slide over finished surfaces. Their convenience does not remove the need to match the surface and installation instructions. [2]
Remove the old felt completely. Work carefully with a suitable non-marring scraper rather than gouging the wood with a knife. Do not pull out an original insert or pry off a glide until you understand how it is fitted and whether the replacement needs it.
Use a cleaning method compatible with the chair’s finish and the pad instructions. Test an unfamiliar cleaner on an inconspicuous area first. A solvent suitable for one finish may harm another. Avoid leaving furniture polish or an oily residue where the adhesive needs to bond, and let the foot dry before fitting new felt.
Smart Surface’s installation guidance calls for removing old adhesive, clearing dust and dirt, and applying pads to a clean, dry surface. It also suggests light sanding of wood legs. Treat sanding as a material-specific option, not a compulsory step for painted feet, plastic inserts, or furniture you want to preserve unchanged. [3]
Choose the correct shape and size. A small circle under a wider square foot may leave its corners unprotected. An oversized patch with unsupported edges is also a poor fit. Cut-to-size felt can help with an unusual flat outline; use a product intended to be trimmed and make a neat perimeter.
Apply fresh pads without touching their adhesive faces. Center each one and press it firmly across the whole bonding area. Follow any stated pressure, temperature, or waiting instructions on that product. There is no single curing time that can safely be assigned to every furniture pad adhesive.
Do not stack fresh felt onto worn felt. If you need additional height or a different contact angle, select an appropriate furniture foot rather than building layers. Reusing a contaminated pad also makes a poor test: use a fresh piece so you are evaluating preparation and fit, not the damage from the previous failure.
Switch attachment methods when the evidence warrants it
After a properly prepared replacement fails, choose the next method according to the foot you actually have. The most useful change may be mechanical retention rather than another adhesive advertised as stronger. It may also be a better-shaped contact surface.
For suitable solid wood legs, consider a purpose-made tap-in, nail-on, or screw-on felt glide. Confirm the manufacturer’s minimum foot size and installation method. Check for cracks, existing fasteners, and nearby joints before making holes. Thin, split, or hollow furniture parts are not substitutes for sound wood simply because the outside looks similar.
Slipstick’s GorillaFelt range illustrates a hybrid approach: a mechanical fixing works with an adhesive backing, while felt provides the sliding surface. Its CB257 documentation identifies wooden furniture legs as the intended application. This is a product-specific construction, not evidence that every tap-in protector fits every chair. [4]
For suitable wood feet, the GorillaFelt 1-inch round tap-on glides in a 16-pack are one option. The listing requires a foot at least one inch across and excludes metal legs or furniture that cannot accept a hammered fixing. Confirm the selected size and check that the complete glide fits within the foot before ordering. This is a fit-based suggestion, not a hands-on durability test.
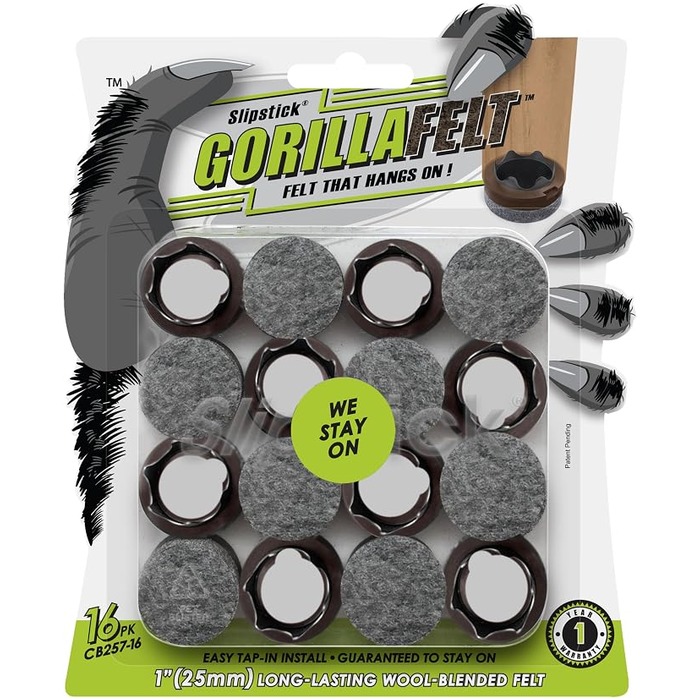
GorillaFelt tap-on felt glides, set of 16
Round tap-on felt glides in a 16-pack. The listing requires a foot at least one inch across and excludes metal legs or furniture that cannot accept a hammered fixing. Confirm the size and check that the whole glide fits inside the foot before ordering.
- Role: Amazon consumer option
- Set of 16, 1-inch round
- Tap-on fixing
- Not for metal legs
- MOQ: Check current listing
Buy a complete glide designed for the job. Driving an ordinary exposed nail through a loose felt disc is a different arrangement. Check that any installed hardware stays recessed and that the felt remains the floor-contacting material as it wears. Stop if installation cracks the housing or damages the wood.
For furniture you do not want to drill, assess a fitted cap. Read the size range for your exact leg shape. A flexible cup must grip the foot without sitting crooked or bunching under it. Stretching a nominally universal cap over an unsuitable rectangle does not establish a good fit.
Check two separate connections: whether the cap stays on the leg and whether its felt stays attached to the cap. A sleeve can solve the first problem while leaving the second unresolved. Inspect the underside after fitting rather than judging success only by how tightly the upper rim grips.
For metal chairs with existing glides, look for a compatible replacement or over-glide protector. Expanded Technologies, for example, makes Slip-Over protectors whose sleeves fit around existing glides without adhesive. Their sizing refers to the glide being covered; it should not be confused with the diameter of the metal tube above it. [5]
For a foot that meets the floor at an angle, investigate an articulating glide. Ask the chair manufacturer which replacement geometry is suitable. A thicker flat pad cannot be assumed to correct edge-only loading. Avoid cutting a chair leg merely to accommodate a protector unless you are undertaking a properly planned furniture repair.
Why stronger glue is not the first answer
Video demonstrations show approaches including hot glue, heat, and recessed pockets in chair feet. They can be useful examples of individual repairs. They do not establish compatibility with your furniture finish, existing plastic foot, or pad backing.
Before adding another adhesive, identify the two surfaces you intend to bond and read that adhesive’s instructions. Consider how you will remove the worn protector later. A repair that holds exceptionally well can still be inconvenient if every replacement requires scraping hardened glue from a delicate foot.
Heat is not a standard installation step unless the product instructions specify it. Nor should a successful repair on unfinished wood become a recommendation for heating a painted or plastic chair foot. The simpler buying decision is often a correctly sized replaceable assembly with a documented fitting method.
Replaceable wear surfaces deserve attention. Expanded Technologies’ VersaGlide system, for instance, uses a fixed base with a separately replaceable formed felt tip. The manufacturer describes replacing that tip without making new nail holes. This shows why the next replacement matters as much as the initial attachment. [6]
Test one chair before fitting the entire set
Use the chair that normally gets the most use, provided it is structurally sound. Fit all its feet with compatible protectors of consistent height. Sweep the test area first, then check that the chair stands evenly before anyone sits on it.
Move the empty chair gently through its normal path. Lift it and inspect the feet for shifting, folded edges, loose caps, or fresh marks. If something catches, stop and identify the contact point. Testing on a clean, inconspicuous section limits the area exposed to an unsuitable replacement.
After ordinary seated use, inspect again. Compare the pad positions with your photographs and check every foot, including the rear legs. This is a practical household trial, not a durability certification. Passing a few movements is encouraging but cannot promise years of service.
Include the actual floor conditions in that trial. A protector that glides across smooth boards may behave differently where the chair crosses tile joints. Smart Surface specifically warns that wide or sanded grout can catch adhesive pads. Do not change glue brands repeatedly without checking where the failure occurs. [3]
If one chair works well, record the exact model, shape, size, and pack specification before ordering more. Count feet rather than chairs and retain a few matching spares. A mixed assortment is only economical if it contains enough pieces of the size you will actually use.
For example, suppose six chairs have square front feet but narrower rectangular rear feet. Ordering twenty-four identical round pads because the packet covers six chairs ignores the fit problem. Make two measurements, identify a suitable protector for each shape, and trial both on the same chair. If the rear protector moves while the front remains secure, you have narrowed the problem to a particular fit or contact condition. Replacing every pad with the same oversized version would discard that useful information. Keep the two specifications together when reordering so the next maintenance session does not start from scratch.
Keep the floor contact clean and replace worn felt
Inspect the underside when cleaning beneath the dining table. Remove loose hair and debris gently, and replace a pad if embedded particles cannot be cleared or the contact surface is damaged. Expanded Technologies sells dedicated cleaners for the dust, hair, and particles that accumulate in felt protectors, underscoring that maintenance remains necessary even when attachment is secure. [7]
Check for thinning felt, exposed hard edges, loose housings, and a new scraping sound. Do not wait for every pad to fail together. A rarely used guest chair and the chair beside the kitchen doorway may need attention at different times; keep replacement decisions tied to their condition.
Felt also serves a different purpose from a gripper. If you want a dining chair to move smoothly, felt is relevant. If your actual problem is a chair sliding when you want it stationary, seek a floor-compatible gripping solution. Adding more felt does not turn a sliding surface into a brake.
Keep the failed pad long enough to learn from it. A dirty bonding face points toward preparation; a distorted or displaced pad calls for checking contact and retention; worn felt calls for replacement. Once those observations guide the purchase, the small packet of protectors becomes a repeatable maintenance item instead of another uncertain experiment.
Sources
-
National Wood Flooring Association — Problem Prevention. Independent flooring care guidance on furniture protectors. Source
-
3M Scotch — Self-Stick Felt Pads. Manufacturer description of the intended sliding application. Source
-
Smart Surface — Product FAQ. Manufacturer guidance on installation, angled legs, grout, and wear; recommendations are product-context guidance. Source
-
Slipstick — CB257 Tap-in Felt Feet. Manufacturer construction and intended wood-leg application. Source
-
Expanded Technologies — Slip-Over Floor Savers. Product-specific attachment and sizing for existing glides. Source
-
Expanded Technologies — VersaGlide Formed Felt. Manufacturer description of replaceable felt tips. Source
-
Expanded Technologies — NuFelt Cleaning Pads. Manufacturer information about debris accumulating in felt protectors. Source
Hook this up to your favourite commenting platform — Giscus, Disqus, or your own.
Continue reading

Do Washing Machine Anti-Vibration Pads Stop Walking?
A pad that has shifted out from under the washer is a symptom, not the diagnosis. Check the machine is stable and the foot fits the cup before buying a grippier set.
When a Silicone Faucet Mat Pools Water, Check the Fit and Drain Path
A mat that holds a puddle is failing at one of three points: the counter does not drain toward the bowl, the mat is set the wrong way, or its outlet is blocked.
How to Keep a Cutting Board From Sliding on a Countertop
Most boards move because of a film of water or oil, a warped corner, or an overhang, not because the board is light. Find the cause, then pick a damp cloth or a grip pad.