How to Remove Dog Hair from Car Carpet Without Damaging It
Loosen embedded dog hair, gather it, and vacuum it up — without fuzzing the carpet or reaching for the wrong tool.
 Lena Schmidt
Disclosure: We may earn a commission if you purchase through links on this page, at no additional cost to you.
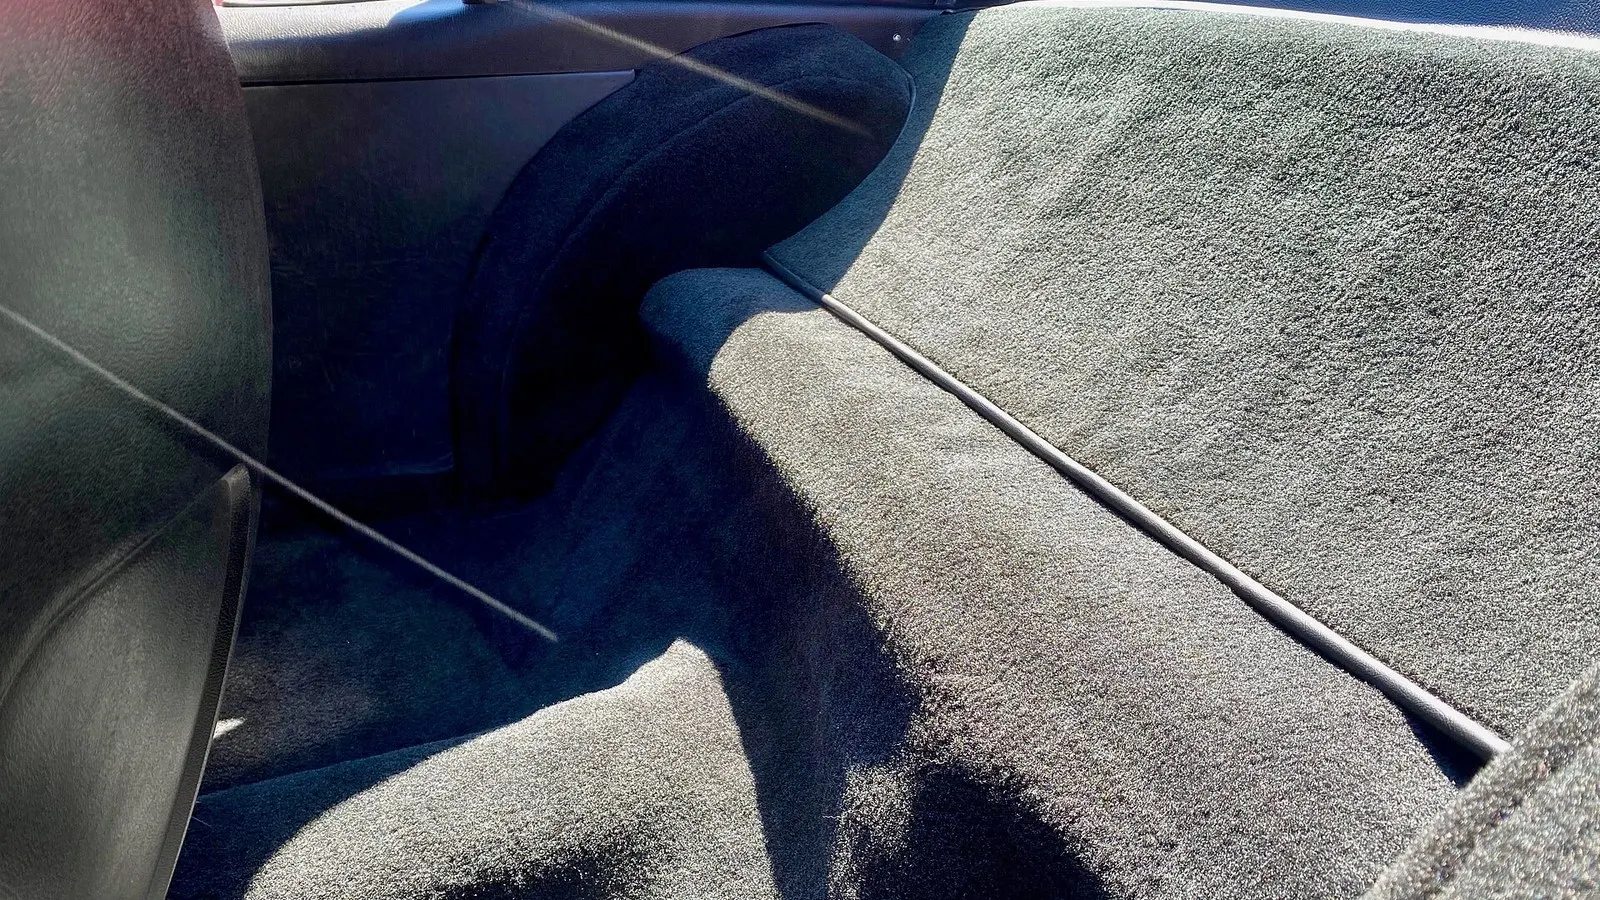
Dog hair in a car is easy to spot and surprisingly hard to remove. A vacuum may clear the loose strands while leaving short hairs woven into the carpet. Scrubbing harder can make the job worse: the fibers fuzz, hair spreads, and the carpet starts to look worn.
A better approach is to loosen the hair first, gather it into small piles, and vacuum those piles up. Use short, controlled strokes and a tool that suits the carpet’s texture. This guide focuses on the fixed carpet and carpeted mats in a car, where embedded hair, seat rails, and trim make cleanup more awkward than it is on a removable household rug. The aim is a clean-enough floor without turning routine maintenance into an upholstery repair job.
Why dog hair stays in car carpet
Carpet holds hair through friction and static. Strands catch between carpet fibers, especially where the pile is dense or the hair is short and stiff. A vacuum can pick up loose hair on the surface, but airflow alone may not release strands caught farther down. That is why repeated fast passes often disappoint: the vacuum moves hair around without pulling it free.
A rubber brush or similar pet-hair tool can help loosen and gather the strands so the vacuum can collect them afterward. Car-care guides commonly recommend this loosen-then-vacuum sequence, and dog owners report the same frustration when vacuuming alone leaves hair embedded. The important distinction is that friction is a tool, not a goal. You need enough contact to lift hair, not enough force to grind the carpet fibers against one another.
What you need
Gather a vacuum with a crevice attachment, a soft vacuum brush if available, and a rubber pet-hair tool. Keep a small waste bag or bin nearby so you can remove the hair as it collects. A flashlight helps reveal thin lines of fur left around seat rails and carpet edges. You do not need a large detailing kit to begin; the key is being able to loosen a small area and then remove the hair you have gathered.
For a compact detailer, see the Lilly Brush Mini Pet Hair Detailer. The FURBLUSTER Grubby dual-side brush below is the heavier option for larger carpet and upholstery areas: a pin side for loosening matted strands and a rubber side for gathering them. Product designs and listing details can change, so check each page for its intended surfaces and current availability. Start with the tool that gives you good control in the confined areas of your car, rather than choosing solely by size or by a broad “works everywhere” claim.
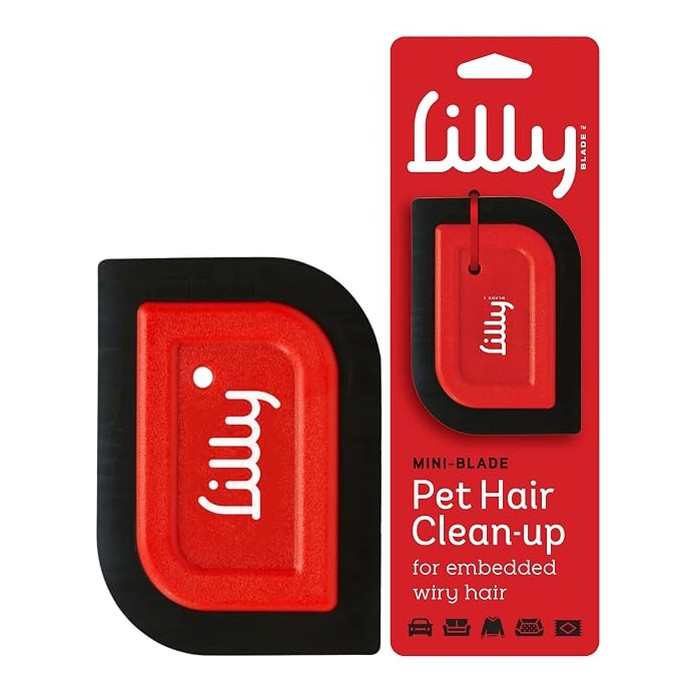
Lilly Brush Mini pet hair detailer
A compact reusable detailer for confined areas such as seat rails, mats and door pockets. Check the intended surfaces and availability on the listing, and start with the tool that gives you control in the tight spaces of a car rather than choosing by size alone.
- Role: Amazon consumer option
- Compact and reusable
- For tight carpet and fabric areas
- Test on a hidden patch first
- MOQ: Check current listing
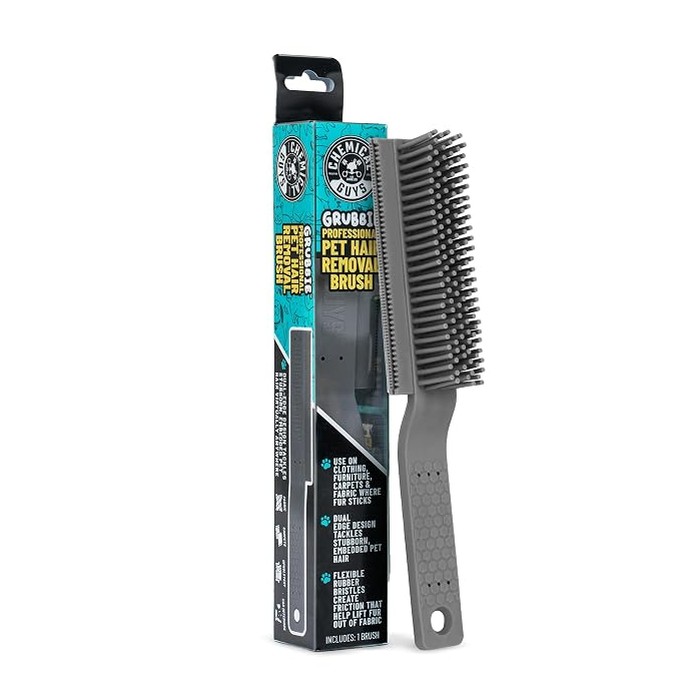
FURBLUSTER Grubby dual-side pet hair removal brush
A heavier dual-side brush for larger carpet and upholstery areas: one side is fine metal pins, the other flexible rubber bristles that gather hair into a removable clump. The delivered packaging reads FURBLUSTER Grubby, so match what arrives against this photo rather than the listing headline. Test on a hidden patch before working across a visible area.
- Role: Amazon consumer option
- Pin side plus rubber bristles
- For larger carpet and upholstery areas
- Test on a hidden patch first
- MOQ: Check current listing
The careful brush-and-vacuum method
1. Take out the floor mats
Remove carpeted floor mats if they come out easily. Shake them outside, away from the car, to dislodge loose grit and hair. Keep them separate from the fixed carpet so you can clean them flat and reach their edges. If a mat has a rubber backing, check that it is not cracked or separating before brushing the carpet face. A tool meant for fabric should not be dragged across the backing.
2. Vacuum loose debris first
Vacuum the floor, mats, and cargo area before brushing. Pick up grit, leaves, crumbs, and loose fur. Work from the top down and use the crevice attachment around seat rails, seat brackets, and edges. This first pass matters because grit can act like an abrasive when it is pushed around under a brush.
Move seats only as far as the vehicle allows safely, and keep the nozzle away from exposed wiring or moving seat mechanisms. Do not pull at electrical connectors or force the vacuum head into a gap. If a space is too tight to reach without catching the tool, clean the accessible edge and leave the mechanism alone.
3. Test the brush on a hidden patch
Choose a small patch beneath a seat or near the edge of a mat. Make a few light strokes with the tool and inspect the carpet. Stop if fibers pull up, twist into balls, or look visibly roughened. A successful test should gather hair without changing the carpet’s appearance or texture.
Car interiors vary. Durable cargo-area carpet may tolerate more friction than a thin, worn floor covering. The tool’s label does not guarantee that every carpet in every vehicle will react the same way. Start gently and let the test patch guide you. If the patch looks different after brushing, do not use that tool on the rest of the carpet.
4. Brush in short, controlled strokes
Work on a small section at a time. Hold the tool at a shallow angle and draw it across the carpet in one direction, using light pressure. The loose hair should roll or gather into a line or clump. Pick up that clump by hand or vacuum it before moving on. Short strokes give you a chance to adjust pressure as the carpet changes from one area to another.
If hair remains, change direction once and repeat with similar pressure. Several short passes are easier to control than one hard, long scrub. Keep the brush away from plastic trim, seat stitching, and exposed carpet edges unless its shape is designed for those areas. Avoid sweeping hair toward a narrow gap where it can disappear under a seat bracket.
Do not brush back and forth rapidly. That motion can scatter hair and increase friction without improving removal. If the tool is not gathering hair after a few controlled strokes, vacuum again, change the angle, or use a gentler compatible tool. Escalating pressure is usually a poor substitute for improved access or a better sequence.
5. Vacuum the gathered hair
Use the vacuum after every few sections, not only at the very end. A crevice tool is useful for the narrow line of hair beside a seat rail or along the center console. For broader patches, a soft brush attachment can help lift gathered strands while suction removes them. Keep the nozzle moving so it does not catch the carpet pile.
6. Repeat only where needed
Inspect the carpet under good light. If a few strands remain, try another light pass in the opposite direction. If the carpet begins to look fuzzy, stop. The remaining hair may not be worth the wear from repeated brushing. A clean interior does not have to be completely hair-free from every angle of light. The practical target is to remove visible loose and embedded hair without damaging the carpet.
How to clean carpeted mats and tight areas
Carpeted mats are easier to work on because you can remove them and place them flat. Vacuum both sides first, then brush the carpet face in short strokes, working toward an edge so the gathered hair is easy to collect. Vacuum again before returning the mat to the car. Do not brush a mat while it is loose on the driveway or sidewalk; it may slide and make it harder to control the tool.
For fixed carpet, the hardest spots are usually around seat rails, under the front seat, and where the carpet meets plastic trim. Use the crevice tool to lift loose hair from the edge before brushing. A small detailer can reach areas a larger brush cannot. Avoid forcing the tool underneath a rail or into a gap where it could catch. If hair is trapped beyond reach, leave it for a professional rather than prying at the rail or trim.
If the seat can slide forward or backward normally, reposition it to access the floor beneath. Do not reach into powered seat mechanisms while adjusting the seat, and do not pull up trim pieces just to reach a few strands. For the cargo area, remove any loose organizer or cargo liner first. If the floor has a removable carpet panel, check the owner’s manual before lifting it; some panels conceal storage compartments, wiring, or tools.
Methods that can cause problems
Brushing harder. More pressure is not a substitute for the right tool. Excess force can rough up the carpet pile or make a worn patch stand out. If the brush is not lifting hair, pause and improve access, vacuum loose material again, or switch tools.
Using a pumice stone without testing. Pumice-style tools are sometimes suggested for stubborn hair, but their abrasive surface makes them a riskier first choice on automotive carpet. A fine or delicate carpet may snag or wear. If you consider one, test it on a hidden area and stop at the first sign of damage. For many owners, beginning with a rubber tool is easier to control.
Spraying the carpet before removing hair. Moisture can make dirt and loose debris harder to vacuum and may turn the job into a more involved cleaning task. Remove dry hair and grit first. If the carpet also needs washing, follow the vehicle manufacturer’s interior-cleaning guidance and use a product intended for automotive carpet. Do not soak the floor; moisture can remain in carpet backing and padding longer than the visible surface suggests.
Using the same tool on every surface. Fixed carpet, cloth seats, leather, plastic trim, and headliners have different surface needs. A tool suitable for durable carpet may be too aggressive for delicate seat fabric or a soft headliner. Keep this job focused on carpet and test before moving to another material. A product’s suitability for one surface is not proof that it is suitable for all interior materials.
When a vacuum alone is enough
If hair is lying on top of a low-pile carpet, vacuuming may be all you need. Use slow, overlapping passes, then check the area from another angle. For a thin layer of loose hair, a rubber glove or pet-hair tool may not improve the result enough to justify extra effort. The simplest effective method is usually the best one for light cleanup.
If hair is packed into a large cargo area, has been there for a long time, or is mixed with mud and odor, removing the hair may be only part of the job. A professional detailer may have tools and extraction equipment suited to a heavy cleanup. Do not keep increasing pressure just because the first few passes did not remove everything. Ask the detailer how they will protect worn carpet and whether cleaning includes the carpet padding or only the visible surface.
A simple maintenance routine
Regular, short cleanups are easier than waiting for months of shedding to build up. After a trip with your dog, remove loose hair from the mats and vacuum visible areas. A seat cover or washable cargo liner can reduce the amount of hair that reaches the carpet; choose one that fits the vehicle and can be secured without interfering with seat belts, side airbags, or driver controls.
For a quick cleanup, remember the order: remove mats, vacuum loose debris, loosen embedded hair gently, gather and vacuum it, then inspect before repeating. The brush does the loosening; the vacuum does the collecting. Keeping those steps separate makes it easier to see whether a tool is actually helping.
Frequently asked questions
Why does dog hair stay in my car carpet after vacuuming?
Hair can catch between carpet fibers through friction and static. Vacuuming removes loose strands, but embedded hair may need to be loosened with a compatible rubber tool before suction can collect it. If vacuuming has stopped picking up hair, check the vacuum filter and dust cup before assuming you need a more aggressive brush.
Can a pet-hair brush damage car carpet?
It can if you press too hard, use it on a delicate or worn surface, or keep brushing after the fibers start to fuzz. Test a hidden patch, use light strokes, and stop if the carpet changes texture. The brush should gather hair; it should not scrape the backing or pull tufts loose.
Should I clean the carpet before or after vacuuming?
Vacuum loose dirt and hair first. Then loosen embedded hair and vacuum the gathered strands. If you also need to wash the carpet, remove the dry hair before applying cleaner. Follow the car maker’s guidance for interior materials and allow the carpet to dry completely before replacing mats.
What should I do if the hair is under the seat?
Slide the seat normally to improve access, then use a crevice attachment along the exposed carpet. Avoid forcing a tool into the seat mechanism or pulling up trim. For hair trapped in an inaccessible mechanism or a heavily soiled interior, consider a professional detailer.
The practical takeaway
Dog hair comes out of car carpet more reliably when you loosen it before vacuuming, but the pressure should stay light. Work in small sections, test first, and stop when the carpet begins to fuzz. The aim is a cleaner floor without turning a routine cleanup into carpet repair. For light shedding, a vacuum may be enough; for embedded hair, controlled friction followed by suction gives you a more manageable process.
References
Hook this up to your favourite commenting platform — Giscus, Disqus, or your own.
Continue reading
Do Washing Machine Anti-Vibration Pads Stop Walking?
A pad that has shifted out from under the washer is a symptom, not the diagnosis. Check the machine is stable and the foot fits the cup before buying a grippier set.
When a Silicone Faucet Mat Pools Water, Check the Fit and Drain Path
A mat that holds a puddle is failing at one of three points: the counter does not drain toward the bowl, the mat is set the wrong way, or its outlet is blocked.
How to Keep a Cutting Board From Sliding on a Countertop
Most boards move because of a film of water or oil, a warped corner, or an overhang, not because the board is light. Find the cause, then pick a damp cloth or a grip pad.