How to Remove Lint From a Hairbrush Without Damaging Bristles
A dry-first method for lifting the gray fuzz and trapped hair at the bristle roots, with brush-specific limits for water and cleaning tools.
 Lena Schmidt
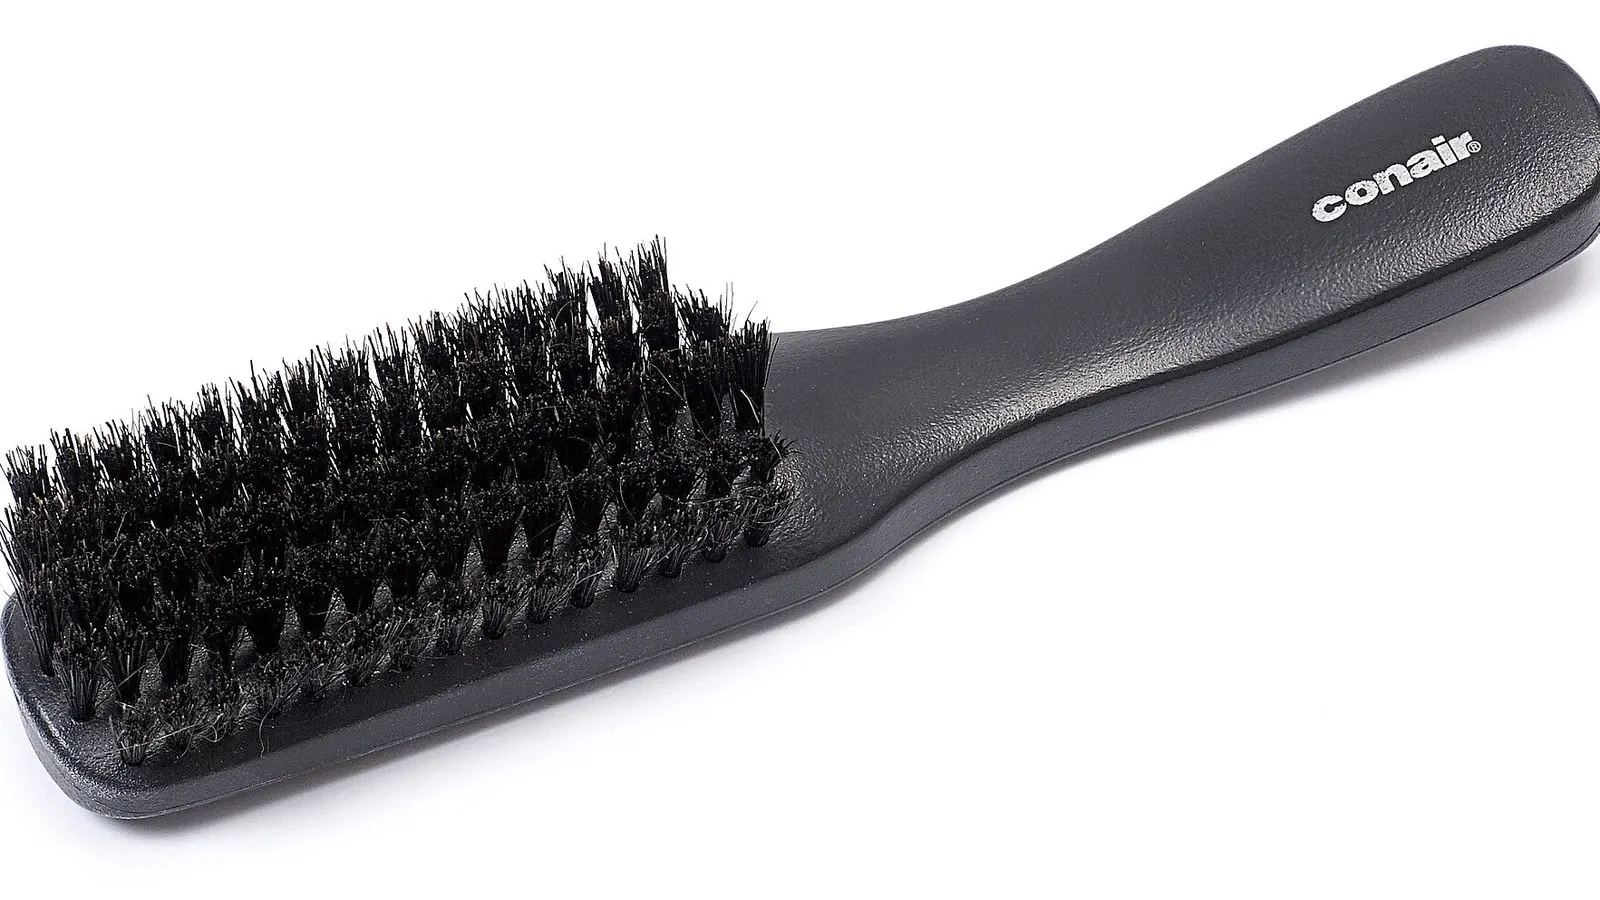
Disclosure: We may earn a commission if you purchase through links on this page, at no additional cost to you.
A dry-first method for lifting the gray fuzz and trapped hair at the bristle roots, with brush-specific limits for water and cleaning tools.
If gray lint stays wrapped around the roots of your hairbrush bristles after you pull out the visible hair, remove it while the brush is dry. Start at the outside edge, loosen one small section at a time, and lift the material up and out with a comb tail or a purpose-made cleaning rake. Do not yank a whole mat through the bristles. Once the loose hair and fuzz are gone, clean the remaining film according to the brush’s construction: a washable plastic brush can usually tolerate a brief, careful wash, while a wooden handle, natural bristles, or a cushioned base needs much less water. The practical distinction is simple: dry tools remove trapped fibers; moisture is for residue left on the brush after those fibers are out.
Why the gray fuzz is harder to remove than loose hair
The pale gray or beige layer at the base of a brush is usually a mix of short shed hairs, textile lint, dust, skin flakes, and traces of oil or styling product. The exact mix varies. Long strands are easy to see and pull out; the finer fibers catch across neighboring bristles and combine with residue, forming a compact web close to the brush bed. If you press a comb down into that web or pull it sideways, it can tighten around the bristles instead of lifting free. A brush with rubber-tipped pins can snag a tool at each rounded tip, while a cushion brush can flex under pressure. That is why the job often feels worse after a forceful first attempt.
Check the brush before choosing a cleaning method
Look at the handle, the base beneath the bristles, and the bristles themselves. A one-piece plastic brush with molded nylon pins is usually the most forgiving. A wooden handle can swell or crack if it is soaked. A vented or pneumatic cushion brush may have a small air opening; water trapped inside the cushion can take a long time to dry and may affect the pad or adhesive. Natural boar or mixed bristles need gentler handling than sturdy plastic pins. If you are unsure whether a brush is washable, check its maker’s care instructions before putting it in a sink. “Hairbrush” is a shape, not a material specification, and one cleaning routine does not fit every brush.
Start dry: remove the hair before the lint
Work over a wastebasket or a sheet of paper. Hold the brush so you can see the roots of the bristles, then lift loose strands with your fingers or the end of a tail comb. If strands are looped around rows, slide the comb under the hair and raise it gradually instead of dragging the comb across the tips. Keep the lift shallow: the goal is to free hair from the bristle bed, not to pry the bristles away from the base. Remove small sections as they loosen. If a strand is tightly wound around a bristle, unwind it with your fingertips where possible. Do not begin with water; wet hair and lint can mat together and become harder to separate.
Next, turn the brush and work from more than one direction. A first pass may lift the long hair but leave short fuzz packed between rows. Use the comb tail, a clean toothbrush, or a brush-cleaning tool to draw that material toward the edge. Pause after each pass and remove what has lifted. Repeatedly combing through the same clump can push lint lower or flex the bristles unnecessarily. For a paddle brush, support the head from underneath with your other hand so the cushion does not bow while you work. For a round brush, rotate the barrel as you lift rather than pulling around the full circumference in one stroke.
Choose a tool that fits the bristle spacing
A wide comb is useful for lifting long strands across open rows. A pointed comb tail reaches between rows, but its sharp point should not be jabbed into a rubber cushion. A soft toothbrush or small detail brush works well for the remaining fine fuzz once the large hair is out. A purpose-made wire or metal-tooth rake can save time on sturdy synthetic pins because its teeth can catch hair near the roots. It is not automatically the safest choice for every brush: metal teeth can scratch a soft base, bend thin pins, catch rubber tips, or snag natural bristles. Use the narrowest tool that passes through freely. If you feel resistance, stop and change the angle or tool rather than adding force.
Using a cleaning rake without pulling out bristles
If a brush has firm synthetic pins and lint is wrapped tightly around their roots, set the cleaning rake near the outer edge of one small section. Pull upward and outward with short strokes. Keep the rake almost parallel to the brush bed, not pointed down into the cushion. Remove the released fuzz from the tool between passes. When the lint is no longer bridging the pins, switch to fingers or a soft brush to clear the last wisps. A rake should separate fibers from the brush; it should not scrape the base or drag every strand across the whole head. Test one corner first. If the pins bend, the cushion tears, or the rake catches on rounded tips, stop and finish with a softer method.
Rounded tips can block a straight comb from sliding out. Angle the tool between rows and lift along the bristle, not sideways. On mixed bristles, use a soft tool on natural fibers. Test a rake on one corner and stop if it catches or bends a pin.
When and how to wash the brush
Wash only after dry hair and lint are out. For a washable plastic brush, use lukewarm water and a small amount of mild shampoo or soap. Swish the bristles or use a soft toothbrush to loosen oily residue at their roots; avoid scrubbing so hard that the pins bow. Rinse until the soap is gone, then shake off water. The point is to remove film that dry tools cannot lift, not to soak every brush for a fixed number of minutes. Avoid very hot water, solvents, and strong household cleaners unless the brush maker specifically recommends them. If the brush has a vent hole, do not fill its cushion with water.
For a wooden brush, natural-bristle brush, or cushioned paddle brush, use a damp toothbrush or cloth instead of submerging the whole brush. Keep water away from the wood and cushion as much as possible. Work a small area at a time and wipe away loosened soap or residue with a clean damp cloth. Manufacturer advice differs by model: some natural-bristle brushes can have the bristles briefly washed while the handle stays dry; some cushion brushes should only be wiped. Follow the care label or the maker’s guide if it is more specific than a general cleaning tip. If the brush has an electrical or heated component, unplug it, let it cool, and follow that product’s instructions; never immerse it.
Dry it fully before putting it away
After cleaning, blot the handle and base with a towel. Let the brush air-dry in a ventilated place with the bristles angled downward or sideways so water can drain away from the cushion and handle. Do not put a damp brush in a drawer, closed toiletry bag, or on a warm radiator. A brush that still feels cool or damp at the roots is not ready to store. Drying time depends on the brush’s construction and how much water it took on, so inspect it rather than relying on a universal timer. Once dry, check that the pins are still secure and the cushion has not lifted. Cleaning cannot repair a split pad or bristles that have come loose.
Common mistakes that make the job harder
Pulling a large wad straight up may remove some lint but can also bend bristles or tug a cushion. Cutting across the brush with scissors is risky because the blades can nick plastic pins, rubber tips, or your fingers; if a strand must be cut, keep the blade away from the bristle bed and use it only when you can see what it will touch. Do not pry beneath the cushion with a knife, needle, or pointed metal tool. Do not soak a wooden or vented brush simply because a video shows a different model being washed. And do not assume that the gray material is all “dirt” that needs disinfectant: the first job is mechanical removal of hair and lint, followed by mild cleaning if product residue remains.
Do not clean while the lint is wet: water can bind loose fibers together and hide what remains at the roots. Clear dry buildup first, then use only the moisture your brush allows. A tool that scratches, catches, or pulls out pins is a poor fit. Replace a cracked brush or one with loose pins; cleaning cannot repair it.
A small routine prevents a large cleanup
Remove visible hair when it begins to cross several rows instead of waiting for a dense mat. A quick lift after brushing takes less effort than working through compacted fuzz later. If lint returns quickly, look at the brush’s use and storage: towel fibers, fleece, and styling-product residue can all contribute. Store the brush where it will not collect dust, and let it dry before returning it to a drawer. There is no useful universal schedule for every person or brush. Someone who uses a brush with a lot of styling product may need to wash it more often than someone who only brushes dry, clean hair; inspect the base and clean when buildup is visible.
A tool option for stubborn hair and lint
The Pikk-it Vacuum & Hair Brush Cleaner Tool is listed for loosening hair and fibers from vacuum brushes and hairbrushes. The listing showed 4.3 out of 5 from 2,606 ratings; that snapshot does not prove safe fit on every brush. Its metal-tooth rake may suit sturdy synthetic pins when lint resists a comb or toothbrush. For natural bristles, rubber tips, or a soft cushion, start with a softer tool and test carefully. If a comb works, there is no need to buy a rake.
Use any rake in short strokes and clean it as you go. Do not press into the cushion or sweep sideways through every row. If you use one tool on a hairbrush and vacuum brush, remove debris between jobs. The brush material still determines whether the tool is a good fit.
Quick answers
How do I get gray lint out of a hairbrush?
Remove loose hair while the brush is dry, then lift lint from the roots with a comb tail, soft toothbrush, or compatible cleaning rake. Work from the edge in small sections. Wash only if residue remains and the brush’s construction allows water.
Why does lint stay after I remove the hair?
Fine fibers can wrap around neighboring bristles and combine with dust, oils, and styling residue near the base. Pulling out long strands does not always release that compact layer; a small brush or rake can lift it after the long hair is gone.
Can I use a metal hairbrush-cleaning rake on a cushioned brush?
Only if the maker permits it and the teeth pass between the pins without snagging. Test a small area, keep the rake nearly parallel to the base, and stop if it catches, bends pins, scratches the pad, or pulls at the cushion.
Can I soak a hairbrush to get lint out?
A sturdy, washable plastic brush may tolerate a brief wash, but wooden handles, natural bristles, vented cushions, and some padded brushes need limited moisture. Remove dry hair and lint first, then follow the brush maker’s care instructions.
How often should I clean my hairbrush?
Remove visible hair as it builds up and wash the brush when residue remains or the base looks coated. The interval depends on how often you brush, your products, and the brush material; a fixed schedule does not fit every brush.
A cleaner to compare
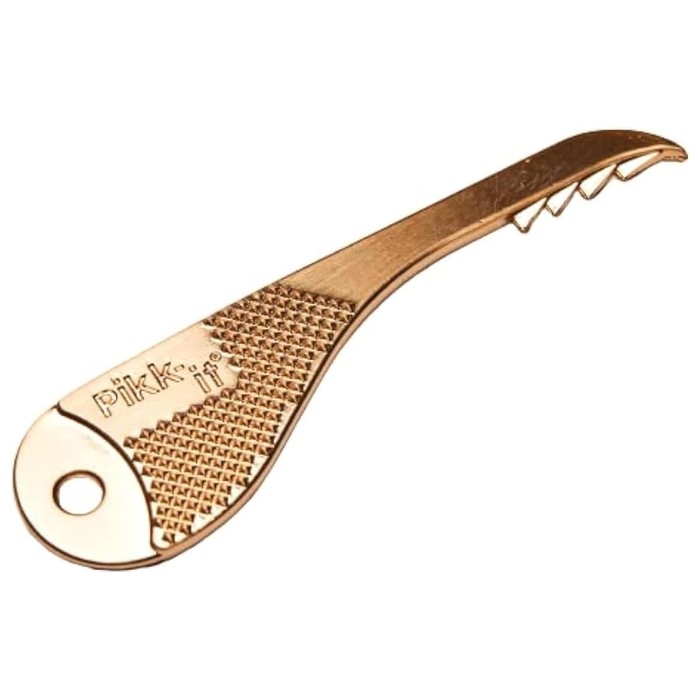
Pikk-it vacuum and hair brush cleaner tool
A compact metal tool with a serrated comb edge and a curved hook, intended for lifting hair and fibres out of brush surfaces. The edge is shaped to get under a wrap instead of cutting through it, which makes it a gentler first tool than a blade when the manual allows prying. Keep it clear of belts, seals and wiring.
- Role: Amazon consumer option
- Serrated comb edge
- For wrapped hair and fibres
- Keep clear of belts and seals
- MOQ: Check current listing
Pikk-it Vacuum & Hair Brush Cleaner Tool — intended for loosening hair and fibers from brush surfaces. Use gently on sturdy synthetic pins; start with a softer tool for natural bristles, rubber-tipped pins, or a cushion base.
If your brush cleans up with a comb tail or toothbrush, keep using the method that causes the least wear. A specialty rake is for compacted hair and lint that resists those simpler tools, not a substitute for checking the brush’s material or care instructions.
Sources
Hook this up to your favourite commenting platform — Giscus, Disqus, or your own.
Continue reading

Do Washing Machine Anti-Vibration Pads Stop Walking?
A pad that has shifted out from under the washer is a symptom, not the diagnosis. Check the machine is stable and the foot fits the cup before buying a grippier set.

When a Silicone Faucet Mat Pools Water, Check the Fit and Drain Path
A mat that holds a puddle is failing at one of three points: the counter does not drain toward the bowl, the mat is set the wrong way, or its outlet is blocked.
How to Keep a Cutting Board From Sliding on a Countertop
Most boards move because of a film of water or oil, a warped corner, or an overhang, not because the board is light. Find the cause, then pick a damp cloth or a grip pad.