Why Your Shower Caddy Keeps Falling and How to Make It Stay
A suction shelf that drops is usually a surface or load problem, not a bad cup. Diagnose the wall, clean the contact area, and pick the right mounting method.
 Lena Schmidt

Disclosure: We may earn a commission if you purchase through links on this page, at no additional cost to you.
A shower caddy that keeps dropping is usually telling you something about its mounting method, the wall, or how the load is arranged. Repeatedly pressing the same suction cups harder rarely fixes a surface that is textured, curved, or crossed by grout. First identify how the caddy attaches; then check its contact points and weight. If the wall is unsuitable for suction, switch to a compatible adhesive, hanging, or tension design instead of repeating the same failed installation.
This guide focuses on the common renter problem: a suction-cup shelf that releases from shower tile. It also separates that failure from an over-the-showerhead basket that slides down its pipe, because the fixes are different. The goal is a stable place for shampoo and soap, not a wall attachment you have to keep rescuing.
Start by identifying what is actually slipping
Look at the caddy before reinstalling it. A wall-mounted suction model has one or more cups pressed directly against tile or glass. If a cup has released and the whole shelf is hanging at an angle, the cup-to-wall seal failed. If the cups remain fixed but the basket has separated from its frame, inspect the locking tabs or the shelf-to-cup connection. A cracked cup, stretched rubber lip, or missing locking piece is a hardware problem; cleaning the tile will not repair it.
An over-the-showerhead caddy is a different design. Its hook rests over a pipe, often with a suction pad against the wall to stop swinging. If the hook slides down the pipe while the pad stays attached, check the hook fit, pipe shape, and load balance. A caddy intended for a narrow straight shower arm may not grip a wide, angled, or unusually shaped head. Do not treat pipe slip with petroleum jelly or by putting more suction cups on a separate wall surface.
A quick diagnosis saves time: if the cup itself came off, inspect the cup and surface; if the cup stayed put while the shelf moved, inspect the frame and load; if the hook slid, inspect the pipe contact. Online discussions describe all three experiences as “the caddy keeps falling,” but they are not the same installation failure. A Reddit user, for example, described a suction dish that repeatedly dropped despite trying multiple cups; replies pointed to soap film, an uneven tile, or a poor cup as different possible causes.
Check the wall before blaming the suction cup
Suction works only when the rim can seal against a smooth, flat, nonporous surface. Glazed tile and glass often qualify, but “tile” alone does not guarantee a good seal. A cup that partly crosses a grout line bridges a recess. Air can enter at that gap, and the seal may gradually release. Consumer Reports likewise advises positioning cups fully on tile rather than over grout.[1]
Run a fingertip across the intended spot. If you can feel a stipple, raised pattern, pits, or a matte texture, a basic suction cup may not seal there. Small mosaic tiles can also be too narrow for a cup to sit flat. Avoid placing the cup on grout, the curved edge of a corner, a tile bevel, or a surface with chipped glaze. Painted drywall, wallpaper, natural porous stone, and textured fiberglass may also be incompatible; confirm the caddy maker’s surface list rather than relying on a broad “works on tile” claim.
Move each cup to the center of a single smooth tile where its full rim sits flat. Keep it clear of grout on every side. If the tile is too small or its surface texture continues across the wall, stop testing random spots. The installation surface is likely the limiting factor, not your technique. TAILI’s support guidance, for instance, specifies a clean, dry, smooth, nonporous surface and excludes textured or painted walls for its suction products.[2] That is a product-specific instruction, but it reflects the same practical compatibility issue found in many suction-caddy manuals.
Clean the contact area, then reinstall once
Soap film is easy to miss because a tile can look clean while still feeling slick. Remove the caddy and wash both the tile and the suction-cup rim with a cleaner that is safe for the finish. Rinse away cleaner residue and dry the surface thoroughly with a lint-free cloth. Also inspect the cup for hair, grit, dried soap, or a distorted edge. If the cup’s rubber has become stiff, warped, split, or permanently creased, replace the cup or the caddy.
Follow the product’s instructions for whether the cup should be dry or slightly damp; designs vary. Press the cup onto the surface evenly and engage its locking lever or twist mechanism if provided. Do not load the shelf while installing it. Give the attachment the manufacturer’s specified settling time, then test it gently by hand before returning toiletries. The point is not to hang from it or jerk it downward; it is to confirm that the cup is seated and the shelf does not shift under a light push.
Avoid household “hacks” as a substitute for checking compatibility. Petroleum jelly sometimes circulates in short-form cleaning videos as a way to revive suction, but it can leave an oily film that makes later cleaning difficult and may interfere with adhesive strips if you switch mounting methods. Grease, caulk, glue, and double-sided tape can also complicate removal or damage finishes. Use only a sealant or lubricant if the caddy manufacturer recommends it for that exact cup and surface. A trick shown in a video is not a tested load rating.
Reduce the load and stop the shelf from twisting
Even a compatible cup can release when the shelf is overloaded or pulled away from the wall. Bottles are awkward loads: their weight sits forward of the tile, so a shelf can act like a small lever. A bottle grabbed from one side can twist the basket; the sudden movement may break a seal that seemed fine at rest.
Remove everything and reinstall the empty caddy. Put the heaviest bottles close to the wall and centered between the attachment points. Keep lighter items toward the outside. If the design has several shelves or hooks, distribute products rather than hanging all the weight from one side. Avoid placing a heavy pump bottle where you have to tug it outward each time. Use the load limit stated for the specific model, and remember that a manufacturer’s rating assumes its prescribed surface and installation. It is not a universal rating for all tiles or all suction shelves.
Do not use a shower caddy as a grab bar, handhold, or support when stepping in or out. It is storage hardware. If the caddy shifts during ordinary use after the surface and load are corrected, take it down and change the mounting approach.
If the surface is unsuitable, change the mounting method
For smooth tile or glass, another suction model may be worth trying if its cups fit fully within the tile and its installation mechanism is clear. One current example is the TAILI suction-cup shower caddy two-pack. Its listing specifies smooth, nonporous surfaces and excludes textured surfaces and grout lines. Amazon displayed a 4.4-star rating with about 5,100 ratings and a “1K+ bought in past month” badge; these are marketplace figures that can change, not a guarantee that it will hold on every wall. The key reason to consider it is that the product is purpose-built around a suction-cup attachment, which suits a smooth surface and a user who wants a removable shelf.
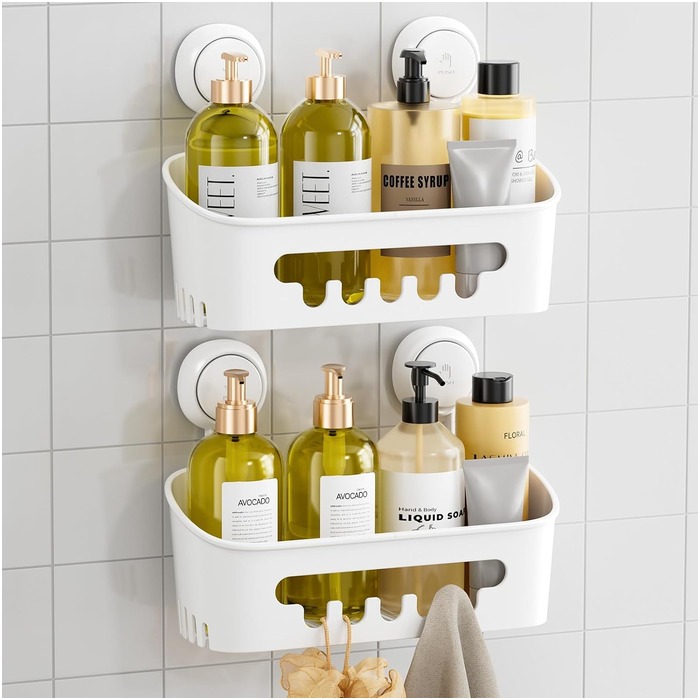
TAILI suction-cup shower caddy, two-pack
A purpose-built suction system: the cups need a smooth, nonporous surface and the listing excludes textured walls and grout lines. The right pick only after the tile itself passes the fingertip test.
- Role: Amazon consumer option
- Two shelves
- Suction-cup mounting
- For smooth tile or glass
- MOQ: Check current listing
If your wall is smooth and flat but suction has been unreliable, an adhesive shelf is a different mechanism. The Veken adhesive shower caddy set is one example. The listing describes adhesive-mounted metal shelves and limits use to smooth, nonporous surfaces such as glazed tile, glass, marble, or metal; it excludes textured and uneven walls. Amazon’s product page showed a 4.6-star rating, around 15,800 ratings, and “10K+ bought in past month”. The large review count and recent purchase badge are useful demand signals, but they do not establish that the adhesive suits every shower finish. Read the exact instructions, especially curing time and removal guidance, before buying.
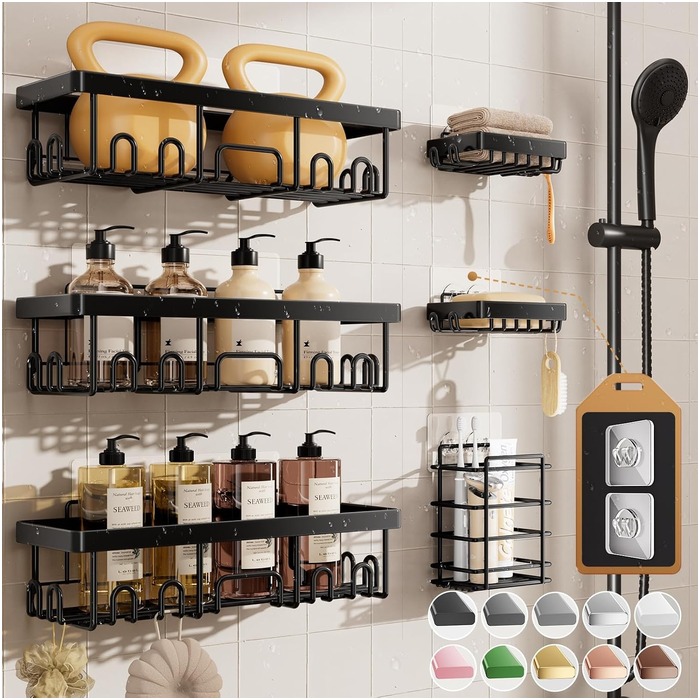
Veken adhesive shower caddy set
A different mechanism for walls where suction keeps releasing: adhesive-mounted metal shelves for glazed tile, glass, marble or metal. Curing time and removal guidance matter as much as the load rating.
- Role: Amazon consumer option
- Adhesive mounting
- Metal shelves
- For smooth, nonporous walls
- MOQ: Check current listing
Before committing to an adhesive shelf, check the wall finish and the removal instructions as carefully as the load claims. Test any cleaner in an inconspicuous place if the surface maker recommends it. Do not install an adhesive base across grout, a crack, or a seam unless its instructions explicitly allow that placement. A shelf can appear stable at first and fail later if part of the pad is unsupported or the wall was damp during application. Keep the package or take a photo of its instructions so the removal method is available months later. When it is time to remove the caddy, use the maker’s release method; prying a bonded base with a metal tool can chip tile or scratch glass.
Adhesive is not automatically the best choice for every renter. A strip can be difficult to remove cleanly if it is installed on an incompatible or delicate finish, and the maker may exclude certain surfaces. For a removable adhesive system, follow its preparation steps exactly and wait the full time stated before loading it. As one reference point, 3M says its Command Bath shower caddy uses water-resistant adhesive and instructs users to wait 24 hours after attaching the base before placing the caddy on it.[3] That is guidance for the named Command product, not a universal wait time for every adhesive shelf.
If the wall is textured, porous, or broken up by small grout lines, consider a caddy that hangs from a suitable shower arm, a tension-pole unit that fits the floor-to-ceiling space, or a freestanding organizer. Check the pipe diameter and shape for a hanging model, and make sure its hook cannot rotate off. Check the ceiling and floor surfaces and the model’s height range before choosing a tension pole. Drilling can provide a more permanent attachment, but renters should get permission and use fixings appropriate to the wall assembly and wet location.
If the hanging basket slides down the shower pipe
A pipe-hung basket that slips needs a different check. Remove bottles, then see whether the hook actually fits the shower arm. Some baskets include a screw collar, rubber insert, or locking feature; make sure it is installed and tightened as instructed. A suction stabilizer should contact a clean, flat wall without being stretched or pulled sideways by the hook. If the pipe is angled or much wider than the hook opening, choose a model designed for that shape rather than forcing the fit.
A viral household hack highlighted by House Digest uses a short piece of foam pipe insulation around the showerhead pipe to add friction beneath a sliding caddy.[4] It may help with a compatible straight pipe and hook, but it is not a universal fix: bulky insulation can prevent the hook from seating securely, trap water, or interfere with a showerhead connection. Do not cover a joint or place material where it could loosen or obstruct water flow. A purpose-made non-slip insert or a better-fitting caddy is a more predictable solution.
A simple decision path
If a suction cup falls from glossy tile, clean and dry the cup and tile, move the cup fully onto one tile, and reinstall according to the model’s directions. If it still fails, inspect the cup and reduce the forward or uneven load. If the wall is textured, porous, or too small for the cup, stop repeating the same installation and choose a compatible hanging, adhesive, tension, or freestanding design. If the caddy hook slides down a pipe, verify hook fit and any locking insert; do not troubleshoot it as a suction-cup failure.
After any fix, check the caddy after the first few showers and whenever you change the load. Take it down if it begins to tilt, loosen, or shift. That brief check is easier than finding the bottles on the shower floor—and it keeps a storage accessory from becoming something you have to trust for support.
References
Hook this up to your favourite commenting platform — Giscus, Disqus, or your own.
Continue reading
How to Choose a Zipper Repair Kit That Fits Your Zipper
A number on the slider is only part of the match. Identify the chain type, confirm the size, then check direction, slider function and end parts before buying a kit.

How to Choose a Stove Gap Cover for Uneven Counters
Measure the seam at the front, middle and back on both sides, then match the profile. A strip bridges a gap; it does not level a range that sits too high.

How to Choose Dishwasher Rack Tine Caps for a Rusty Rack
Tine caps only work when the rust is limited to a few exposed tips and the wire is still firm. Check the opening, length and shape of the tine before ordering a pack.